Quantcast
Channel: Receiver and Processor Reviews – HomeTheaterHifi.com
Viewing all 42 articles
Browse latest View live

Marantz SR 5009 Receiver Review

$
0
0

Marantz SR 5009 Receiver Review Highlights

With excellent sound quality, plenty of power and the ability to stream music from your NAS or phone, the SR 5009 offers the music lover an above average 2-channel sound system. For the movie buff, the SR 5009 provides ample power for a moderate sized home theater with very good auto room correction, an intuitive GUI, and support for 7.1 channels. If you are interested in Atmos, you’ll have to move up to the next receiver in the Marantz line. Add to this a very useful App, a well thought out remote, and distinctive styling, the Marantz SR 5009 may well be just the receiver you are looking for.

Marantz SR 5009 Receiver Review

Marantz SR 5009 Receiver Highlights Summary

  • Top notch sound quality
  • Intuitive GUI for fast setup
  • Audyssey Laboratories’ MultEQ- XT six-point auto setup and room calibration system
  • Very user friendly App for your smart device
  • Streaming from a NAS allows you to sit and listen for endless hours

Introduction to the Marantz SR 5009 Receiver Review

Marantz (D&M) has been making hifi equipment since way back when. My first into to real high fidelity was a Marantz 2226B receiver back in my college years, circa 1979. The blue glow of those diodes, needle dials and the “fly wheel” tuner knob served me well for several years. I’d listen to music throughout the evening just to relax and be awash in the blue glow of that beautiful, chrome faced receiver. Today, their receivers look like nothing from yesteryear, but their reputation for sound qualities still lives on.

MARANTZ SR 5009 RECEIVER REVIEW SPECIFICATIONS

Power and Processing:

  • 7-channel Amplifier
  • 100 Watts per Channel into 8 Ohms (20 Hz – 20 kHz) at 0.08% THD, with 2 Channels Driven
  • Dolby® and DTS® Surround Sound Decoding, including Dolby Pro Logic® IIz
  • Video Upconversion (1080p and 4K) for Analog and HDMI Sources
  • Audyssey “Silver” Speaker Calibration and System Optimization Includes:
  • Audyssey Laboratories’ MultEQ® XT Six-point Auto setup and Room Calibration System (microphone included)
  • Audyssey Dynamic Volume Mode to Keep Listening Levels Steady
  • Audyssey Dynamic EQ for Fuller Sound at Lower Listening Levels

Connections:

  • HDMI 2.0 Audio/Video Switching: 8 In (includes 1 front-panel input), 2 Out
  • omponent Video Switching: 2 In, 1 Out
  • composite Video Switching: 3 in, 1 out (includes front-panel input)
  • digital Audio Inputs: 2 Optical and 2 Coaxial
  • 4 Analog Stereo Audio Inputs
  • 7.1 Channel Pre-outs, including 2 for Subwoofers
  • Front-panel USB Port for Audio Playback from USB Memory Devices and an iPod or iPhone
  • 7 x Speaker 5-way Binding Posts
  • Surround Back Speakers can be Reassigned for Zone 2, Front Height, Front B, or Bi-amping Compatible Front Speakers
  • Ethernet Port for Wired Network Connection
  • RS-232C, Remote (IR), and 12 Volt-trigger Connections for Use with External Controllers
  • 1/4″ Headphone Output

General Features:

  • 4K/60p and 3D Vdeo Pass-through
  • Wi-Fi RemoteApp for Apple or Android Devices
  • AM/FM Tuner
  • Remote Control
  • Dimensions: 6.4″ H x 17.4″ W x 13.6″ D
  • Weight: 22.7 Pounds
  • MSRP: $899 USD
  • Marantz
  • SECRETS Tags: Marantz, Marantz SR 5009 Review, HDMI, 4K, 60p, Audyssey Dynamic, MultEQ- XT, 7-channel amplifier, Dolby, Receiver Reviews 2014


Design of the Marantz SR 5009 Receiver

If much of your music listening takes place in the digital domain, you’ll be impressed with the SR5009’s many digital music features. Built-in Wi-Fi makes it easy to connect to your home network, but you can also connect with a LAN line. I selected the later because it is a more secure connection to my WD MyCloud NAS, but the dual antennae on the back of the Marantz pulled in wifi very well, too. Apple users can stream tunes from an iDevice of choice, or a computer running iTunes with AirPlay. In my review, I used my Mac Mini. You can connect your iPod or iPhone to the front-panel USB port and control it with the receiver’s remote. Marantz has a very useful App that you can download that provides almost all of the features of the remote, as well as providing a visual display your entire music library in the palm of your hand.

Marantz SR 5009 Receiver Review

Android users will appreciate Bluetooth connectivity for wirelessly streaming audio from any App on your device. Spotify and Sirius XM subscribers can listen to their favorite playlists or stations. There is built-in support for Pandora and hundreds of free online radio streams. They have not forgotten you high resolution music fans either. The SR5009 can play files with sampling rates up to 24-bit/192kHz as well as DSD files.

Marantz SR 5009 Receiver Review

With its internal seven-channel amplifier, it can be configured for two-room output. Simply assign the surround back channels to Zone 2 and you can send audio to a set of speakers in another room. While the wife listens to Pandora on the porch, you and the kids can watch Frozen (yet again) in the main theater room. You can assign the back surround channels for front height speakers or bi-wire to your mains.

For video, it will pass through 4K at 60 Hz and will upscale lower resolution video to1080p or 4K if you have a new UltraHD set.

Power is provided by their HDAM (Hyper Dynamic Amplifier Module) system, which combines ultra fast slew rate and maximum dynamic range to deliver optimum sound quality along with Current Feedback technology, which provides a wide closed-loop bandwidth. This is the same stuff found in some of their higher end units.

The look and style of the SR5009 is quite distinctive, with a rounded edge front panel and a “porthole” display window. My first impression of the display was, “How can that tiny window display anything?’ However, first impressions can be wrong. That little window not only looks distinctive, but it proved to be quite functional as well. If I was streaming, let’s say Bach’s Brandenburg Concerto No. 3, the display would scroll “JS Bach- Brandenburg Concerto No. 3 in G Major, BWV 1048, movt. II-Adagio”. It repeats this line until it goes on to the next movement.

Here, for example, is Emerson, Lake and Palmer Trilogy.

Marantz SR 5009 Receiver Review

I use it as an example because it fits the whole display, so you get the idea. When I preformed the software update after first turning on the SR 5009, it displayed the % download and gave an ETA for completion.

Marantz SR 5009 Receiver Review

Nice! All of this can be displayed on your TV, too, but should you choose not to turn it on, the little display works fine on its own.

Another useful feature was the “Info” button on the remote. When pressed, it would briefly display what was going on with SR 5009. The OSD reveals the incoming signal, sample rate, what speakers are being feed a signal and what mode your outputs to the speakers are.

Marantz SR 5009 Receiver Review

Also, the ECO display would tell you your “real time” power consumption use. You can pop this information up at any time, whether you are streaming, watching a movie or listening to a CD. I liked this function a lot because it kept me abreast of what was going on as I was changing sources.

Setup of the Marantz SR 5009 Receiver

So what’s in the box? Besides the actual receiver and remote, there was a CD-ROM manual, the Audyssey mic with a cardboard stand (clever design, I might add, but I stuck with my trusty mic boom), labels for your cables and a detachable power cord. I understand the need for the digital copy of the manual, but having the actual booklet in hand makes the set up go faster.

After my initial set up, I plugged in my network cable, powered up the SR 5009, and was immediately told an update was ready. After selecting to proceed, the receiver connected and the new software uploaded in about 25 minutes. Going into the set up menus, I was surprised with the amount of control and ease of use the GUI system provided.

Marantz SR 5009 Receiver Review

Running the Audyssey Laboratories’ MultEQ- XT six-point auto setup and room calibration system was easy enough that a complete novice could perform it with relative ease.

Marantz SR 5009 Receiver Review

The on-screen display made it virtually fool proof and the overall audio performance sounded so good, that I left it engaged for the entirety of my review. Of particular notice, it got the bass in my room just about perfect...better than most other correction system I have used in the past.

Marantz SR 5009 Receiver Review

You can, of course, set up your speakers manually. The distances can be set to within inches (or centimeters, if you prefer), and a fully manual EQ can be set up as well. Dialog can also be enhanced if you desire.

Marantz SR 5009 Receiver Review

In the back, all of the usual connectors are available. I find that the speaker terminals are a bit tightly packed together, but if you use bare wire or bananas over thick spade connectors, you will be fine. Hooking up the pre-outs to my amplifiers was easy. Marantz supplies labels for your interconnects and speaker wires to assist you in your hook-ups.


The Marantz SR 5009 Receiver In Use

Since the SR 5009 is designed to be the center piece of your home theater, it can also function as a music machine, as well, whether you listen to stereo or multi channel music. Marantz has always been known for their excellent sound quality, and the SR 5009 is no exception. Let’s start by discussing the sound quality and versatility of this receiver. My musical taste is somewhat eclectic, with a heavy leaning toward classical and orchestra music.

Marantz SR 5009 Receiver Review

Bartok’s Concerto for Orchestra (Fritz Reiner and the Chicago Symphony) plays out like musical murder. Dissonant, jarring crescendos and angular rhythms, this over 50 year old recording on SACD is marvelous and exciting to hear. Even though this recording is in 3-channel, it filled my front wall with great depth, as well as width. Brass, strings and percussion sounded realistic and natural. Strings had bite, brass had a well rounded tone and the percussion was tight and deep. Vocals sounded natural and full without over emphasis or sibilance.

Marantz SR 5009 Receiver Review

I listened to CS&N Greatest Hits, which is a HDCD. Instruments and vocals were well placed in a 3D space. Bass was punchy and tight. The” boys” voices blended impeccably with pleasing harmonies. Acoustic guitars had a natural balance and detail you would expect. You could easily hear the fingers sliding along the strings of the guitars. You could even hear the slight breath intake before a phase was sung. Overall, sound reproduction was beautifully rendered by the SR 5009. Sonically, I would have had difficulty distinguishing the overall sound quality from my Emotiva UMC-200 pre/pro. If I had to permanently swap units, I could easily live with the SR 5009. The Marantz certainly has more features than my UMC-200 and a super GUI that is a tweekers dream. Even though it made my pre/pro seem a bit primitive, I still love its simplicity and sound quality and have no plans to replace it any time soon..

Changing pace, I streamed the same music from my NAS (WD MyCloud) with the same results in sound quality. Using the Marantz App (free), I began to appreciate streaming directly without having to go through my Oppo 103. My pre/pro has to use the Oppo as a bridge. The App proved to be quite stable and it was a snap to go from one input to the next. I could stream from the NAS and instantly switch to TV or internet radio stations, all without getting out of my chair. The radio stations alone can keep you glued to you chair for the rest of your life.

Marantz SR 5009 Receiver Review

I did hit one anomaly while streaming, however. The SR 5009 would not directly play hi-rez multi-channel music that the Oppo 103 had no trouble with. I have several selections from the Scandinavian music company 2L that would not play at all. Perhaps a software update could remedy this? Otherwise, if you have all your music ripped to FLAC, WAV or in my case AIFF, this unit is set to go.

Marantz SR 5009 Receiver Review

The ease of going from one song to another made my wife ask, “What are you doing? I hear classical one minute and Jethro Tull the next and then you’re off onto Vangelis!”- What can I say? I’m an eclectic kind of guy, remember?

Moving on to movies, I selected Prometheus. The sand storm scene is very immersive in 7.1, and the SR 5009 delivered the goods here as well. The storm swirled all around me and really ratcheted up the tension in that scene. You could easily hear sand, stones and wind whipping around you.

Marantz SR 5009 Receiver Review

In Batman Begins, the “tumbler” scene is a good demo of the dynamics and deep bass extension that your system can accommodate. I played that scene loudly and was rewarded with some tremendous dynamics. With Audyssey engaged, the sounds all melded with the room and provided a vivid and coherent sound field, with no over emphasis on the surrounds or subs (of which I have 2 in my theater). Front to back pans were without gaps. The seamless sound field allowed me to get into the movie and never pulled me out because of some sonic hiccup in the playback. Here again, I preferred the sound with the EQ engaged. When comparing EQ on verses EQ off, I would describe the difference as subtle, but EQ engaged made the speakers less localized and the overall soundscape being better blended.

I used the SR 5009’s amplification as well as using the pre-outs to my Emotiva LPA-1 and dual UPA-1 mono block amplifiers. Having pre-outs gives you so much more flexibility. You could provide mono blocks on the front R/L while using the SR 5009 amps to power you center and surrounds, for example. The only down side is that this receiver does not provide for Dolby Atmos. You’d have to move up to the next model up to get that feature (AV 7702, for example). Personally, I don’t think that omission would be a deal breaker for me, but it might be something to consider if the thought of Atmos makes you all tingly inside.

Marantz SR 5009 Receiver Review

Another thing I noticed when running the SR 5009 for extended periods of time: heat. I measured the surface temperature at 105 degrees near the front left side of the receiver with a digital thermometer. This occurred whether I used external amplification or the SR 5009’s own internals amps, so I wonder if I was getting heat from the power supply or perhaps the processor. In any case, it was moderately hot, but no more so than any other receiver I have test from Pioneer or Onkyo. I only mention it, too, because my Emotiva per/pro and amplifiers all run cool to the touch.


Conclusions about the Marantz SR 5009 Receiver

Sonically, I liked what I heard from the SR 5009. It performed well with both movies and music. The streaming from my NAS was a lazy man’s fantasy. The remote was well laid out and the INFO button quite useful. The App worked without glitches and could easily do everything the remote could do. The pre-outs allow for you to beef up your system with bigger amps and different options. Be forewarned that it runs a bit on the warm side and if you have future aspirations to step up to Atmos, you will have to look for something else. However, if you are in the market for a 7.1 system that plays music well, this Marantz should be near the top of your list. Because of the features and ease of set up and use, I liked what the SR 5009 offers over much of the similarly priced competition. Now if I were to wax nostalgic, the only improvements I could wish for are blue diodes and that slick flywheel tuner knob. But then again, perhaps I am being too eclectic.


The post Marantz SR 5009 Receiver Review appeared first on HomeTheaterHifi.com.


Marantz AV7702 Surround Sound Processor Review

$
0
0

Marantz AV7702 Surround Sound Processor Review Highlights

Marantz is in their seventh decade of providing high-performance audio equipment, and in that time they’ve often pushed the envelope, especially in surround sound. Marantz’s new AV7702 surround sound processor (SSP) maintains that tradition by being one of the first SSPs to support Dolby Atmos and (optionally) Auro immersive sound, which Secrets’ Chris Eberle recently discussed in depth in “Dolby Atmos and Auro 3D: The Technology and The Reality.” The Marantz AV7702 also features a very clear and intuitive setup routine, an excellent iOS Remote Control app, and distinctive styling.

In addition to Atmos and (optionally) Auro immersive sound, the AV7702 includes the new Dolby Surround and (optionally) Auro-3D upmixers. Both upmixers synthesize an immersive 3D soundfield from a stereo or multichannel recording. The AV7702 also includes Audyssey DSX and dts Neo:X upmixers, but deletes Dolby Pro Logic II.

The Marantz AV7702 uses Audyssey’s flagship Platinum audio processing suite. It can decode practically every digital audio format ever created, including multichannel DSD. The AV7702 can stream music from AirPlay or Bluetooth sources, and offers a comprehensive array of streaming options over its wireless or wired network connection. On top of all that, the AV7702 provides a built-in HD radio tuner, and even a simple phono preamp. On the video side the AV7702 boasts ISF display calibration controls.

Marantz AV7702 Surround Sound Processor Review

Marantz AV7702 Surround Sound Processor Highlights Summary

  • Immersive sound is a paradigm shift with massive potential to enhance enjoyment of both music and movies
  • Immersive sound upmixers (Dolby Surround, Auro-3D) are addictive for movie/TV content
  • Intuitive setup routine dramatically reduces scope for user error
  • Stable and consistent implementation of Audyssey room correction
  • Excellent free iOS Remote Control app
  • While Dolby Surround and Auro-3D are amazing for movies, they are a step back from Dolby Pro Logic IIx (not included) or Logic7 (Harman proprietary) for music
  • Gain structure makes pairing with high-gain amps or high-efficiency speakers difficult

Introduction to the Marantz AV7702 Surround Sound Processor Review

When Chris Heinonen reviewed the Marantz AV7701 in 2013, he noted that Marantz was one of the few companies offering an SSP at an aggressive price. A big reason for the aggressive pricing is that Marantz based their SSP off of an A/V receiver (AVR) platform. Today, there are more SSP options on the market, but few of them are as up-to-date as the AV7702. So two things haven’t changed since Chris’s review: Marantz remains a player in the SSP market, and their AV7702 remains aggressively priced.

MARANTZ AV7702 SURROUND SOUND PROCESSOR REVIEW SPECIFICATIONS

Processing

  • Decodes Dolby Atmos, Audyssey DSX, dts Neo:X, 6-channel DSD, All Mainstream Digital Audio Codecs; Auro-3D Decoding Optional
  • Dolby Surround (and Auro-3D, with paid upgrade) Immersive Sound Upmixers
  • 7.1.4 Channel Dolby Atmos Decoding, with dual Subwoofer Outputs
  • 9.1 Channel Auro-3D Decoding, with Dual Subwoofer Outputs, or 10.1 Channel Auro-3D Decoding with a Single Subwoofer Output and a “Voice of God” (“VOG”) Overhead Speaker.
  • Audyssey Platinum Suite (MultEQ XT32, Dynamic Volume, DynamicEQ, SubEQ HT, LFC) with Microphone and Microphone Stand; Audyssey Pro Optional
  • DACs: TI PCM 1690 (24-bit/192kHz)
  • Four Analog Devices SHARC 32-bit DSPs
  • Analog Devices ADV8003 Video Processor
  • D/A Conversion for Zones 2 and 3

Connections

  • 8 HDMI 2.0 Inputs (7 back, 1 front), and 3 HDMI 2.0 Outputs (2 main, 1 zone)
  • Built-in Phono Preamp for MM Cartridges
  • AirPlay Streaming (audio-only), Bluetooth and DLNA Streaming
  • AM/FM/HD Radio Tuner
  • 6 Analog Stereo Inputs (1 front)
  • 4 Digital Stereo Inputs (2 optical, 2 coaxial)
  • 7.1-channel Multi-channel Analog Input
  • Preouts: 15 Channel RCA, 13 Channel XLR
  • Stereo Headphone Output (1/4″)

General Features

  • Advanced ISF Video Calibration Controls
  • Marantz-exclusive HDAM Circuits
  • iOS and Android Control Apps
  • Built-in Wi-Fi and Bluetooth Receivers
  • AM/FM/HD Radio/Streaming Options
  • Dual 12V triggers, RS232, IR Input
  • Step-by-step Setup GUI
  • IR Remote Control
  • Control for Two Additional Zones
  • Dimensions: 7.28” H x 17.32” W x 15.39” D
  • Weight: 22.5 Pounds
  • MSRP: $1999.00 USD (Auro 3D is an additional $200, Audyssey Pro license is also available as a paid option with professional calibration.)
  • Marantz
  • SECRETS Tags: Marantz, Dolby, Atmos, Auro, Dolby Surround, Auro-3D, surround sound, Surround Sound Processor, SSP, Audyssey, AirPlay, immersive sound, upmixing

Considering the AV7702’s hardware and feature upgrades from the AV7701, I am impressed Marantz managed to keep the price so close to the old AV7701’s. The analog signal path is substantially better. The AV7702 is the first SSP near this price to support Atmos and Auro immersive sound, or to incorporate the Dolby Surround and Auro-3D upmixers. The included Audyssey’s “Platinum” package includes their MultEQ XT32 and SubEQ HT room correction, and DynamicEQ loudness compensation.

To upgrade the room correction and add immersive sound formats, the AV7702 bulked up to four Analog Devices SHARC DSPs! Oh, while they were at it Marantz seriously polished the setup experience and user interface, too. Marantz’s AV7702 is as featured-packed as anything else on the market right now, and its interface is organized for intuitive access to its copious feature set. In 60-plus years of operation, Marantz clearly learned a thing or two about making a high value, highly usable SSP.

The big stories here are, of course, Atmos and Auro-3D. The AV7702 is the first SSP to implement both immersive formats. Comparatively under the radar, but arguably the more important story right now given the paucity of native immersive content, are the new upmixers, Dolby Surround and Auro-3D. Dolby Surround supplants Dolby’s previous upmixers on the AV7702. Including, unfortunately, Pro Logic IIx. Auro-3D is a new technology.

For Dolby Atmos, the AV7702 controls up to 7.1.4 channels, with two subwoofers (essentially 11.2 in the manner the industry has labeled their channel configuration in the past). For Auro-3D, the AV7702 controls up to 9.1 channels with two subwoofers or 10.1 channels with a single subwoofer. Auro and Atmos require slightly different speaker layouts, though one system can accommodate both formats.


Design and Setup of the Marantz AV7702 Surround Sound Processor

The AV7702’s aesthetic is more Don Draper than Saul Goodman. Like the Marantz SR7009 AVR Jim Milton recently reviewed, the AV7702’s faceplate has rakishly curved flanks and a central “porthole” display set off by a blue LED ring. A door under the porthole hinges down to expose a second, larger display, along with extra I/O: USB audio and HDMI inputs, analog audio input, composite video input, and headphone jack.

Marantz AV7702 Surround Sound Processor Review

On a personal note, in the 1990s Marantz’s AV600 SSP, the AV7702 of the day, was my first separate preamp and first jump into multichannel audio. That AV600 offered years of great-sounding and reliable service. How appropriate that the Marantz also provided my first taste of immersive home audio! It’s also nice to see Marantz still uses classy copper-colored screws on the AV7702’s back panel, just like my old AV600.

Marantz AV7702 Surround Sound Processor Review

The AV7702 supports legacy video players with composite and component video inputs; no S-video. For 2-channel the AV7702 offers optical and coaxial digital inputs, and multiple unbalanced analog stereo inputs. There is also a 7.1-channel analog input. Marantz even includes a phono preamp for moving magnet cartridges. Given the vinyl resurgence, a phono preamp is a very smart inclusion, albeit one I could not evaluate without relocating my carefully set up turntable.

I do wish AV7702’s preouts were color-coded. Color-coding is very helpful to streamline complicated systems with up to 13 speakers. The CEA established a color-coding standard for loudspeaker channels several years ago. I would like to see this CEA standard more widely adopted by SSP, AVR, and amp makers. Marantz thoughtfully provides laminated cable flags to help keep things organized behind the AV7702, though oddly a few of the labels (subwoofer, right surround) do not conform to the CEA standard.

In addition to adding immersive sound, Marantz significantly upgraded the analog side of the AV7702, Secrets’ own Dr. David Rich dove into the AV7702’s service manual. He found Marantz significantly upgraded the HDAM preamp outputs compared to the previous AV7701 and even the AV8801. He commented, “The new HDAM is a nice, discrete, unity gain buffer. It should be 16 bit equivalent or more SNR.”

Marantz also upgraded the DAC compared to the AV7701. Dr. Rich again: “The 7702 DAC has a slight upgrade to the TI PCM 1690, which is the workhorse standard in AVRs these days up to about $1000 – $1500 when the transition to better DACs in Pioneer, Yamaha and Onkyo occur. Denon / Marantz gives better DACs only in the top of the Denon AVR at $3000 and Marantz Pre/Pro at $4000. But the others do not give you Audyssey, which adds that extra DSP chip. That is a trade I would make.” To see more on DACs used in AVRs and SSP, see Dr. Rich’s chart in the Secrets technical article “AVR – Audio Video Receiver – Build Quality: Part I”.

Unfortunately, when I first hooked everything up and turned on the AV7702, I was immersed…in hiss! All seven main speakers, and both subwoofers, sounded like proverbial snakes in the grass. Only the heights were acceptably quiet, though I could hear some hiss from them up close. I tried multiple RCA and XLR cables, but swapping interconnects had no effect on the hiss. The noise was clearly HF hash from the AV7702 and not a ground loop or something else setup-related. Unfortunately after we moved in to this house it gave me a crash-course in powerline noise, so we had a dedicated 20A circuit installed for the audio system.

I nearly contacted Marantz for a replacement unit, but in browsing through forums I read several AV7702 owners complain of hiss. So the hiss was not likely a specific defect in my review unit, but either a wider defect or a consequence of some design choice Marantz made. I asked Secrets’ Dr. David Rich for some insight. After examining the service manual, he replied, “This should have no more hiss, if it is working, than any other current Pre/Pro from Japan. The DAC output to the volume is the standard 2VRMS at 0dBFS. The hiss level will be the same as any $500 and up AVR from the past 5 years.”

However, from what I read in user forum threads, the hiss-afflicted AV7702 owners all used highly sensitive speakers (>90dB/1W/1m), amplifiers with higher gain than usual, or both. (“Gain” is the ratio of an amp’s output to its input.) My “main seven” speakers have fairly standard sensitivity, around 87dB/1W/1m. But my mains amp, an ATI AT2007, is rated as having higher-than-usual gain: 34dB unbalanced/28dB balanced.

There is no universal standard for gain in home audio amps, and in the real world amplifier gain is all over the map. For instance, I drove the height modules with amplifiers built around the popular ICEpower 125ASX2 module; in stereo mode the 125ASX2 has 25dB gain per its datasheet. The closest thing to a standard that THX-certified amps must offer 29dB gain from an unbalanced input. Marantz’s own MM8077 has THX-standard gain, so that is likely what they designed for.

Now, I expected some “fun” times interfacing the AV7702 with my subwoofer amp, a German-made, 4kW, fan-cooled commercial cinema monster that lives in our basement. Getting pro audio gear to play nice in a home audio system usually requires some improvisation. So I don’t ding the AV7702 at all for subwoofer hiss. Anyone who uses pro gear in home audio systems has at one time or another experienced such issues. But the AV7702 is the first preamp, SSP, or AVR I have ever tried that did not play nicely with my ATI amp out of the box. In fact, I bought the AT2007 because of its pitch-black noise floor when driving very sensitive speakers!

I was able to drive the snakes away by inserting 10dB attenuators on balanced cables between the AV7702 and my AT2007, slightly lowering the volume on my height speaker amps, and turning down the subwoofer amp’s level controls by 18dB. XLR attenuators add at least $10 per channel to the cabling cost if you use standard pro audio models, though I’m sure someone markets Golden Ear Approved (TM) attenuators for $$$$ more. Aside from hiss reduction, I could not hear any audible consequences from the attenuators.

That said, once I sorted the gain structure, the AV7702’s sonic performance was subjectively quite good. When I stuck my ear up to the speaker grills I still heard more hiss than I’d like. But the hiss was sufficiently tamed that I could not hear it from our sofa.

Initial hiccups with gain structure excepted, Marantz really makes setting up the AV7702 a snap. Modern A/V electronics generally are admirably transparent, but very complex. While we all hate to admit it, in truth most perceived sonic flaws in modern audio electronics boil down to user setup and configuration errors. The Marantz setup app helpfully walks you through every step of configuring the AV7702 with both illustrated guidance and useful confirmation steps.

Marantz AV7702 Surround Sound Processor Review

When you start or reset the AV7702, Marantz’s setup app pops up to configure your system. The app starts by asking how many speakers you have, and whether you connect each speaker group (front, center, side surround, front height, etc.) with XLR or RCA cables. The on-screen graphics also depict the correct placement for each speaker.

Marantz AV7702 Surround Sound Processor Review

After you finish the speaker setup routine, the AV7702 confirms you wired everything correctly by sequentially playing a few bars of music through each speaker. That thoughtful and tasteful touch can save much aggravation later.

Next, Marantz’s setup app walks you though Audyssey calibration. The Audyssey app directs you to place the included microphone at ear level at the primary listening position, and then confirms subwoofer level by playing noise through each subwoofer, one by one, and asking you to adjust their volume until they are each playing at about 75dB.

Marantz AV7702 Surround Sound Processor Review

After you’ve adjusted your subwoofers’ volume, the Audyssey chirps begin. After Audyssey finishes primary listening position measurements, it checks to make sure all the speakers are connected in the correct polarity. I inadvertently wired the front-left height speaker out of phase. As I wrote above, user error is common at all levels of experience, and complex multichannel systems offer many avenues for user error to creep in. Kudos to Marantz and Audyssey for working to catch problems early! After the quality-control step, the setup app walks you through measurements in seven other locations, for eight total runs.

Marantz AV7702 Surround Sound Processor Review

Marantz provides a microphone stand to ensure people don’t just place the Audyssey microphone on the couch, an unfortunately common occurrence. Marantz’s stand is cardboard, and looks like an origami rocket once assembled. It has notches for height adjustment. While their stand is not as durable as the metal boom mic stand Anthem provides with their AVRs and SSPs, it works well and takes up little space when not in use. I used the included stand for my Audyssey calibrations in this review, with reliable, stable results. If you don’t want to use the included stand, the Audyssey microphone is still threaded for use with a camera tripod.

Our primary listening area is a large sofa with leather seating and veneered bent-ply sides/back. I know from experience taking acoustic measurements – as well as from previous use of Audyssey, ARC, Dirac, and Trinnov room correction systems – that a large, reflective sofa can jack up measurements. So before calibrating the AV7702 I placed a wool blanket over the sofa, and a plush throw over the blanket, as in the picture below.

Marantz AV7702 Surround Sound Processor Review

After the eighth measurement, Audyssey calculates its filters directly on the AV7702, unlike some systems that offload calculations to a computer. The AV7702 calculates filters remarkably fast for an onboard system. The AV7702 then asks if you want to turn on DynamicEQ, which is Audyssey’s loudness compensation. You should select “yes” if you regularly listen at non-deafening levels.

The AV7702 setup app then seamlessly moves from Audyssey calibration to source component setup. After each input assignment, the AV7702 helpfully asks you to confirm that audio and video works properly on that input.

Marantz AV7702 Surround Sound Processor Review

Thanks to the setup app, I discovered the AV7702 has a built-in HD Radio tuner. I really like that feature, because many radio stations offer multiple options in HD. For example, my local NPR station offers a talk HD channel, a classical music HD channel, and an HD simulcast of the analog FM broadcast. Unfortunately, HD radio tuners are rare in SSPs and AVRs. It’s nice to see Marantz didn’t scrimp here.

However, I found one puzzling omission in the AV7702’s feature set: there is no user-accessible acoustic measurement app. Other room correction systems allow users to access the measurement engine for system set-up. A simple measurement app using the included microphone and measurement engine would add immense value to the AV7702, and greatly enhance the performance of systems built around the AV7702. Hopefully Marantz and/or Audyssey will include a quick measurement app in the future.

It’s worth noting that Marantz built significant room into the AV7702 for updates. For example, my review unit did not have the Auro upgrade pre-installed. So I upgraded it as any AV7702 owner would, with a firmware update. I found the upgrade process seamless, though Auro does require rerunning Audyssey. Marantz also offers an upgrade to Audyssey Pro. My review unit did not have it because I wanted to review the AV7702 as a typical user would configure it. Audyssey Pro adds significant extra cost.

For most of the setup, and most of my audition, I controlled the AV7702 with a Harmony Ultimate remote. I could not use the AV7702’s included IR remote, because my equipment rack is off to the side. Also, I bet that most AV7702 owners will use learning remotes with macros (“Activities”) anyway. The AV7702 worked pretty well with my Harmony Ultimate hub on the shelf above it, though the AV7702’s IR receiver sometimes did not “see” commands very well when we slid the smoked-glass door of our media cabinet closed. I found Marantz’s excellent iOS Remote App much easier to use than the Harmony Ultimate when I needed to access the setup menu or change sound modes.

Marantz AV7702 Surround Sound Processor Review

As I mentioned above, I evaluated the AV7702 with a “7.1.4” channel configuration, using two subwoofers. Normally, I use 7 main channels, with surround rears on the back wall about a foot below from the ceiling. I reconfigured my usual surround rears as rear heights, and temporarily set up a pair of speakers on 30” stands for surround back. Our living room was pre-wired with 14/4 speaker cable to each speaker on the back wall, so I tapped into the unused wire pair for the new surround rears. Also, as a temporary measure for this review, I placed a set of older KEF “eggs” on 39” tall stands atop my left and right speakers.

Marantz AV7702 Surround Sound Processor Review

Thank my wife for being so understanding! (And so out of town when I mounted the front height speakers).

This speaker placement is close to the preferred Auro configuration. It is also an acceptable Atmos configuration, described on pg. 34 of the Dolby Atmos Home Theater Setup Guidelines, with 30 degrees of elevation for the front heights. My setup was, admittedly, not the optimal Atmos 7.1.4-channel installation, as shown on pg. 22 of the Guidelines. The optimal Atmos configuration uses four speakers in a tight rectangle around the listening area. That configuration is impracticable except in dedicated theater rooms. In addition to the cost of ceiling speakers, installation, running wires, etc. …how do you add overheads in those positions to a room with a large ceiling fan? What if your ceiling has cross-joists?

Likewise, I cannot imagine any multipurpose room incorporating an Auro VOG speaker. So my setup simulates a practicable immersive audio configuration in a multipurpose family room. The differences between my temporary setup and a permanent immersive sound installation in a multipurpose living room are aesthetic. In a permanent installation the front height speakers would likely be mounted to the front or side walls. A really sleek installation might use motorized drop-down ceiling speakers.

Dolby does offer another, more practical, option for front/rear height channels: upfiring “Atmos Enabled” modules that sit atop your front and/or rear speakers. I played with Atmos Enabled speakers briefly before Marantz provided me the Auro firmware. But Auro does not support Atmos Enabled speakers and I wanted a configuration compatible with both immersive sound formats. I plan to explore Atmos Enabled speakers for TV/movies and music more thoroughly in a future review.

I made one other change to my reference configuration for this review. Normally, I use four individually amplified and equalized subwoofers distributed around the room, controlled by a dedicated DSP processor. This setup reduces modal problems and minimizes seat-to-seat bass variation. But for this review I wanted to experience Audyssey SubEQ HT as a typical (i.e. less warped) Marantz AV7702 buyer would.

So I took the processor out of the signal chain and reduced my subwoofer count from four to two. I used the two subs under my left and right speakers because they are identical, and symmetrical with respect to the listening position. Also, using those two subwoofers mimics two full-range speakers with deep bass capacity to 20Hz. While the seat-to-seat variation was higher than with my usual four-sub setup, I never lacked raw deep bass output despite using “just” two subs.


The Marantz AV7702 Surround Sound Processor In Use

The Marantz AV7702 generally sounded good. Audyssey XT32 and SubEQ HT tightened up the bass, and did a passable job of integrating my two subs into the system once I inverted the subs’ polarities. Audyssey, like most automated room EQ systems, does not take a sweep of the mains and subwoofers together. So they all guess on subwoofer polarity, and get it wrong half the time. But there is an easy fix. Secrets’ Dr. Rich explains a procedure applicable for getting subwoofer polarity right regardless for all room correction systems at the bottom of page 3 in “Anthem Room Correction – Part 2 – Including a Subwoofer.”

Audyssey on the AV7702 also intruded less on the midrange and treble than I’ve experienced with previous Audyssey implementations, though I would still prefer a lighter touch. Dialog intelligibility was maybe a little better than my reference for TV/movie content. However, on music sometimes I felt image depth was a little flatter than my reference, and low-level details in a mix were very slightly smeared. Still, overall I found it very hard to criticize the sound the AV7702 gave me. And on video content it sounded amazing.

As for video performance…I am not a discerning videophile. Also, my TV is just an old 46” LCD mounted high over the fireplace in a multipurpose living room. So all I can really say is that I thought everything that passed through the AV7702 looked absolutely wonderful. If there were any artifacts of any sort, they slipped past me. I know the AV7702 offers some pretty sophisticated video calibration tools, but I was scared to even explore those menus for fear of messing something up!

My very first cinematic experience with the AV7702 floored me, and it was just a Dolby Surround upmix of a movie broadcast on basic cable! After setup, the AV7702’s input defaulted to my cable box. Comedy Central was showing the 2012 movie “Hit and Run.”

Marantz AV7702 Surround Sound Processor Review

The scene I dropped in on had people running through the woods. Dolby Surround convincingly placed me under the tree canopy like I’ve never heard from an audio system. I heard sounds placed everywhere, front-to-back, side-to-side, up-and-down. There was no discernable hole in the soundfield. The canopy of the forest was just so vividly rendered. I was, um, immersed. So I was solidly sold on the value of Dolby Surround upmixing for legacy movie content after maybe two minutes exposure to a movie I had not previously seen.

But I soon ventured into movies I know better. “Lola Rennt” (“Run Lola Run”) is a late-1990s German action movie starring Franka Potente, and in my view a classic.

Marantz AV7702 Surround Sound Processor Review

The scene “100,000 in 20 Minuten” does a good job of contrasting how Dolby Surround and Auro-3D steer movie effects. The scene begins with Lola on the phone with her boyfriend Manni. She is at home and he is in a telephone booth. Manni is panic-stricken because he is supposed to deliver 100,000DM to a shady character, but he left the money on the train. He must come up with the money in twenty minutes. The scene includes Lola’s glass-shattering scream, a ticking clock high on a building, and a telephone card ejecting from Manni’s payphone with a beep. Dolby Surround handled it superbly. I felt Lola’s scream travel through the air, and the wavefront of breaking glass cascaded over the room. The clock’s ticks emanated from a distinct point in space floating between the center, right, and right front height speakers. The telephone beep was clearly placed a little ahead of the right-front speaker, forward of and below the clock. While Auro-3D did make the scene feel more expansive and room filling, it did not seem to steer effects to specific elevations in 3D space the way Dolby Surround did. Also, Auro-3D somewhat blurred the sonic contrast between the Manni in the phone booth and Lola in her home.

I also enjoyed Radiohead’s “The King of Limbs: Live from the Basement” Blu-Ray concert disk through the AV7702, upmixing the native DTS-HD 5.1-channel track with both Dolby Surround and Auro-3D. (N.B.: Dolby Surround works just fine on DTS-encoded disks.)

Marantz AV7702 Surround Sound Processor Review

I chose this disk specifically to evaluate how the two upmixers handle a multichannel recording of a dead acoustic space. On “Good Morning Mr. Magpie,” they were basically opposite. Dolby Surround tilted the spectral balance brighter, but the spatial difference was very subtle. Maybe Dolby Surround stretched guitars a little and added a 3D shimmer to cymbal splashes, but overall it preserved the acoustic of a small, dead-ish performance space. Auro-3D, by contrast, did not introduce any spectral coloration I could perceive. It deepened the front soundstage and increased the apparent size of the performance space. Honestly, with this disk neither immersive upmixer equaled what Dolby Pro Logic IIx can achieve with high-mounted surround rears. DPL IIx adds subtle extra definition and envelopment to the studio space without altering the spectral balance or enlarging the perceived venue. AV7702 unfortunately does not offer DPL IIx.

Moving on to native content…well, we are in the very early days of immersive sound. Native immersive program material is scarce right now, just as native program material was scarce immediately after lossless multichannel was introduced, and Dolby Digital 5.1, and for that matter CD. In A/V paradigm shifts, the recordings usually lag behind the hardware. During my time with the AV7702 there were only four Atmos movies for sale in the US according to Dolby’s website. Call me a snob if you like, but I have no interest in watching, let alone owning, any of them. My first rule about buying art is, it must intrigue me! Likewise, an Amazon search for native Auro disks came up empty. But Marantz was kind enough to send me Dolby’s Atmos demo disk. They also send the Auro’s demo disk to every AV7702 owner who buys the Auro feature upgrade.

Marantz AV7702 Surround Sound Processor Review

The Dolby Atmos demo disk mostly contains clips of animated scenes with sound effects. They were impressive. The “Leaf” trailer and “Amaze” trailer commonly shown before Atmos movies in the cinema both sounded honestly much more precise in my home than they have in any Atmos movie theater. The “Unfold” trailer, which I had not previously seen, impressively demonstrated Atmos’s ability to position sounds in three-dimensional space around the listener, as a series of shards fly around and form Dolby’s “Double D” logo.

The most impressive trailer to me, though, was the “Napa Valley Dreams” track. It featured impressively lifelike guitar and drums, and bird calls ricocheting off mountains. This track highlighted how Atmos can improve the fidelity of percussion, especially, by expanding the wavefront propagation of percussive hits in 3D. I was less impressed with the other music track on the demo disk, the Enrique Iglesias and Sean Paul song “Bailando.” It was a fine recording, detailed and punchy with some nicely textured height information. But “Bailando” mostly left me yearning to hear Atmos on something acoustic.

Marantz AV7702 Surround Sound Processor Review

By contrast, not to put too fine a point on it, but…the Auro disk blew me away. It does a heckuva job selling the format. The program material on the disk is mostly real-world sounds and acoustic music. You hear how adding the height layer really makes a street corner come alive. There is a tractor pass so lifelike that my wife turned her head to see the monster truck rumbling down the street outside our house. I almost did, too! The fireworks track may not have the sub-killing infrasonic bass content of Tom Danley’s infamous fireworks recording, but it impressed me greatly with how precisely the aerials’ reports tracked their heights on the screen, and how realistic Auro rendered the reports and decays. Do not try without good subwoofers! The fireworks track also set our two cats hopping around to see what was going on.

In addition to the astoundingly realistic sound effects, the Auro demo disk offered a hearty dose of real live music. It was especially impressive in transporting me to the cathedral for a Bach organ recital, conjuring an organ sound so expansive that I couldn’t believe fit in our living room. I strongly recommend AV7702 owners spring for the Auro upgrade. I also fervently hope musicians wake up to the incredible opportunities Auro (and immersive sound generally) offers for recorded music.

Of note, the AV7702 had no trouble recognizing this native Atmos or Auro 3D content from my now-ancient disk player, an Oppo BDP-83 I mostly use for SACD and DVD-A playback. (We rarely watch movies on disk.) I mention this fact because, as Chris Eberle explains in his Secrets technical article about Atmos and Auro, older Blu-Ray players can stumble on “seamless branching,” and the four current native Atmos Blu-Rays use that technology. So my glitch-free experience with the demo disks may not translate to glitch-free Atmos (or Auro) playback of commercial Blu-Rays with a BDP-83. I encourage anyone interested in native Atmos or Auro content to read through the Blu-Ray player reviews here at Secrets to explore newer players.

After exploring the demo disks, I was eager to hear how Atmos and Auro-3D upmixed multichannel and 2-channel music. One of the best-executed examples of a multichannel pop recording is R.E.M.’s “Green” on 5.1-channel DVD-A.

Marantz AV7702 Surround Sound Processor Review

As with the forest scene in “Hit and Run,” Dolby Surround won the first few bars of “You Are the Everything,” transporting me in to a pasture at night. But when the music played, Dolby Surround brightened up the mix. While Auro-3D did not set the mood as well as Dolby Surround, it also did not color the sound. Auro-3D also provided a more detailed, rich, layered soundstage that fit the tone and scope of the music well. Good stuff!

The Mercury Living Presence series of 3.0-channel SACDs were recorded in the late 1950s and early 1960s, before stereo was degraded to a 2-channel format for vinyl records. Despite their age, this series offers some of the best orchestral sounds ever burned to disk. Listening to Fritz Reiner take the CSO through Dvorak’s New World Symphony in 1957 on the AV7702 was a treat.

Marantz AV7702 Surround Sound Processor Review

The recording is detailed and lush, with outstanding dynamic range. The performance is peppy, and the imaging realistically amorphous. (Have you ever closed your eyes during a symphony and been able to point exactly at the fourth horn player in the mix? Didn’t think so.) With the upmixers off, the AV7702 stepped back and let those essential qualities shine through. Upmixing this recording with Dolby Surround and Auro-3D was interesting, too. Dolby Pro Logic IIx does not expand this disk (or any of the 3.0-channel Mercury Living Presence SACDs) into the side or back speakers, and neither did Dolby Surround or Auro-3D. However, both upmixers expand it to the front heights.

Stripped to just expanding the sound to the two front height speakers, the upmixers worked in subtly different ways that required me to listen multiple times and regularly flip between them midstream to discern any differences. Ultimately, I decided Auro-3D stretches the soundstage a little vertically, similar to a line array speaker. Dolby Surround moves your seat a couple rows closer to the orchestra, and images a smidge flatter. Overall, I preferred Dolby Surround on this disk. But, again, the differences between no upmixing, Dolby Surround, and Auro-3D were pretty small on this disk.

Of course, I also listened to 2-channel music on the AV7702. Most of my time with it was listening to 2-channel music, in fact. Compared to multichannel, in 2-channel the choices Audyssey makes to optimize movie playback at home are apparent compared to more music-focused room correction systems. For example, on the 2.0-channel mix of the aforementioned R.E.M. “Green” on DVD-A, I found the Audyssey midrange dip and treble boost caused a slight “cupped hands” coloration atop Michael Stipe’s vocals that I did not hear in multichannel, or with Audyssey’s Bypass LR curve. But other than some quibbles with the Audyssey target curve and the slight smearing of extreme low-level detail I mentioned above, I cannot point to anything I heard as a specific flaw, or a specific virtue, in the AV7702’s 2-channel performance. It mostly did what good audio electronics do: get out of the recording’s way.

Now, allow me a possibly heretical confession: at home when I use my reference electronics to enjoy 2-channel recordings stored in the cloud or on a hard disk or even in spiral grooves, I almost always upmix them to 7.1 channel with Dolby Pro Logic IIx. On most recordings, I find DPL IIx (and Harman’s similarly-conceived “Logic7” upmixer) to present a more convincing sense of the original acoustic scene than the “pure” 2-channel original. So what I wanted to hear most of all from the AV7702 is how Dolby Surround and Auro-3D work with 2-channel music.

Here is a quick summary of what I heard from each upmixer. Dolby Surround adds a glossy bright sheen to the music, sometimes throws high-frequency sounds into unnatural places in the room, and can sharply render the original acoustic space of the recording. Auro-3D is spectrally neutral, and offers an alluring increase in soundstage depth and layering on all program material, but levels spatial contrasts between recordings. In short, while native Auro content can offer a startlingly real “you are there” effect, stereo content upmixed with Auro-3D is sharply “they are here.” These differences came out clearly on the recent remaster of Led Zeppelin’s “Whole Lotta Love,” from the recent “Super Deluxe Edition” remaster of Led Zeppelin II.

Marantz AV7702 Surround Sound Processor Review

Dolby Surround moves sounds around the room seemingly at random, and tips the spectral balance way to the bright and steely side of things. Auro-3D put Bonzo in front of our fireplace.

I wish I did not have to write this paragraph, but for two-channel music overall, I prefer the Dolby Pro Logic IIx we’ve had for a decade over both Dolby Atmos or Auro-3D. In a way, that makes sense. Dolby Atmos is primarily designed to immerse the listener in the soundfield of a movie, steer cinematic sound effects to 3D space, etc. And it does a fantastic job at those things. Auro-3D has a foot in both camps. DPL IIx is, by contrast, was designed wholly for music. DPL IIx is a DSP adaptation of a tube-based upmixer Jim Fosgate designed to make music come alive in multi-channel systems. This difference in design intent comes through in how the different upmixers render timbre, space, and location. While I hope and expect that immersive upmixers will only improve in their performance with music, until they do I hope Marantz finds a way to bring DPL IIx to the AV7702 via a firmware update, or to add DPL IIx back on future SSPs and AVRs until the new upmixers catch up to DPL IIx.

Note, however, that if the music is designed for Aurio-3D, i.e., the digital music tracks contain the Auro-3D encoding, then you have a different story. Totally immersive sound that you have never experienced before. Of course, with 11 speakers, this is not unexpected. Auro-3D music in high resolution is already available. Here are three new discs from 2L (Norway).

Marantz

Marantz

Marantz

Here is the rear cover art of the album above. Notice that besides including 24/192 two-channel PCM, it also includes 24/96 9.1 Auro-3D. Most of our writers who attended CES 2015 felt that Auro-3D was more immersive than Dolby Atmos. However, it is likely that both codecs will be a standard inclusion on AVR’s and processors in the near future, so you can choose one or the other for any audio source.

Marantz


The Marantz AV7702 Surround Sound Processor On the Bench

This section will differ from measurement sections of most AVR or SSP reviews here at Secrets. In listening to the Marantz AV7702, what struck me more than anything was that offered the best implementation of Audyssey’s technology I have heard. It is not perfect, but it worked better than even prior versions of Audyssey XT32. SubEQ HT, especially, offers much better bass correction. Also, unlike previous versions that I found unstable, XT32 in the AV7702 provides stable and consistent correction without requiring absolutely identical microphone placement or a lab-grade noise floor in the room. I ran it a total of three different times during my time with the AV7702, and the results were essentially the same.

So instead of taking measurements of the hardware’s THD or jitter or what have you, I decided to focus on, in my opinion, the single most sonically relevant aspect of an SSP’s (or AVR’s) performance – its room correction system. Opinions differ about the importance of THD, jitter, etc. But no reasonable person can argue against the premise that large differences in frequency response are audible and significant. Room correction systems differ tremendously in the shape of their target curves, precision of their fit, and repeatability of their calibrations. My measurements showed Audyssey XT32 and SubEQ HT to be admirably precise and repeatable. As for the shape of the target curves, Marantz offers three user-selectable Audyssey target curves: Reference, Flat, and Bypass LR. Additionally, DynamicEQ loudness compensation can ride atop all three target curves.

All measurements below are spatial averages around the listening position. I styled my technique after Geddes and Blind, “The Localized Sound Power Method,” 34 JAES 3, pg. 167-173 (March, 1986).

Measurement setup was: Dayton EMM-6 measurement microphone calibrated (on axis and 90 degrees off axis) by Cross Spectrum Labs on a boom mica stand; Focusrite Scarlett 2i2 24-bit/96kHz USB recording interface; and an Apple MacBook running FuzzMeasure v. 3.3.3 measurement software on OSX Mavericks. Automatic device (“loopback”) correction was used for all measurements. All measurements are, unless stated otherwise, smoothed to 1/12 octave resolution. Unfortunately I have no way to measure the corrected center, surrounds, or heights directly, so I only measured the left and right speakers.

First, here is the native response of the system, i.e. without Audyssey.

Marantz AV7702 Surround Sound Processor Review

There are four important things to highlight in this measurement. First, the unequalized response in the modal region (red) looks horrid. The in-room response maybe fits into a ± 8dB window. That is just what rooms do down low, and why digital room correction is just not optional for high-performance bass. Are these frequency response swings audible? You bet they are! And the variance will actually be worse in a system with a single subwoofer and bass management, because at least the two subwoofers excite different room modes. So always use two (or more) subwoofers if you can.

Second, there is little “room gain,” or rise in the upper bass. That is somewhat artificial. The speakers are my own design. I voiced them lean in the upper bass, because they were nearly against the front wall in our previous home. Unfortunately, this naturally lean balance removes one big point of contrast between Audyssey and more music-focused room correction systems. Audyssey by design knocks “room gain” flat to standardize sound for movie playback. More music-focused room correction systems smooth the bass response around the room’s natural upper bass rise, and sometimes offer means to adjust the room gain.

Third, there are two peaks in the lower-midrange (purple) due to cabinet diffraction. Fourth, the frequency response from 1kHz up (green) is exceptionally smooth and falls off with frequency the way a speaker with a flat direct field response should at this listening distance. The midrange-tweeter crossover is also seamless.

Now let’s look at what happens when we engage Audyssey MultEQ XT32 and SubEQ HT, without DynamicEQ.

Marantz AV7702 Surround Sound Processor Review

Overall this curve sounds pretty good, but let’s highlight its stronger and weaker features.

Stronger: subwoofer response is much, much improved. My prior experience with Audyssey (including XT32) was that it set the subs’ level too low. Here, Audyssey Platinum gets the baseline level right. Also, Audyssey doesn’t try to fix the room’s major null (green). Room correction can flatten peaks, but can’t bring up nulls. Only placement changes or multiple distributed subs can fix such nulls. Audyssey also successfully reduces it the midrange diffraction peaks. The extreme treble is appropriately rolled off. Subwoofer integration (pink) looks like a weakness, but it is actually not bad. I took these measurements before manually fixing subwoofer polarity, to starkly illustrate the importance of doing manually checking sub polarity.

Weak: first, the infamous Audyssey “midrange compensation” dip (yellow) is present. The Audyssey dip is intended to improve the performance of speakers with upper midrange sound power problems. But it colors the midrange of speakers without midrange sound power problems. The AV7702 does not offer the Reference curve without the Audyssey dip. Second, treble is artificially boosted (red) until the top octave. The treble boost does seem to make movie playback a little more exciting, but it compresses imaging in well-recorded music.

The AV7702 also offers a target curve called Audyssey Flat.

Marantz AV7702 Surround Sound Processor Review

While Audyssey Flat does not impose the Audyssey dip (green) it does add a huge treble boost (red) all the way up to 20kHz. If your listening position is closer to the speakers and you prefer a sharper voicing, the Audyssey Flat target curve is an excellent choice. It is not a good choice at my listening distance or a good fit for my sonic preferences, though.

The last Audyssey target curve on the AV7702 is called Bypass LR, and it does what its name claims.

Marantz AV7702 Surround Sound Processor Review

The response above the mains/subs crossover region is basically the same as the Baseline Response, diffraction peaks and all. The bass is smoother. Bypass LR quickly became my favorite of the Audyssey target curves for 2-channel use, though it does something I couldn’t quite put my finger on to the center and side surrounds in multichannel.

Add DynamicEQ, Audyssey’s loudness compensation system, and the sound improves across the board at volume levels under “cinema reference.” If 0dB is “cinema reference,” my “loud” level during my time with the AV7702 was around -15dB, and my “normal” listening level was around -30dB. So I measured the effect of DynamicEQ at those volume levels.

At -15dB, DynamicEQ adds a little extra zest on the top, and a gentle rise from the upper bass down. In fact, except for the midrange dip and a slightly hot treble, the -15dB curve looks a lot like the target curve of music-focused room correction systems!

Marantz AV7702 Surround Sound Processor Review

At -30dB, the bass rise is steeper than at -15dB, though the treble rise is about the same.

Marantz AV7702 Surround Sound Processor Review

Comparing the sound quality at these volume levels with DynamicEQ to without is not a comparison worth making. I could not find anything I preferred with DynamicEQ turned off. In every case, DynamicEQ broadened the volume range over which music exploded into the room with vivid life and clarity, and made movies more impactful. Even The Nightly Show was better with DynamicEQ! Without loudness compensation, most pieces require a very tight volume range to present the perceptual balance the artist intended. I consider DynamicEQ the best part of the Audyssey Platinum package. I recommend every AV7702 owner turn DynamicEQ on during setup and never turn it off. If DynamicEQ seems to do too much, reduce its effects with the “Reference Level Offset” control.

Lastly, though I didn’t audition it, I was curious to know what exactly Audyssey’s “LF Contain” does. Turns out, at least at the default setting, “4,” LFC is basically a highpass filter with a corner frequency of 80Hz.

Marantz AV7702 Surround Sound Processor Review

I did not investigate LFC at other settings or volume levels. Audyssey claims to apply some psychoacoustic jujitsu to enhance the perception of bass, but, at least with my swept sine wave test signals it did nothing to the response except add a highpass filter.


Conclusions about the Marantz AV7702 Surround Sound Processor

As of right now, the Marantz AV7702 is the least expensive SSP on the market to offer Dolby Atmos and Auro-3D immersive sound. Once I sorted my gain-structure issues, I found the AV7702 incredibly easy to configure and use despite the comprehensive feature set. The iOS app is great and the GUI is both intuitive and attractive.

I feel that the AV7702 leans towards wowing a listener on movie playback over providing the best possible music reproduction. To my ears, the current iterations of Dolby Atmos and Auro-3D do not expand 2-channel music as naturally as the now ancient Dolby Pro Logic IIx does. Now, 11.2 immersive sound is the latest and greatesst, although the industry has been talking about “height” speakers for the past five years. I expect upmixers to evolve, and ultimately for an immersive upmixer to consistently best DPL IIx on 2-channel music.

Also, the AV7702 would provide even better music reproduction if Marantz offered an Audyssey target curve that corrects the room (i.e. up to 500Hz or so) while preserving your speakers’ voicing above that. Perhaps such a curve could replace LR Bypass. Still, even with the current target curves, the AV7702’s Audyssey Platinum suite handily sounds better than every previous Audyssey implementation I’ve heard. My measured results also correlate extremely well with Audyssey’s intended target curves. That wasn’t always the case with previous versions of Audyssey installed on AVRs and SSPs.

Regardless of my caveats, the AV7702 came within shouting distance of my reference for music. The AV7702 also offers a sublimely engaging TV/movie experience, by some margin the finest I have ever experienced in any home theater or commercial cinema. And that’s just using the Dolby Surround and Auro-3D upmixers. Native immersive content sounds so real it’s unreal. As more native Atmos and Auro content comes out, watch out!


The post Marantz AV7702 Surround Sound Processor Review appeared first on HomeTheaterHifi.com.

Emotiva XMC-1 7.2 Surround Sound Processor (SSP) Review

$
0
0
Secrets of Home Theater and High Fidelity - Best Of Awards 2015

Emotiva XMC-1 Processor Review Highlights

Emotiva has earned a reputation for delivering great quality products at a substantial value to their customers. Emotiva has come a long way with their processor line, and this review covers the Emotiva XMC-1 Gen 2 which is a 7.2 channel preamplifier/processor (SSP). The XMC-1 build quality is exemplary for its price point. Secrets of Home Theater and High Fidelity has published a series of articles on build quality and how component choices contribute to high-performance design.

Emotiva is a great example of a company that takes design engineering and component choice very seriously. The XMC-1 may not have every feature on the market, but it delivers on a price and performance goal that is remarkable in this industry.

Emotiva XMC-1 Processor Review

Emotiva XMC-1 Processor Highlights Summary

  • The sound quality is excellent for both music and movies.
  • The XMC-1 includes Dirac Live LE for Emotiva room correction. An upgrade to Direct Full for Emotiva is available for $99 which offers features like custom correction curves and adjustment range “curtains”.
  • Emotiva has focused on a premium design at an affordable price.
  • The XMC-1 performed very well on the bench with very low distortion measurements.
  • Speaker levels may need manual adjustment after Dirac correction filters are loaded into the XMC-1.
  • Designed and built in the USA, in Franklin, Tennessee.

Introduction to the Emotiva XMC-1 Processor Review

Emotiva is perhaps best known for their high power, affordable amplifiers like the Emotiva XPA-1 Gen 2 Monoblocks. Emotiva has also strived to deliver high-performance processors at an affordable price. Emotiva learned a great deal from the challenges on their earlier designs, which brings us to the subject of this review – the XMC-1 Gen 2. The XMC-1 is a 7.2 channel preamp/processor which includes Dirac Live LE for Emotiva room correction. Their goal was to create a product that delivers premium sounds quality at an affordable price. Let’s take a closer look at the XMC-1 Gen 2 and see just how Emotiva went about it.

EMOTIVA XMC-1 PROCESSOR REVIEW SPECIFICATIONS

Processing:

  • Design: 7.2 channel Preamp/Processor (Pre-Pro; SSP)
  • DACs: Texas Instruments (Burr-Brown) DSD1796 24-Bit/192kHz
  • ADC: Texas Instruments (Burr-Brown) PCM4202
  • DSP: Two Texas Instruments DA710 32-bit, 300 MHz processors
  • 2-Zone Operation
  • Dolby® and DTS® Surround Sound Processing

Connections:

  • HDMI 1.4b Audio/Video Switching: 8 In (includes 1 front-panel input), 2 Out
  • Digital Audio Inputs: 3 Optical, 3 Coaxial, and 1 AES/EBU (XLR)
  • Analog Audio Inputs: 3 Stereo RCA, 1 Stereo XLR, 1 Stereo 3.5 mm (front), 7.1 Multi-channel (1 set)
  • 7.2 Channel Pre-outs (RCA and XLR)
  • Rear-panel USB Type B Port for Audio Playback
  • Ethernet Port for Wired Network Connection
  • Remote IR (1 in, 1 out), and 12 Volt-triggers (4 out)
  • 3.5 mm (1/8″) Headphone Output

General Features:

  • 4K and 3D Video Pass-through
  • AM/FM Tuner
  • Remote Control
  • Dimensions: 5-3/4″ H x 17″ W x 15-1/2″ D
  • Weight: 21 Pounds
  • MSRP: $2,499 USD
  • Emotiva
  • SECRETS Tags: Emotiva, Emotiva XMC-1, Surround Sound Processors, SSP, Preamplifier

The Design of the Emotiva XMC-1 Processor

Emotiva XMC-1 Processor Review

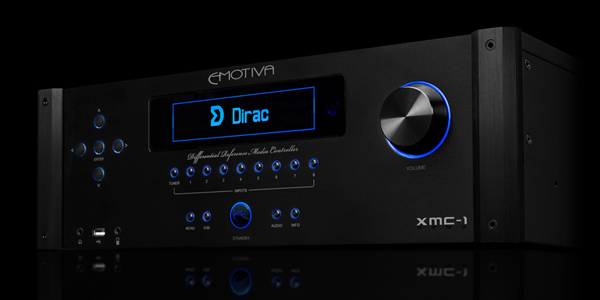
This is the first generation of the XMC-1 (the Gen 2 on the faceplate refers to the Gen 2X-series styling), and the two-tone black and silver styling of the first generation units are replaced by all black controls and black aluminum trim pieces. The front panel is made from brushed aluminum, and unlike the first generation units, the XMC-1 Gen 2 has a beautiful custom-designed 5.5” OLED display. The display is blue and supports a resolution of 256×64. Under the display are nine input buttons, one of which is assigned to the built-in tuner, while the other eight are user-assignable. To the left of the display is a standard set of cursor buttons that allow for easy navigation of the XMC-1 setup menus. In the lower left is a 3.5 mm (1/8”) headphone jack, a USB input for firmware updates, and a 3.5 mm analog stereo jack, which can be used to connect an iPod or portable music player. The large button with the Emotiva logo directly below the display is the standby power button. All the controls on the XMC-1 are highlighted in blue, which makes for a very bright but striking product in a darkened room. The brightness of the front panel can be adjusted or turned off if desired.

Emotiva XMC-1 Processor Review

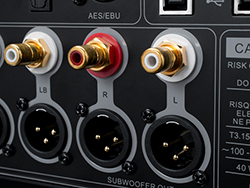
Moving on to the rear panel of the XMC-1, the first thing that jumps out is the complete absence of any analog video jacks. The XMC-1 supports eight HDMI 1.4b video inputs and two HDMI outputs that operate in parallel. Other than its ability to produce an on-screen menu, the XMC-1 does not offer any video processing capabilities. The inputs are simply passed through to the HDMI outputs. The XMC-1 still includes a 7.1 multi-channel input, as well as three stereo RCA inputs on the rear panel. It also includes a conventional record loop which makes use of a pair of RCA jacks. The XMC-1 supports seven digital audio inputs (3 coaxial, 3 optical and 1 balanced AES/EBU XLR) and includes two USB inputs on the rear panel. The USB Type A connector is used for firmware updates, and the USB Type B connector is used as a DAC input supporting up to 24-bit/192 kHz. You will also find an Ethernet connector on the rear panel that is used for the included Dirac Live LE for Emotiva room correction system and for remote control applications.

The pre-amp output jacks on the XMC-1 support a full complement of seven speakers and two independent stereo subwoofers. The RCA jacks on the pre-amp outputs, as well as the RCA jacks on the first stereo input, are premium quality gold-plated connectors.

Emotiva XMC-1 Processor Review

The remaining connections on the XMC-1 back panel include antenna connections for the AM/FM tuner, and one IR input and one IR output jack. Four 12-Volt DC Triggers are also included, which allow you to turn on another device, such as an external amplifier for multi-zone operations. A nice touch is a separate power switch and a fuse panel on the power supply.

The XMC-1 comes with a custom-made aluminum remote.

Emotiva XMC-1 Processor Review

From a feature perspective, the XMC-1 supports all the high-resolution audio codecs like Dolby TrueHD and DTS-HD Master Audio just as you’d find in any receiver or processor currently on the market. The XMC-1 is focused on audio quality, so you won’t find mass-market features such as multimedia applications for things like Pandora, internet radio, or accessing home media servers. Unlike some high-end processors on the market (e.g. the Bryston SP3) that offer no room correction, the XMC-1 includes three options for room correction. The first is the built-in support for Dirac Live LE for Emotiva which is a special version of Dirac Live Room Correction optimized exclusively for the XMC-1.

The second option is to upgrade to the Dirac Live Full for Emotiva software which includes features like custom target curves and offers the ability to control the adjusted frequency range or “curtains”. The upgrade costs an additional $99 for the license which is non-transferable. The third option is to use the built-in parametric EQ. The XMC-1 supports two sets of speaker presets, each of which has 11 bands of independent parametric EQ. The EQ values can be entered manually or they can be imported from the software room-calibration tool Room Equalization Wizard (REW), which can be found on the web.

From a technology perspective, the XMC-1 functions more like a very specialized computer than a traditional A/V processor. The heart of the XMC-1 is a Texas Instruments AM-1808 Sitara ARM9 32-bit 375 MHz processor which runs a custom Linux operating system that controls all the other audio and video boards in the XMC-1. Emotiva says this design gives them the ability to evolve functionality and swap-out hardware modules as required without a complete redesign of the product architecture.

On the audio side of things, the XMC-1 uses Texas Instruments (Burr-Brown) PCM 4202 for 24-bit analog-to-digital conversion and Texas Instruments (Burr-Brown) DSD1796 for 24-bit/192 kHz digital-to-analog conversion. As we’ve seen in other products like the Bryston SP3, the Emotiva makes use of technology from Momentum Data Systems to help manage the ever-changing HDMI and audio-format landscape. On the XMC-1, the audio DSP section is handled by a Momentum Data Systems DAE-7D DSP-based OEM-audio module. The MDS DAE-7D uses two Texas Instruments DA 710 DSP chips to perform Dolby and DTS audio decoding, bass management, and surround sound synthesis for Dolby Prologic IIx and DTS ES Matrix. The MDS DAE-7D uses an ASRC (Asynchronous Sample Rate Converter) chip between the two DSPs for jitter reduction. The output from the DAE-7D is then passed to dual Cirrus Logic CS3318 lossless resistor ladder volume controls.

The Left and Right main channels are fully balanced with no balanced-to-singled-ended conversion taking place. This is a great feature of the XMC-1 and it was very expensive to include. This allows balanced two channel audiophile listening.  It is also worth noting that this is a pure analog path with no AD/DA conversion, unlike many other products. In fact, the 7.1 inputs are pure analog, which is great for multi-channel SACD listening.

On the video side of things, the XMC-1 uses two Analog Devices ADV7625 video transceivers to manage the HDMI interface with two independent HDMI V1.4b inputs and eight outputs. The ADV7625 chips support 3GHz video formats, including 4K resolution of 3840×2160 at 24/25/30/60 Hz. The ADV7625 supports the XMC-1 on-screen display as well as audio return channel (ARC), CEC, and 3D.

Setup of the Emotiva XMC-1 Processor

Emotiva takes great pride in their products, and it showed from the moment I opened the box. The first thing I found was a letter printed on high-quality stationery welcoming me to the “most exclusive group of audiophiles in the world – audio-conscious, uncompromising home theater aficionados.” The letter offers some additional background on the XMC-1 and on Emotiva as a company, and it provides some info on getting started. It also bears the printed signatures of the team that created the XMC-1. The letter is a very nice touch and helps to set expectations about the product. The XMC-1 itself was well packed and felt substantial taking it out of the box.

I was pleasantly surprised to find a comprehensive owner’s manual on the XMC-1 in the box along with another manual on using the Dirac Room Correction system. The owner’s manual is almost 100 pages long and is very well written. It starts with an overview of XMC-1 operations and then covers the menu system, connection options and troubleshooting. For anyone wanting to learn about the XMC-1 or if you bought the product, do yourself a favor and read the manual. It provides a wealth of information; I wish other manufacturers would include such useful documentation in the box.

Since my main speakers have powered subwoofers, I connected the XMC-1 in a 7.2 speaker configuration running a subwoofer cable to the LFE input on each speaker. Using HDMI, I connected my television, satellite DVR, OPPO BDP-105, and an Apple TV. I turned on the power, pressed the front Standby power-button, and watched as the beautiful OLED display illuminated with an Emotiva logo. Directly below the logo was a progress bar.

Emotiva XMC-1 Processor Review

The boot time for the XMC-1 operating system is about 43 seconds and the progress bar definitely helps if you’re impatient. At the end of the boot sequence, the XMC-1 displays the Emotiva brand message of “Rethink High-End”.

Emotiva XMC-1 Processor Review

The long boot time can be adjusted by enabling the “Video on Standby” feature. This feature keeps the XMC-1 operating system loaded when the Standby button is pressed (when the XMC-1 is on). Bringing the XMC-1 out of Standby takes less than four seconds with this feature enabled. As its name implies, the “Video on Standby” feature passes all audio and video directly to the television without any processing. This allows for watching the TV without engaging the sound system. I ended up leaving the XMC-1 in this mode for convenience and to eliminate an annoying popping sound that I occasionally experienced when using the default startup procedure. Lonnie Vaughn, VP and CTO for Emotiva, explained to me that the popping sound was most likely caused by a slight DC offset from my amplifier. When the unit is off and in its lowest power standby, the relays completely drop out the audio output lines. Once the XMC-1 boots, the relays engage, and if there is any DC offset from a downstream device, you might get a pop in the speakers while the input of the downstream device stabilizes.

The menu system on the XMC-1 is very well organized, comprehensive, and really easy to use once you spend some time getting the hang of it. Menu navigation is done using the normal arrow buttons on the remote or front panel, while option selections are made using the up and down arrows. When a new selection is highlighted, simply pressing the left arrow button automatically saves the selection and lets you continue navigating the menus and menu options. There are no “save” buttons to worry about or ambiguity about what was selected. For example, when renaming an input, there is no virtual keyboard. Instead, the letters, numbers and character options for each space in the input name are presented in a vertical menu. Simply scroll up and down the list to select the desired letter and then move on to the next letter of the input name. When finished, just move to the left using the arrow button, and the name is saved automatically. This simple and intuitive approach makes changing options on the XMC-1 really fast.

The menu system of the XMC-1 is also displayed on your television or monitor, but the size is scaled proportionally based on the output resolution. This means the menu is pretty small when overlaid on 1080p output. This can be a bit hard to read when making lots of changes depending on how far you are sitting from the television. I found that changing to a source resolution of 720p made the menus much more comfortable to view during initial product setup. There is an option to stretch the menus to make them larger, but the option makes the menu text look strange.

The XMC-1 does not automatically configure speaker size, distance or level, so the first thing I focused on was configuring the first speaker preset to match my speaker configuration. With that out of the way, I wanted to dive into Dirac Live LE for Emotiva. Emotiva provides detailed documentation on Dirac with the XMC-1, so the following is a brief overview of the Dirac process for those unfamiliar with the Dirac software.

Before getting started with Dirac, it’s crucial to configure the Dirac Speaker preset on the XMC-1 to match the speaker configuration in the room. Dirac does not identify which channels are present and will not generate any correction filters for speakers set to “None” in the Dirac Speaker preset. Along with the review unit, Emotiva sent me a laptop that was already configured with the Dirac Live LE for Emotiva software. I connected the XMC-1 to my home network and connected the laptop wirelessly. I also made sure that the laptop could successfully access the Internet. Internet access is important because the Dirac Live LE for Emotiva software needs to contact Dirac Servers both for license validation and for computational support during the measurement process. If you don’t have a good Wi-Fi connection, then Emotiva recommends connecting the laptop directly to your network router.

The XMC-1 ships with a calibrated microphone and a special cable that has a USB microphone preamp and digitizer on one end and an XLR connector on the other. Simply connect the XLR connector to the microphone and connect the USB jack to your computer. Emotiva ships the XMC-1 with a small tabletop microphone stand, but I found it best to use a boom microphone stand to properly place the microphone during the measurement process.

Emotiva XMC-1 Processor Review

Once everything was connected, I started the Dirac Live LE for Emotiva software. The program starts by displaying the system configuration which includes the XMC-1, the microphone and the speaker configuration read from the XMC-1 Dirac Speaker preset. If a device is missing, the program allows for a simple rescan. One of the nicest features of the Dirac interface is a clearly visible help screen that is available throughout the process.

Emotiva XMC-1 Processor Review

The next step in the process is to adjust the input gain of the microphone and the output volume of the test tones so that room background noise is below -24 dB and output volume is approximately -12 dB for each channel. The process involves playing a test tone for each channel and adjusting the output and input gains to keep all the test signal levels in the center of the green bars. It sounds much harder than it really was to do and only took a couple of minutes to complete.

Emotiva XMC-1 Processor Review

The next step is to place the microphone in the center of the “sweet spot” for the listening room. The Dirac interface highlights where the microphone needs to be placed for each of the nine sets of recommended measurements.

Emotiva XMC-1 Processor Review

You will notice the dropdown box with a value of “Oblique View”. The other values are “Top View” and “Frontal View”. Changing the view provides some essential perspective on how the various microphone measurement positions are placed relative to each other. It is very helpful to change the view throughout the measurement process so that the microphone can be placed correctly.

Emotiva XMC-1 Processor Review Emotiva XMC-1 Processor Review

Once the microphone is in position, the measurement process can begin. The Dirac Live LE for Emotiva interface displays the output level and measures response for each speaker as measured from the current position.

Emotiva XMC-1 Processor Review

As each position is measured, the software works on processing the measurements and indicates where to move the microphone next. In the interface, measurement positions in green are complete, blue are measured but being processed, and yellow indicates the next position to be measured.

Emotiva XMC-1 Processor Review

Once the measurement process is finished, it’s time to review the measurements in the Dirac Live LE interface and create the correction filters. Dirac has the ability to correct for both frequency response and compensate for errors in time response. The Dirac Live LE for Emotiva software provides graphs for each measured channel, highlighting the response and impulse timing before and after correction. The final step is to load the filters into the XMC-1. The whole process takes about 30 minutes depending on how quickly you can maneuver the microphone into position.

Emotiva XMC-1 Processor Review Emotiva XMC-1 Processor Review

Emotiva offers the option to upgrade to the Dirac Live Full for Emotiva software at an additional cost of $99. The benefits of upgrading include the ability to create your own correction curve and adjust the correction limits or “curtains” for each speaker. The Dirac Live Full for Emotiva software also allows for the use of other third-party calibrated microphones and the use of custom microphone calibration files.

The Emotiva XMC-1 Processor In Use

For my listening tests, I was using a McIntosh MC8207 amplifier and a seven-speaker configuration from Definitive Technology, including a pair of BP-3000TL speakers with powered subwoofers for the front mains, a CLR 2002 speaker for the center channel, and four Definitive Technology UIW 94/A speakers for the surrounds and rear channels. I used an OPPO BDP-105 as my primary source device. I was looking forward to hearing how Dirac Live LE for Emotiva performed on the XMC-1.

I had done some initial listening tests with the XMC-1 without any room correction. I was really impressed with how great the XMC-1 sounded with some of my usual reference material from Norah Jones, Alison Krauss, and Ray Charles. The XMC-1 soundstage was richly detailed with well-placed instruments, and individual nuances in the soundtracks could be picked out with ease. Vocals sounded natural and had great detail and soul. This was a terrific sound and I often had to remind myself about the price point of the processor that I was listening too.

I turned my attention to Dirac Live LE for Emotiva and started again listening to music. The first thing that jumped out at me was just how loud everything was. With the Dirac Speaker Preset enabled, the XMC-1 was playing at approximately 10 dB higher than the Speaker Preset 1 configuration (without Dirac) at the same position on the volume control. This was simple enough to correct just by adjusting the volume. I still liked the sound, but honestly I thought it made my speakers sound a bit bright. I attributed this to the fact that I am used to the sound of Anthem’s Room Correction (ARC) in my room, and I normally only correct up to about 2 kHz in my room. In the case of the default room correction curve, Dirac Live LE for Emotiva was boosting the higher frequencies and I wasn’t crazy about it. It was also reducing some of the natural room gain, again thanks to the default curve. Both of these issues could be addressed with the Dirac Live Full for Emotiva, but that software was not available on the review system.

When it came to movies, I started out listening to some of my favorite scenes from Tron: Legacy and the James Bond Thriller Sky Fall. With the Dirac Speaker Preset enabled, I noticed that the bass response was not to my liking, and I felt that the vocals were a bit hard to hear. I ran another set of Dirac measurements, and this time I removed the subwoofers from the system and just told the XMC-1 that I had full-range speakers since my towers have built-in subs. The result was dramatically improved bass response, at least in my configuration. However, I was still not happy with the center channel vocals. I had to increase the volume to make the center channel sound correct, but then the front channel speakers were too loud.

I ran a speaker test tone through the system and quickly discovered that the channels were out of balance. The center channel was approximately 3 dB too low. I made a level adjustment in the Dirac Speaker Preset and the problem was solved. Lonnie Vaughn from Emotiva tells me that by default, the Dirac Speaker levels are set at 0 dB for all channels after Dirac measurements are loaded into the XMC-1. This is so that the levels can be adjusted as needed by the user. I question how user friendly this is for the typical user, and wish that Dirac would provide some information as to how it adjusts the channel levels in the first place. This piece of information is standard practice for systems using Audyssey and Anthem Room Correction.

Emotiva XMC-1 Processor Review

Without having the full version of Dirac, I ultimately chose to not use the Dirac corrections at all and just listen to my room using the Speaker Preset 1 settings that I had already dialed-in. The result was simply delightful. Whether I listened to vocal, rock, pop, jazz or classical, the XMC-1 delivered beautiful, engaging music that made me want to listen more. For movies, I chose The Hunger Games: Mockingjay Part 1. The attack on the District 13 bunker filled the room with the sound of falling water and the rumble of bombs falling from above. The attack on the hydro-electric dam layered against the haunting lyrics and chorus in James Newton Howard’s “The Hanging Tree” was impressive.

I also loved Lorde’s amazing vocals and the bass track on the “Yellow Flicker Beat” track as the credits rolled. While Ridley Scott’s Exodus: Gods & Kings might not be quite the story of Moses as I remember it, the XMC-1 delivered an amazing performance, filling my listening room with the sound of swarming locusts and the thunder of chariots. The dramatic score sounded impressive on the XMC-1 and the sound of the sea crashing on the rocks followed by the sound of the seagulls, the wind, and the army fading into the depths of the water was simply immersive. The XMC-1 had no trouble delivering impressive sound for today’s blockbuster movies.

From an operational perspective, I was very pleased with how well the Emotiva XMC-1 handled all of my HDMI sources. I loved the OLED display but found it impossible to read from across the room since there was so much small text packed onto the screen. I had no handshake issues or audio dropouts with my satellite receiver, and even devices like my first-generation Apple TV worked well over HDMI. I ran into an occasional problem where the XMC-1 would play in multi-channel format versus stereo despite my settings, but I could not duplicate the issue reliably and found it to not be a problem in regular use. The remote is definitely very custom, very heavy, and has no backlight.

The Emotiva XMC-1 Processor On The Bench

My standard benchmark tests were done using Reference Stereo mode so that all digital signal processing was off. On tests using the XLR input, I measured the XLR preamp output of the XMC-1. On tests using an RCA input, I measured the RCA preamp output of the XMC-1. The source device for both analog and HDMI tests was an Oppo BDP-105.

At 1 kHz into the XLR input, THD+N was 0.001093%. We see two harmonics in the spectrum with the second harmonic at 2 kHz being about 100 dB below 2 VRMS.

Emotiva XMC-1 Processor Review

At 1 kHz into the RCA input, THD+N was 0.003069%. We see two harmonics in the spectrum with the second harmonic at 2 kHz being about 86 dB below 2 VRMS. The major difference between this and the previous graph is related to the voltage difference. For a power amplifier with the typical minimum gain of 20 (26dB), a 2 VRMS RCA input is required to produce 200 Watts out into 8 ohms. With 2 VRMS balanced as shown in the previous graph, you only have 1 VRMS single ended. In this test, we have 2.03 VRMS single ended with a slight increase in distortion.

For the XLR tests at 2 VRMS, a power amp with a gain 20V/V will have a power output of only 50Watts which is why we also supply 5 VRMS tests which will take the power amp to 300Watts.

Emotiva XMC-1 Processor Review

At 10 kHz into the XLR input, THD+N was 0.001195%. The second harmonic at 20 kHz is about 100 dB below 2 VRMS. The third harmonic at 30 kHz is about 94 dB below 2 VRMS.

Emotiva XMC-1 Processor Review

At 10 kHz into the RCA input, THD+N was 0.003577%. Compared to the previous test, we see an increase in distortion due to the higher 2.02 VRMS single ended. The second harmonic at 20 kHz is about 84 dB below 2 VRMS. The third harmonic at 30 kHz is about 90 dB below 2 VRMS.

Emotiva XMC-1 Processor Review

The IMD measurement using the XLR input was 0.000661%. We see no noise spurs on either side of the fundamentals which is excellent and a second harmonic at 14 kHz at 114 dB below 2 VRMS.

Emotiva XMC-1 Processor Review

The IMD measurement using the RCA input was 0.001710%. The difference compared to the previous graph is due to the higher internal voltage of 1.98 VRMS single ended.

Emotiva XMC-1 Processor Review

Here are the results for 19 kHz, 20 kHz combined test frequencies using the XLR input. There is a visible B-A peak at 1 kHz about 102 dB below 2 VRMS. We see several distortion spurs but the spectrum is well behaved. The second harmonics at 38 kHz and 40 kHz are about 105 dB below 2 VRMS (6 dBV).

Emotiva XMC-1 Processor Review

Here are the results for 19 kHz, 20 kHz combined test frequencies using the RCA input. There is a visible B-A peak at 1 kHz about 92 dB below 2 VRMS. We see several distortion spurs throughout the spectrum. The second harmonics at 38 kHz and 40 kHz are about 91 dB below 2 VRMS.

Emotiva XMC-1 Processor Review

I measured the frequency response of the XMC-1 out to 96 kHz. Using Reference Stereo mode with the balanced analog input, the response is flat out to about 50 kHz and then we see a very gradual 5 dB roll-off of the high frequencies. The second plot shows what happens in stereo mode with digital signal processing and Direct Live LE for Emotiva enabled. The XMC-1 downsamples the signal to 48 kHz and applies any room correction filters for each channel. You can clearly see the inverse of the room correction curve in the plot. The signal then abruptly falls off around 24 kHz. This result isn’t surprising since we’ve seen this same downsampling with AudysseyXT32 implementations.

Emotiva XMC-1 Processor Review

Now we take a look at the results using one of the HDMI inputs, fed from test discs played on an OPPO-BDP-105. At 1 kHz, and 16-bit/44.1k sampling rate, THD+N was 0.000638% measured from the XLR preamp output. We see some spurs in the low end of the spectrum but there are no visible harmonics or FM modulation which is excellent. For all digital tests, the DAC was driven at -5 dBFS and the volume adjusted for 2 VRMS at the output. The excellent performance on the HDMI tests is due to the ASRC (Asynchronous Sample Rate Converter) on the MDS DAE-7D board.

Emotiva XMC-1 Processor Review

At 1 kHz, and 16-bit/44.1k sampling rate, THD+N was 0.002297% measured from the RCA preamp output, which is slightly higher than the previous test. We see some distortion spurs as well as harmonics in the spectrum with the peak at 2 kHz being about 94 dB below 2 VRMS and the peak at 3 kHz being about 108 dB below 2 VRMS which is insignificant. As with the analog direct tests, the volume was increased 6 dB to bring the single ended output to 2VRMS with the same -5 dBFS digital input to the DAC.

The remaining tests are for XLR only.

Emotiva XMC-1 Processor Review

At 1 kHz, and 24-bit/96k sampling rate, THD+N was an impressive 0.000726%. We see some distortion spurs in the low end of the spectrum but otherwise this is an excellent result.

Emotiva XMC-1 Processor Review

At 1 kHz, and 24-bit/96k sampling rate, THD+N was 0.000759% at 3.92 VRMS. We see some distortion spurs as well as harmonics throughout the spectrum with the third harmonic at 3 kHz being about 102 dB below 4 VRMS. We normally show this test at 5 VRMS, but the 3.92 VRMS output is the measured limit with a -5 dBFS signal with the volume control maxed at 11.0 dB. Emotiva confirmed that this is a known issue with the Texas Instruments DA710 DSP. We could achieve a higher output value by using a 0 dBFS signal, but Emotiva confirmed that the XMC-1 peaks out at 7V output when used in Reference Stereo Mode. The XMC-1 produces 10V output when using the analog inputs.

Emotiva XMC-1 Processor Review

Here’s a look at the same test using the analog XLR input. At 1 kHz into the XLR input, THD+N was 0.001202% at 5.08 VRMS. We see two harmonics in the spectrum with the second harmonic at 2 kHz being about 90 dB below 5 VRMS and the third harmonic at 3 kHz being about 86 dB below 5 VRMS.

Emotiva XMC-1 Processor Review

At 1 kHz, and 24-bit/96k sampling rate, THD+N was 0.000691%. The spectrum shows one harmonic at 3kHz and only some distortion spurs in the low end of the spectrum.

Emotiva XMC-1 Processor Review

At 1 kHz, and 24-bit/192k sampling rate, THD+N was 0.001450%. The spectrum shows no harmonics and only some distortion spurs in the low end of the spectrum. This is another excellent result.

Emotiva XMC-1 Processor Review

At 10 kHz, and 16-bit/44.1k sampling rate, THD+N was 0.001935%. We see a few distortion spurs in the spectrum.

Emotiva XMC-1 Processor Review

At 10 kHz, and 24-bit/96k sampling rate, THD+N was 0.001038%. We see a well behaved spectrum with the second harmonic at 20 kHz being almost non-existent about 118 dB below 2 VRMS. The third harmonic at 30 kHz is about 108 dB below 2 VRMS. This is excellent performance.

Emotiva XMC-1 Processor Review

At 10 kHz, and 24-bit/96k sampling rate, THD+N was 0.001410% at 2.76 VRMS. The spectrum looks identical to the previous test. We normally show this test at 5 VRMS, but the 2.76 VRMS output is the measured limit with the volume control maxed at 11.0 dB.

Emotiva XMC-1 Processor Review

At 10 kHz, and 24-bit/192k sampling rate, THD+N was 0.003031%. We see a few distortion spurs in the spectrum with the third harmonic at 30 kHz being about 108 dB below 2 VRMS.

Emotiva XMC-1 Processor Review

The IMD measurement through HDMI at 16-bit/44.1k sampling was 0.000296%.

Emotiva XMC-1 Processor Review

The IMD measurement at 24-bit/96k sampling rate was 0.000200%. We see a very clean spectrum with no distortion spurs.

Emotiva XMC-1 Processor Review

The IMD measurement at 24-bit/96k sampling rate was 0.002144% at 3.22 VRMS. We see similar results with the second harmonic at 14 kHz being visible at about 113 db below the 60 Hz tone at 3.22 VRMS. We normally show this test at 5 VRMS, but the 3.22 VRMS output is the measured limit with the volume control maxed at 11.0 dB.

Emotiva XMC-1 Processor Review

The IMD measurement at 24-bit/192k sampling rate was 0.002326%.

Emotiva XMC-1 Processor Review

Here are the results for the 19 kHz, 20 kHz combined test frequencies using the HDMI input with 16-bit/44.1k sampling. There is no visible B-A peak at 1 kHz which is excellent.

Emotiva XMC-1 Processor Review

Here are the results for the 19 kHz, 20 kHz combined test frequencies using the HDMI input with 24-bit/96k sampling. We see some distortion spurs throughout the spectrum. There is a barely visible B-A peak at 1 kHz about 118 dB below each test tone at 1 VRMS which is insignificant. The second harmonics at 38 kHz and 40 kHz are about 110 dB and 114 dB respectively below 1 VRMS.

Emotiva XMC-1 Processor Review

Here are the results for the 19 kHz, 20 kHz combined test frequencies using the HDMI input with 24-bit/96k sampling at 2.75 VRMS. We see slightly higher distortion spurs throughout the spectrum and two side spurs on either side of the fundamentals. There is a barely visible B-A peak at 1 kHz about 114 dB below each test tone at 1 VRMS which is insignificant. The second harmonics at 38 kHz and 40 kHz are about 108 dB and 106 dB respectively below 1 VRMS. We normally show this test at 5 VRMS, but the 2.75 VRMS output is the measured limit with the volume control maxed at 11.0 dB.

Emotiva XMC-1 Processor Review

For the 19 kHz, 20 kHz combined test frequencies using the HDMI input with 24-bit/192k sampling, as in the previous test, there are distortion spurs throughout the spectrum.

Emotiva XMC-1 Processor Review

Below are the results for 1 kHz, at 24-bit/192 kHz sampling rate, measured from the coax digital input to the RCA output. The measured THD+N% was 0.004327%. The second harmonic is about 95 dB below 2 VRMS.

Emotiva XMC-1 Processor Review

Here are the spectra for the 19 kHz, 20 kHz combined test frequencies using the coax digital input with 24-bit/192k sampling measured from the RCA output. Note that this test would normally be shown at 2 VRMS, but the 1.38 VRMS output is the measured limit with the volume control maxed at 11.0 dB.

Emotiva XMC-1 Processor Review

For 1 kHz, at 24-bit/96 kHz sampling rate, measured from the coax digital input to the RCA output, the measured THD+N% was 0.002919%. The second harmonic is about 97 dB below 0 dBFS.

Emotiva XMC-1 Processor Review

Here are the results for the 19 kHz, 20 kHz combined test frequencies using the coax digital input with 24-bit/96k sampling to the RCA output. We see slightly higher distortion spurs throughout the spectrum and two side spurs at 105 dB below each test tone at 1 VRMS on either side of the fundamentals. There is a small visible B-A peak at 1 kHz about 102 dB below each test tone at 1 VRMS which is insignificant. The second harmonics at 38 kHz and 40 kHz are about 90 dB below each test tone at 1 VRMS. We normally show this test at 2 VRMS, but the 1.38 VRMS output is the measured limit with the volume control maxed at 11.0 dB.

Emotiva XMC-1 Processor Review

Conclusions about the Emotiva XMC-1 Processor

I had the XMC-1 in my system for several weeks and overall I was extremely pleased with it. The audio quality that Emotiva has managed to put into the XMC-1 at its price point is simply fantastic, and this is shown in the bench tests. The XMC-1 is amazingly configurable while being easy to understand. The inclusion of Dirac Live LE for Emotiva is a plus, but it does have some limitations that require the purchase of the Dirac Full LE for Emotiva version. I was disappointed that the speaker levels did not come out perfectly balanced after running the Dirac calibration. As it stands today, Anthem’s implementation of Anthem Room Correction on the MRX series may produce a better result for the average user than using the default curve in the Dirac Live LE for Emotiva software.

If there is any limitation to the XMC-1 at this point, it is that it does not support the new multi-channel height formats such as Dolby Atmos. I have no doubt that Emotiva is working on a product that will support Dolby Atmos, but in the meantime the XMC-1 should be on your short list if you are in the market for a 7.1 channel processor. There are certainly products like the Bryston SP3, the Anthem D2v 3D, or the Classé SSP-800 that command much higher prices and are excellent products, but the XMC-1 is a no brainer when it comes to value for the dollar in the processor market. I wouldn’t buy the XMC-1 just for Dirac, but if you are looking for a more premium sound on a reasonable budget, then I would have to agree with Emotiva on this when they say “Rethink High-end.”

Editorial Note: As Dirac makes improvements to its mathematical algorithms, and they are downloaded to the Emotiva XMC-1, the combination of Emotiva’s extremely low distortion and improved Dirac Room Correction will make an unbeatable processor in the $2,000 price range. – John E. Johnson, Jr.

The author would like to thank Dr. David Rich for his contributions on this article.


The post Emotiva XMC-1 7.2 Surround Sound Processor (SSP) Review appeared first on HomeTheaterHifi.com.

Denon AVR-X4100 7.1.2 A/V Receiver Review

$
0
0
Secrets of Home Theater and High Fidelity - Best Of Awards 2015

Denon AVR-X4100 A/V Receiver Review Highlights

The X4100W is Denon’s most affordable AVR designed for Dolby Atmos immersive sound, which Chris Eberle discussed in depth for Secrets earlier this year. The X4100W is a few levels up Denon’s hierarchy in performance and price from the Denon X2100W Gabe Lowe reviewed for Secrets last fall. In addition to Atmos, the X4100W’s enhancements over the X2100W include more powerful amplifiers and better Audyssey room correction. The X4100W supports two fewer channels than the Marantz AV7702 pre-pro I reviewed last spring. But like Marantz’s AV7702, the X4100W features Audyssey’s “Platinum” signal processing package, a very intuitive setup routine, and an excellent iOS Remote Control app

Denon AVR-X4100 A/V Receiver Review

Denon AVR-X4100 A/V Receiver Highlights Summary

  • Dolby Atmos and Audyssey Platinum room correction at an attractive price
  • Upfiring height speakers increase listener immersion into movies and TV
  • Intuitive setup routine dramatically reduces scope for user error
  • Excellent free iOS Remote Control app
  • Very flexible and user-friendly amp assignment
  • Dolby Surround upmixing is great for movies and TV, but less so for 2-channel music

Introduction to the Denon AVR-X4100 A/V Receiver Review

Denon is always one of the first AVR makers to leap forward with new technologies. They were one of the first AVR makers to offer room correction, dynamic loudness compensation, and synthesized height channels. They were one of the first AVR makers to build in Wi-Fi and music streaming options. The X4100 is, in this respect, typical Denon. It adds Dolby’s new Atmos immersive sound technology, and a user can also add Auro 3D capabilities at extra cost if her system can accommodate high-mounted effects speakers. (I highly, highly recommend any Denon X4100W purchaser who can install “true” height speakers spring for the Auro upgrade.) Best of all, Denon didn’t skimp on sound quality despite all of these bells and whistles. The X4100W’s internal amps act much beefier than the AVR’s trim 28 lb. weight implies, and its preouts have a low noise floor.

DENON AVR-X4100 A/V RECEIVER REVIEW SPECIFICATIONS

Power and Processing

  • Design: 7-channel A/V Receiver
  • Power Amplifiers: 7 x 125 Watts RMS into 8 Ohms, Two Channels Driven
  • Dolby Atmos (7.1.2 or 5.1.4), Audyssey DSX, dts Neo:X, 6-channel DSD; Auro Decoding Optional, with Paid Upgrade
  • Dolby Surround (and Auro-3D, with Paid Upgrade) Immersive Sound Upmixers
  • Maximum Number of Output Channels: 11 (7.1.2 or 5.1.4, with Two Subwoofers)
  • Audyssey Platinum Suite (MultEQ XT32, Dynamic Volume, DynamicEQ, SubEQ HT, LFC) with Microphone and Microphone Stand; Audyssey Pro Compatible
  • DACs: TI PCM 1690 (24-bit/192kHz) with Denon AL24 Processing
  • Quad 4th-generation Analog Devices SHARC 32-bit DSPs
  • Analog Devices ADV8003 Video Processor

Connections

  • 8 HDMI 2.0 inputs (7 Rear, 1 Front), and 3 HDMI 2.0 Outputs (2 Main, 1 Zone)
  • Built-in Phono Preamp for Moving-Magnet Cartridges
  • AirPlay Streaming (Audio-only), Bluetooth and DLNA Streaming
  • AM/FM Tuner
  • 6 Analog Stereo Inputs (1 Front)
  • 5 Digital Stereo Inputs (2 Optical, 2 Coaxial, 1 Denon Link HD)
  • Stereo Headphone Output (1/4-inch)

General Features

  • Advanced ISF Video Calibration Controls
  • iOS and Android Control Apps
  • Built-in Wi-Fi and Bluetooth Receivers
  • Dual 12V Triggers, RS232, IR Input
  • Step-by-Step Setup GUI
  • IR Remote Control
  • Control for Two Additional Zones (Stereo)
  • Eco Mode to Reduce Power Consumption
  • Dimensions: 6.6” H x 17.1” W x 15.3” D
  • Weight: 27.1 Pounds
  • MSRP: $1,299 USD (Auro adds $200)
  • Denon
  • SECRETS Tags: Denon, Dolby, Atmos, Auro, Dolby Surround, Auro-3D, Surround Sound, A/V Receiver, Audyssey, AirPlay, Immersive Sound, Upmixing


Design and Setup

From the front, the X4100W maintains the form-follows-function styling of past Denon receivers. Most of the controls, and all of the front inputs and outputs, hide under a flip-down door.

Denon AVR-X4100 A/V Receiver Review

The X4100W’s back panel is no more or less complex than AVRs past. Just different complex.

Denon AVR-X4100 A/V Receiver Review

While the 7.1-channel analog input and switched AC power outlet have disappeared, the X4100W has dual antennae for Wi-Fi and Bluetooth. The back panel has seven of the X4100W’s eight HDMI inputs, and all three of its HDMI outputs. It also has a serial port for control apps and dual 12V triggers for downstream components. The speaker connection options are necessarily more complex than current 7.1-channel AVRs such as the Anthem MRX 510. The X4100W has more pairs of speaker terminals than internal amp channels or possible outputs, to allow for different configurations.

Setup for Denon X4100W was substantially the same as on the Marantz AV7702 I reviewed earlier, albeit with a different color scheme. So the X4100W offers the same intuitive, user-friendly setup experience I enjoyed with the AV7702. See Secrets’ Denon X2100W review and Marantz AV7702 review for extensive screenshots that walk you through setup.

The X4100W adds a very flexible and well thought-out amp assignment menu to the initial setup menu. The X4100W can process 9 channels (plus subs) but only has a 7-channel amp inside. That leaves two channels unpowered in a 7.1.2- or 5.1.4- channel system. Amp assignment allows the user to determine which seven channels use the internal amplifier, and which ones require a separate amplifier. (Amp assignment affects the speaker outputs only: line level preouts for all channels used in a given sound mode are always live.)

Amp assignment sounds confusing, but Denon’s on-screen directions show you exactly what to connect where. The photo below shows Denon’s hook-up instructions for what I think is the ideal setup with the X4100W: front speakers assigned to preouts only for use with an external amp (ideally a three-channel amp that also powers the center channel), and the internal amps powering the less critical surround and height channels. Note that the on-screen display greys out the Front binding posts and all of the preouts to the right of Subwoofer, and illuminates the Front preouts.

Denon AVR-X4100 A/V Receiver Review

The X4100W includes the same “origami rocket tower” Audyssey microphone stand as the Marantz AV7702. While calibrating Audyssey on the X4100W you’ll hear a few relays click between Audyssey chirps.

As on the Marantz AV7702, I found one unfortunate omission in the Denon X4100W’s feature set: no user-accessible acoustic measurement app. Other room correction systems allow users to access the measurement engine for system set-up. A quick measurement app leveraging the included microphone and measurement engine would add immense value to the X4100W, and greatly help X4100W owners optimize their systems before calibrating with Audyssey. Hopefully Denon and/or Audyssey will develop such an app in the future.

I could not test the included remote control. It is IR-based, and our equipment cabinet stays out of the line of sight. But our Logitech Harmony Ultimate remote operated the X4100W perfectly, and a universal remote with macros always beats a table full of component remotes. However, I found Denon’s iOS Remote App easier to use than the Harmony when diving into the X4100W’s setup and adjustment menus. One tip to get the most out of the Remote App: a long press on one of the eight buttons lets you replace that button with something possibly more useful to you. At the very least, I recommend changing one button to the cursor icon.

Denon AVR-X4100 A/V Receiver Review

For this review I wanted to pair the X4100W with upfiring front height speakers, because my review of the Marantz AV7702 explored the new immersive technologies (Atmos, Auro) and upmixers (Dolby Surround, Auro-3D) with a full 7.1.4 setup and high mounted effects speakers for the “dot 4.” Here, I chose 7.1.2 over 5.1.4 because our side speakers are in-walls. While, based on my experience with Marantz’s AV7702, I unreservedly recommend Auro for anyone who can install “true” height speakers, but Auro does not support upfiring speakers. So I did not use Auro in this review.

Why bother with upfiring speakers? My blunt take on Atmos and other immersive formats is: either they can render a compellingly immersive bubble of sound in 5.1.2- and 7.1.2- channel systems with upfiring front height speakers, or they become analogous to 3-D TV to date: enjoyed by some but ignored by most. Most of us enjoy our music and video in multipurpose living rooms, not dedicated spaces. Few enthusiasts will install ceiling or “true” height speakers in their living rooms. But upfiring height speakers are an easier sell than ceiling speakers or high mounted effects speakers. For the majority who keep their equipment up front, the costs of upfiring front speakers are just the upfiring modules themselves and a few feet of speaker wire.

Dolby seems to agree with that reasoning. They’ve dedicated lots of brainpower into making upfiring height effects speakers work, and have several patents to show for it. Also, renowned speaker designer Andrew Jones has now designed upfiring height speakers for two different companies: Pioneer and Elac. Jones’ endorsement of upfiring height speakers strongly piqued my curiosity to try them.

That brings me to a quirk in my setup. I was unable to acquire a pair of certified Atmos Enabled upfiring speakers of similar quality to the rest of my system in time for this review. So just as I set up temporary front height speakers to review 7.1.4-channel, I used “Atmos Enabled-ish” upfiring speakers for this review.

Denon AVR-X4100 A/V Receiver Review

While Dolby understandably reserves the full spec for “Atmos Enabled” upfiring speakers to paying licensees, we can infer from Dolby’s Atmos Enabled literature and other statements by Dolby and licensees that any licensed “Atmos Enabled” speaker must meet three specifications: a patented treble curve, certain directivity standards, and bass down to at least 180Hz. Dolby discloses the required frequency response curve in their patent filings, which I emulated using a miniDSP 10x10HD.

Denon AVR-X4100 A/V Receiver Review

While Dolby publishes the required frequency response, they only release the directivity spec to licensees. But directivity is largely a function of cone diameter, driver placement, and any waveguides used. So I investigated the Atmos Enabled speakers on the market to infer the required directivity. Here’s what’s inside the current-production Atmos Enabled speakers:

-5” coax with post-mounted 1” tweeter (Atlantic Technology)

-3” full-range driver (Definitive Technology, Onkyo)

-3” x 4” coax with 0.75” tweeter (Elac TS3000)

-4” coax with 1” tweeter (Elac Debut by Andrew Jones)

-5” concentric driver with 1” tweeter (KEF)

-4.5” concentric driver 1” tweeter (Pioneer Elite)

-Square array of four 2” full-range drivers (Triad)

Those configurations have one thing in common: symmetry. So small speakers with symmetrical drivers or arrays (i.e. full range, coax, or concentric) should work fine with the right EQ. However, standard 2-way mini-monitors with asymmetric driver arrays i.e. separate woofer and tweeter, may fall outside Dolby’s specification. I used the same KEF 3005SE eggs I used as front height speakers for the Marantz AV7702 review. The eggs’ concentric drivers are similar in size and cone depth to the Pioneer Elite concentrics, and I know their sound well. I set the eggs atop my left and right speakers, with their feet/wall-mounts configured to point the baffle up, and angled them so their on axis sound bounced off our ceiling as shown in one of the Dolby Atmos patents.

In Use

For my listening tests, unless indicated below I used the X4100W’s internal amps to drive my seven main speakers (Pioneer EX and KEF R-Series) and a Pro-Ject Amp Box SE to drive the upfiring speakers (KEF eggs). I used two of my four custom subwoofers, because Audyssey SubEQ HT has two subwoofer outputs. I played digital disks on an Oppo BDP-83, streamed video and lossless 2-channel audio from my MacBook over an AppleTV, and watched broadcast content through a standard Comcast HDTV cable box. As mentioned above, I used a miniDSP 10x10HD (normally my subwoofer processor) to emulate the Dolby upfiring speaker curve. The X4100W’s HDMI output fed our Sony LCD over network cable and WyreStorm HDbaseT baluns.

I engaged Audyssey MultEQ XT, SubEQ HT, and DynamicEQ for all my listening. I know what my room sounds like with just two subwoofers and no room correction or loudness compensation, and I prefer not to listen that way. So a few minutes after I opened the X4100W’s box the Audyssey chirps played over nine speakers and two subs.

Overall, the sound of the calibrated X4100W reminded me very much of the Marantz AV7702 that had recently left my system, especially in the midrange and highs, though the bass seemed more prominent than on the AV7702. I would still appreciate a lighter touch in the treble than Audyssey’s Reference curve, though the Audyssey curve likely benefits movies mixed using a similar curve.

Dialog intelligibility in movies and TV was maybe a little better at low levels compared to my reference Anthem AVR when using the Audyssey Reference curve, perhaps due to the treble boost. However, on music image depth was a little flatter and less layered. Even my preferred Audyssey curve for 2-channel music, Bypass LR, removed a smidge of lushness and palpability compared to Anthem ARC. Still, the X4100W is a solid-sounding AVR generally, and on stereo music in Bypass LR the X4100 sounds a lot like my reference AVR. As for Audyssey Flat, forget it. In my room at least, it sounds horrible.

The X4100W’s amplifier section also impressed me. Our speakers are easy to drive, though the rears are fairly low in impedance. Still, the X4100W had no trouble cleanly driving my speakers to levels requiring a shout to talk to the person one seat over, even when I set the front three speakers to large and cued up Bruckner or Massive Attack on my iTunes server.

Despite the amps’ prowess, in a 7.1.2 or 5.1.4 Atmos/Auro setup I recommend adding a stout three-channel amp to drive the left, center, and right speakers, and using the internal amplification to drive surround and height speakers. If you have to add an amp anyway, why not upgrade your amplification for the most important speakers? The X4100W had no issue driving our mighty ATI AT2007 from its preouts, without any drama or extraneous noise.

You may recognize the movie and music selections I discuss below from my Marantz AV7702 review. I used the same demo material for my critical listening in order to compare/contrast the similarities and difference between a 7.1.4-channel setup with “true” height speakers and a 7.1.2-channel setup with upfiring speakers.

As was the case when I reviewed the AV7702, native Atmos program material is scarce right now. There are, as of this writing, twelve native Atmos Blu-Rays available. My native content comes from the Dolby Atmos demo disk.

Denon AVR-X4100 A/V Receiver Review

I expected more drop off than I actually heard after downsizing from 7.1.4-channel with “true” height speakers front and rear to 7.1.2-channel with upfiring heights. “Leaf” and “Amaze,” trailers often shown before Atmos movies, both offered more precise placement in my home than in the local Atmos cinema. The effects also reached higher up with the upfiring speakers than “true” height speakers. Positional rendering in the “Unfold” trailer was not quite as precise as in 7.1.4 channels with “true” heights, but I only noticed the difference when specifically looking for it. Taken simply as entertainment, both setups offered an immersive bubble of sound. The “Napa Valley Dreams” time-lapse video still sounded great, and its birdcalls hung in the air beautifully. The upfiring speakers may suit such “music plus ambient sounds” tracks better than high-mounted effects speakers, when the recording is mixed natively in Atmos.

Given the paucity of native Atmos content, in the short-term Dolby’s immersive upmixer, Dolby Surround is arguably more important than Atmos itself. I still found Dolby Surround very impressive with movie content, but still have reservations about it for 2-channel music.

Denon AVR-X4100 A/V Receiver Review

As it happens, Comedy Central showed this movie several times while I had the Denon X4100W. So I watched the same forest scene I referenced in the AV7702 review several times. Even in 7.1.2 with upfiring height speakers, Dolby Surround convincingly placed me under the tree canopy. I heard sounds swirling everywhere: front-to-back, side-to-side, and up-and-down. There was no discernable hole in the soundfield, though the scene did not have any flyovers or other such front-rear that may benefit more from rear height speakers. Dolby Surround vividly rendered the sounds of life in and around the forest. While I felt there was little discernable drop off compared to the full 7.1.4-channel experience, when I turned Dolby Surround off and listened to the 5.1 channel soundtrack, the immersive bubble of sound conjured by Dolby Surround collapsed into a donut. I was really surprised how much immersion the two little eggs atop my front towers added.

I also played the scene “Hundert Tausend in Zwanzig Minuten” from the now-classic German action movie “Lola Rennt” (“Run Lola Run”) in Dolby Surround.

Denon AVR-X4100 A/V Receiver Review

This scene features a glass-shattering scream by main character Lola (Franka Potente, probably best known in the US as Matt Damon’s first love interest in the Bourne movies), a ticking clock high on a building, and a telephone card ejecting from a payphone with a beep. Denon’s X4100W and Dolby Surround brought this scene to life. As with the 7.1.4-channel setup, I felt Lola’s scream travel through the air, and the wavefront of breaking glass clearly started above the center channel. The clock’s ticks emanated from a distinct point in space floating between the center, right, and right front height speakers, perhaps a little less focused not enough to affect immersion in the soundfield. I did notice the telephone placement was less precise than in 7.1.4-channel; instead of sounding slightly forward of the right front speaker, it came more-or-less from the right-side speaker.

I also played Radiohead’s “The King of Limbs: Live from the Basement” Blu-Ray concert disk through the X4100W, upmixing the native DTS-HD 5.1-channel track with Dolby Surround.

Denon AVR-X4100 A/V Receiver Review

I chose this disk specifically to evaluate Dolby Surround with upfiring speakers on a multichannel recording in a dead acoustic space. On “Good Morning Mr. Magpie” the soundstage lost some definition and clarity in Dolby Surround compared to 5.1-channel, and I noticed cymbal hi-hats occasionally coming from my ceiling. Phil Selway is an amazing drummer, but he doesn’t have 8-foot long arms! Dolby Surround also tilted the spectral balance a little brighter, just as it did with “true” heights and 7.1.4 channels.

I noticed the greatest contrast between 7.1.2-channel with upfiring speakers on the X4100W and 7.1.4-channel with “true” heights on the AV7702 on Fritz Reiner’s 1957 romp through Dvorak’s New World Symphony with the Chicago Symphony Orchestra on Mercury Living Presence 3.0-channel SACD. The upfiring speakers simply seemed less subtle than “true” heights. The orchestra just sounded fuzzy with Dolby Surround on, compared to Dolby Surround off.

Denon AVR-X4100 A/V Receiver Review

Because of the unevenness of Dolby Surround with music, I listened to 2-channel music without upmixing more often than I usually do. For 2-channel playback I also quickly honed in on Audyssey’s Bypass LR target curve as by far the X4100W’s best-sounding option for music. Bypass LR did what I think a room correction system should do: address the room (i.e. the frequency response at the listening from the upper bass down) without trampling the speakers’ voicing underfoot. Bypass LR works much better in 2-channel than in multichannel, perhaps because Audyssey still equalizes the centers and surrounds up to 24kHz. The benefits of this Bypass LR shone through on “Whole Lotta Love,” from the Led Zeppelin II Super Deluxe Edition, which sounded simultaneously expansive and crisp. And alive!

Denon AVR-X4100 A/V Receiver Review

After some listening to 2-channel and multichannel music, I reached out to Brett Crockett, Dolby’s Vice President, Sound Technology, Research and Development, and relayed my reservations about Dolby Surround’s performance on 2-channel music. He told me that “[Dolby] did extensive listening tests with…music when developing the Dolby Surround Upmixer,” and that “[Dolby has] heard from many who happen to be big 2 channel (upmixed by PLII) fans praise the Dolby Surround Upmixer and now make it their preference for listening to music.”

So your experience with Dolby Surround, either with “true” height or upfiring height speakers, may differ from mine. Listen to recordings you know well in Dolby Surround on an otherwise-familiar system to find out for yourself. But I sorely missed Pro Logic IIx for 2-channel music during my time with Dolby Surround. Fortunately, Pro Logic IIx and Atmos can coexist. Dolby’s Brett Crockett told me, “A manufacturer may choose to license (and integrate) the Dolby Pro Logic Suite in addition to Dolby Atmos/Dolby Surround.” I hope Denon and others do so in future products.

I also found the drop-off from four “true” height speakers to two upfiring speakers more pronounced on music than on movies. To be clear, Dolby Surround greatly impressed me on TV shows and movies with upfiring front height speakers. Often, it created an astonishingly lifelike bubble of sound. I am just less convinced of Dolby Surround’s merit for music.

On The Bench

UPDATED JUNE 30, 2015 WITH AUDYSSEY SUBEQ HT MEASUREMENTS AFTER RESET AND RECALIBRATION

As I wrote in the Marantz AV7702 review, my AVR and pre-pro measurements focus on the acoustic performance of their signal processing features, such as room correction and loudness compensation. I focus on signal processing because learned audio experts differ starkly about the audibility of harmonic distortion, jitter, and other nonlinear distortions, at least at the levels found in mainstream audio equipment today. However, everyone agrees that large differences in linear distortion, i.e. frequency response, are both audible and significant. Room correction systems differ tremendously in their target curves, resolution, and repeatability. Despite that, third-party measurements of these systems are rare. The X4100W offers Audyssey’s MultEQ XT32 with SubEQ HT and three user-selectable Audyssey target curves: Reference, Flat, and Bypass LR.

For all measurements below, I used FuzzMeasure measurement software (versions 3.3.3 and 4.0) running on a MacBook in Mac OSX Mavericks 10.10.3; a Focusrite 2i2 24/96 USB audio interface and microphone preamp with loopback correction; and a Dayton Audio EMM-6 measurement microphone calibrated by Cross Spectrum Labs for grazing incidence, mounted on a boom stand.

Unless otherwise indicated, all graphs below show spatial averages of six points located within a roughly 5-foot diameter “bubble” centered on the primary listening position. See Earl Geddes and Henry Blind, “The Localized Sound Power Method,” 34 JAES 3, pg. 167-173 (March, 1986), for more on this measurement technique. All six points were identical for each different target curve: I placed the microphone, took a measurement of each target curve, and then moved the microphone to the next position. I made no attempt whatsoever to mimic the Audyssey microphone positions.

As I wrote when this review originally went online, the anomalous bass performance I measured with Audyssey SubEQ HT on the Denon X4100W required further investigation. The good news is that the problem went away after a fresh calibration, as shown below. I cannot explain what happened with certainty, but my best guess is that the most recent firmware update inadvertently corrupted the SubEQ HT filters. Anyone who owns a computer or smartphone knows that software or firmware updates often have unintended effects on seemingly unrelated functions. All graphs below state which Audyssey run the data comes from.

The first set of graphs clusters four frequency response curves together: the baseline (Audyssey Off) and the three Audyssey target curves (Reference, Flat, Bypass LR) offered on the Denon X4100W. All of these measurements come from the original calibration.

Denon AVR-X4100 A/V Receiver Review

Sharp-eyed readers will note that the Audyssey Off measurements differ slightly from those in my Marantz AV7702 review. The speakers and room configuration are the same, but due to external factors both the speakers and listening position were slightly different for the two setups. The Audyssey target curve measurements show that each curve closely mirrors my measurements of the AV7702 from 300Hz up, which shows Audyssey’s technology to be stable and mature. The Reference curve adds Audyssey’s signature upper midrange dip, and boosts the treble from 5kHz – 10kHz on my speakers at my approximately 12-foot listening distance. Bypass LR mimics the Audyssey Off curve above about 200Hz. Audyssey Flat omits the “Audyssey dip” but massively boosts the treble on my speakers at my listening distance. The figure below compares my baseline and Audyssey Reference measurements for the X4100W and the Marantz AV7702.

Denon AVR-X4100 A/V Receiver Review

While the results above the bass were substantially the same, Audyssey SubEQ HT was simply ineffective on the X4100W in my first measurement run. SubEQ HT left the peak at 80Hz basically untouched, and only slightly reduced the larger peak at about 60Hz. It also killed an octave of bass, moving the system -3dB point up an octave, to the low 40s, compared to the “no Audyssey” curve. However, MultEQ XT32 performed exactly as expected above 300Hz.

I did not expect the bass measurements to come out like that, based on my listening experience with the X4100W and my earlier measurements of Audyssey SubEQ HT on the Marantz AV7702. (The AV7702 has the same Audyssey room correction package, and I did all of my critical listening to the X4100W long before I took measurements.)

To figure out what went wrong, I asked Dr. Chris Kyriakakis, Audyssey’s CTO, if the microphones were graded to different tolerances for different products. He replied “Audyssey only makes one consumer microphone so there are no tolerance issues for different price points.” I also asked him if the resolution of SubEQ HT’s correction differed on different components. He assured me there was no difference in resolution, and showed me an example. Dr. Kyriakakis suggested I reset the AVR and re-run Audyssey to see if the problem persisted, so I did.

This fresh calibration restored the smooth and extended bass I expected from Audyssey SubEQ and that I heard during my audition. The graphs below compare the bass frequency response in my room using the X4100W after the original calibration and after the fresh calibration.

Denon AVR-X4100 A/V Receiver Review

The next set of graphs compares the bass frequency response after fresh Audyssey calibration on the X4100W to my previous measurements in this room of Audyssey SubEQ HT on Marantz’s AV7702.

Denon AVR-X4100 A/V Receiver Review

The new calibration and AV7702 measurements show that Audyssey SubEQ HT does a superb job of providing smooth, flat bass down to a 16Hz organ pedal at my primary listening position on both devices. The differences between the X4100W new calibration and the AV7702 come from slight changes in the positioning of the sofa and the speakers, as well as the error inherent in acoustic measurements. SubEQ HT is one of the biggest benefits Audyssey provides music lovers and cinephiles.

The next set of graphs shows the “inverse curve,” or equalization applied to the left speaker and sub during the original calibration, for each Audyssey target curve.

Denon AVR-X4100 A/V Receiver Review

The Reference curve adds a treble boost to my speakers at my approximately 12-foot listening distance from 2.5kHz to 7kHz that peaks at about 4dB, before falling to 2dB boost at 22kHz. The Reference curve also imposes Audyssey’s upper midrange dip. I wish Audyssey would provide an option to turn off this dip without buying Pro calibration. This dip may help speakers with midrange directivity issues, but in my view it does more harm than good on speakers designed for smooth power response. If you use the Reference curve, you’re stuck with the dip.

Denon AVR-X4100 A/V Receiver Review

The Bypass LR curve preserves the speakers’ voicing above 300Hz, a pretty good stopping point for room correction. That is likely why I vastly preferred Bypass LR to Reference (let alone Flat) on 2-channel music.

Denon AVR-X4100 A/V Receiver Review

The Flat curve adds excessive treble boost that not only sounds unpleasant but also can fry tweeters. As you see above, Flat’s treble boost peaked at about 8dB at 22kHz on my speakers in my room. To put that staggering amount of boost in perspective, 8dB is the difference between a 100W amp and a 630W amp! While recorded music and movies rarely have content above 20kHz, due to the dangers of such excessive boost I cannot recommend ever using the Flat target curve.

Interestingly, the X4100W displays the equalization Audyssey applies to every channel except the subwoofer. (Go through the following menus: Speakers > Audyssey Setup > Check Results > Equalizers.) The next figure compares the X4100W’s displayed inverse curve for the left speaker on the Reference target curve to my actual measurement of the inverse curve for that speaker.

Denon AVR-X4100 A/V Receiver Review

The two curves basically agree, though the X4100W’s displayed inverse curve understandably has lower resolution than my 1/12-octave smoothed measurement. The bass is only different because my sweep includes the subwoofers and the Denon curve shows the left speaker only. This agreement, in my view, validates both the on-screen display and power of the localized sound power measurement technique. Good for Audyssey and Denon for giving users an accurate picture of what their software is doing!

Tests of DynamicEQ, not shown, mirrored the results I measured for the AV7702.

Lastly, in fine-tuning the X4100W at the beginning of my audition I found a bug in the Subwoofer Level Adjust control. This bug persisted through all firmware updates and the reset.

Denon AVR-X4100 A/V Receiver Review

It appears that when you turn on Subwoofer Level Adjust, before any level adjustment, the X4100W “forgets” the subwoofer level Audyssey set and changes it to 0dB. So you will get more bass just by turning on Subwoofer Level Adjust if Audyssey attenuates your subs, and less bass if Audyssey boosts your subs. The former is far more likely than the latter with dual subs. During the Audyssey setup menu I set both subwoofer to about 73dB according to the on-screen display, or a little under the recommended 75dB but in the “green zone.” In the final calibration, Audyssey attenuated one sub to -6.5dB and the other to -7.5dB. (These numbers were the same for both calibrations.) The next graph shows the bass level difference between Subwoofer Level Adjust On, with 0dB for both subs as shown above, and Off.

Denon AVR-X4100 A/V Receiver Review

As you can see, the overall subwoofer level rises by about 5dB at “0dB” adjustment just by turning Subwoofer Level Adjust on. There are additional ripples above the nominal crossover frequency, because raising the subwoofer level also changes the complex modal interaction between the subwoofers and mains in the region where both still contribute.

This bug, all told, is minor. Just ignore this optional control. The X4100W gives you other ways to adjust subwoofer level that don’t start by throwing everything out of balance. If you want more bass, use the standard channel level menu rather than the Subwoofer Level Adjust menu to increase the subs’ output, or increase the level at your subs’ amps after running Audyssey.

Conclusions

I reached three epiphanies during my time with the Denon X4100W.

First, any modern AVR is more computer than audio component. While that means capabilities one could only imagine a short time ago, it also means that updates can have unintended consequences. I don’t ding Denon too badly for the Audyssey SubEQ HT issue I measured. There were several firmware updates while I had the X4100W. How often has an update from Apple, Google, or Microsoft inadvertently messed up something unrelated? I see no ground to hold Denon to a higher standard than those companies. Also, a fresh Audyssey calibration resolved the issue. Moral of the story is that if you have an X4100W that’s been in service through several firmware updates, re-run Audyssey to get the bass refinement you paid for. And if you have any AVR or pre-pro, listen carefully before and after any firmware update. If you hear anything untoward after the update, re-run the room correction software as soon as you can.

Second, the gap between 7.1.2-channel with upfiring front height speakers and a full 7.1.4-channel setup with high-mounted effects speakers is, in most cases, very small. Put another way, I found a large difference on movie and TV content when going from 7.1-channel to 7.1.2-channel with upfiring speakers, but relatively less difference between 7.1.2-channel with upfiring heights and 7.1.4-channel with “true” heights. The difference between the two immersive setups comes down to preference rather than a clear-cut “better” or “worse.” At least in my living room, with the program material I tried. I consider that an unqualified victory for upfiring speakers. The effort Dolby put into making upfiring speakers believably project sound from the ceiling paid off. For movie content, at least.

Third, I am still not sold on Dolby Surround to upmix 2-channel music. Compared to the mush older Dolby Pro Logic IIx, Dolby Surround brightens the spectral balance and does not extract hall ambience as well. That was true for a 7.1.4-channel configuration with “true” heights on 2-channel music recordings, and it applies even more with upfiring front height speakers. PL2x had “movie” and “music” modes. Dolby may want to pursue a similar path for Dolby Surround. Alternately, Denon and other Atmos licensees should add PL2x back onto their future products for weirdoes like me who like our 2-channel music upmixed to surround.

Overall, the X4100W stands out to me as a great option for someone who wants immersive sound for TV/movies but takes a purist no-upmixing-allowed approach to 2-channel music. I do think a music-first listener, especially one with an open-plan home who needs ambience extraction to add the spaciousness that early sidewall reflections add in a traditional room, should look hard at an AVR with Dolby Pro Logic II. But the Denon X4100W immerses you in an audiovisual scene in Atmos or Dolby Surround, sounds excellent playing 2-channel music with the Audyssey Bypass LR curve, and is commendably easy to set up and use. I call that a win.

The post Denon AVR-X4100 7.1.2 A/V Receiver Review appeared first on HomeTheaterHifi.com.

Integra DHC-80.6 11.2 Surround Sound Processor (SSP) Review

$
0
0
The DHC-80.6 is the current top-of-the-line 11.2 channel processor / preamp from Integra. It includes support for Dolby Atmos as well as the latest Dolby Surround upmixer, which can create a 3D surround experience from a stereo or multichannel soundtrack.

While the Integra product line has always included the latest version of Audyssey room correction, the DHC-80.6 eliminates support for Audyssey room correction in favor of a more simplistic solution called AccuEQ. Integra has also changed the internal design of the DHC-80.6 to incorporate less expensive AVR LSI technology, which is a notable design difference from the previous generation DHC-/DTR-80.3. While the DHC-80.6 delivers on the immersive 3D experience of Dolby Surround and Dolby Atmos, it falls a bit short of the Integra heritage in terms of features, quality and performance.

Integra DHC-80.6 11.2 Surround Sound Processor (SSP) Review

Highlights

Integra DHC-80.6 11.2 Surround Sound Processor

  • Includes Dolby Atmos and Dolby Surround processing to create an immersive 3D surround experience.
  • The Audyssey room correction suite has been replaced with a much simpler AccuEQ room correction which only measures the primary listening position.
  • Audyssey DSX processing, Audyssey Dynamic Volume and Dolby Volume are no longer included.
  • Build quality has changed to the more typical AVR LSI implementation.
  • Phono stage no longer supports moving coil cartridges.
  • Excellent free iOS Remote Control application
  • Support for HDCP 2.2 is included on HDMI input 3 and Main Out for future compatibility with copy-protected 4K content. Video passthrough at 4K 60Hz is supported but only in 4:2:0 color space.
Introduction

Dolby Atmos demonstrations and products were all the rage at CEDIA 2014 this past September. The new audio format promised a more immersive listening experience and the object-based Dolby Atmos surround technology offered movie makers and sound designers much more creative freedom. The opportunity for the industry is huge since Dolby Atmos requires an updated A/V receiver or processor and additional speakers to create the height channels used for the Dolby Atmos format. This means additional revenue opportunities for the manufacturers and for the custom installer market, and of course licensing opportunities for Dolby. I wondered how Dolby Atmos would sound in my own home theater and I was especially curious if adding additional speakers to my home theater would be worth it. I was thrilled when Integra offered to send me their latest flagship processor, the DHC-80.6 preamp/processor for review. Let’s take a closer look at the features of the DHC-80.6 and see how well Integra’s latest processor offering delivers on Dolby Atmos and the 3D surround experience.

INTEGRA PROCESSOR REVIEW SPECIFICATIONS

Processing:

Design:

11.2 channel Preamp / Processor

DACs:

Texas Instruments PCM1795 32-Bit/192kHz

ADC:

Texas Instruments PCM9211

DSP:

Two 32-bit processors (Texas Instruments TMS 320 Aureus family)

3-Zone

Operation

Dolby® and DTS® Surround Sound Processing,

including Dolby Atmos and Dolby Surround

THX Ultra2

Plus Certified

Video Upconversion (1080p and 4K)

for Analog and HDMI Sources

Connections:

HDMI 2.0 Audio/Video Switching:

8 In (includes 1 front-panel input), 3 Out plus 1 HDBaseT

Component Video Switching:

2 In, 1 Out

Composite Video Switching:

4 in, 2 out (includes front-panel input)

Digital Audio Inputs:

3 Optical (includes 1 front-panel input) and 3 Coaxial

Analog Stereo Audio Inputs:

8 RCA, 1 XLR

11.4 Channel Pre-outs (RCA and XLR),

including 4 for Subwoofers

Front-panel USB Port for

Audio Playback from USB storage devices

Ethernet Port for

Wired Network Connection

RS-232C, Remote IR (2 in, 1 out), and

12 Volt-triggers (3 out)

1/4"

Headphone Output

2nd Zone (Stereo Audio, HDMI, Composite),

3rd Zone (Stereo Audio, Composite)

General Features:

4K/60p and

3D Video Pass-through

Wi-Fi RemoteApp for

Apple or Android Devices

AM/FM

Tuner

Remote

Control

Dimensions:

7-13/16" H x 17-1/8" W x 17-1/2" D

Weight:

29.8 Pounds

MSRP:

$3,200 USD

Company:

Integra

SECRETS Tags:

Integra, Integra DHC-80.6, Surround Processor, Preamplifier, Dolby Atmos

Design

Integra DHC-80.6 11.2 Surround Sound Processor (SSP) Review

When I took the Integra DHC-80.6 preamp/processor out of the box, I was reminded at just how large a component this was. The DHC-80.6 processor shares the same chassis and functionality as the Integra DTR-80.6 receiver, with the difference being the inclusion of the power amplifier and speaker jacks on the receiver. I was also struck by how little the product has changed cosmetically since I reviewed the previous flagship Integra DTR-80.3 receiver three years ago. The overall style is classic Integra, with a simple curved front panel along with a very crisp white LED display. There are now two small LEDs just to the right of the power button. The first illuminates when a Dolby Atmos soundtrack is decoded. The second illuminates to indicate that the DHC-80.6 is in “Hybrid Standby” mode which means that all audio and video from a pre-selected input is sent directly to the television without any processing. This allows for watching the TV without engaging the sound system.

Secrets Sponsor

Just below the main power button are discrete power buttons for zones two and three. The previous DHC-/DTR-80.3 models used to support four zones, but Integra dropped support for zone four and replaced the Zone Level controls with a “Whole House Mode” function. The “Whole House Mode” feature automatically turns on Zone 2 and Zone 3 and plays the main room source in all zones. This assumes that the source device being played is also connected via analog audio inputs since Zone 3 doesn’t support a digital input. In the lower-right corner of the DHC-80.6 is the auxiliary input, which provides an external HDMI/MHL connection along with analog and optical-digital audio inputs and a composite video input. Just to the left of the auxiliary input is a USB jack. The headphone jack is on the lower-left corner along with the microphone jack for AccuEQ room correction. Other than changes to the silk-screened logos, the rest of the front panel remains unchanged and includes lots of buttons for input selection, tuner control, and listening mode selection.

The rear panel of the DHC-80.6 supports a wide array of components and is color coded to help distinguish inputs from outputs. Inputs have a black background while outputs have a white or checkered background.

Integra DHC-80.6 11.2 Surround Sound Processor (SSP) Review

The DHC-80.6 processor is THX Ultra2 Plus certified and supports eight HDMI 2.0 inputs and three HDMI 2.0 outputs (one for Zone2) which can be operated simultaneously or independently. The DHC-80.6 includes an HDBaseT output which ships covered by a black label with the warning “Custom installer use only.” The HDBaseT connection on the DHC-80.6 supports runs up to 328 feet utilizing cat5e/cat6 cable to a powered third-party HDBaseT receiver. This is a great way to reliably transmit audio and video over HDMI without the hassle of long and expensive HDMI cables. This is useful for projector installations or a separate zone that requires audio and video. The label certainly eliminates any ambiguity as to which Ethernet port to use when connecting the DHC-80.6 to your home network. The label can be removed and the connection used without hesitation or fear of repercussions, although a custom installer can come in very handy when implementing distributed audio and video in the home.

Secrets Sponsor

The processor supports a full complement of analog audio and video inputs with two component video inputs, four composite video inputs, eight stereo analog RCA inputs, and one balanced XLR input. The DHC-80.6 supports six digital audio inputs (3 coaxial and 3 optical). Integra has dropped support for S-Video inputs and no longer includes a 7.1 multi-channel input or the universal port which was used for the older UP-A1 iPod dock.

Integra DHC-80.6 11.2 Surround Sound Processor (SSP) Review

The pre-amp output jacks (both XLR and RCA) on the DHC-80.6 support eleven speakers, including two pair of height channels, and two subwoofers. For maximum convenience, the DHC-80.6 includes four pair of parallel subwoofer pre-amp outputs (both XLR and RCA) for those using more than two subwoofers in their home theater. The height channels are intended for Dolby Atmos, but if you don’t use the height channels, you can use those channels as front-width channels or to bi-amp your front speakers if your speakers support a bi-amp configuration.

The remaining connections on the DHC-80.6 back panel include antenna connections for the AM/FM tuner, two IR inputs and one IR output jack, and an RS-232 jack which can be used to control the DHC-80.6 with an external control system. Three 12 Volt DC Triggers are also included, which allows you to turn on another device, such as an external amplifier for multi-zone operations.

The DHC-80.6 comes with a basic remote.

From a technology perspective, the DHC-80.6 supports Dolby Atmos and speaker configurations up to 7.2.4 with two pair of height channels. The latest Dolby Surround upmixer is included to synthesize an immersive 3D surround experience from a stereo or multichannel soundtrack. Sadly, Integra chose to eliminate support for Audyssey technology from the DHC-80.6, so the Audyssey MultEQ XT32 room correction is gone, along with Audyssey DSX processing, and Audyssey Dynamic Volume. Integra also chose to not include Dolby Volume, but since the unit is THX Ultra2 Plus certified, THX Loudness Plus can be used for volume management but only when using a THX listening mode. In place of Audyssey room correction, Integra has included AccuEQ room correction which measures a single listening position.

Integra DHC-80.6 11.2 Surround Sound Processor (SSP) Review

On the audio side of things, the DHC-80.6 uses the Texas Instruments PCM9211 24-bit analog-to-digital converter and Texas Instruments PCM 1795 32-bit/192 kHz digital-to-analog converters. Secrets’ Dr. David Rich has done an extensive review of the schematics on the DHC-/DTR-80.6 compared to the previous DHC-/DTR-80.3 model. He noted that “the analog audio path on the DHC-80.6 has been completely changed from a premium Small Scale Integrated (SSI) analog-chip design and migrated to a more typical Large Scale Integrated (LSI) AVR implementation. Since the DHC-80.6 supports so many channels, the processor uses two Renesas R2A15220 AVR LSI electronic volume controls chips. Each chip is limited to 8 channels. The DACs and the power supply for opamps on the DAC PC board remain unchanged from the DHC 80.3 at +/-12V rails, so any performance degradation is from the LSI AVR chips alone which are on +/-7V supplies. The DHC-80.6, when listening to a 5.1 channel source, has the option to run the DACs in mono mode (1 DAC per channel), which is a feature carried over from the DHC 80.3. Analog direct mode performance is now fully dependent on the Renesas R2A15220 chips’ performance.” Dr. Rich also noted that the phono stage no longer supports a moving coil cartridge. For a perspective on how build quality and component choices contribute to high-performance design, see these Secrets of Home Theater and High Fidelity articles.

On the video side of things, the DHC-80.6 uses a Marvel Qdeo 4K processor for scaling to 4K resolution up to 30Hz. Since the DHC-80.6 supports HDMI 2.0 and HDCP 2.2 copy protection (only available on HDMI input 3 and the HDMI Main output), the processor can successfully receive and transmit copy-protected Ultra HD content as long as the source and display device also support HDCP 2.2. Video passthrough at 4K 60Hz is supported but only in 4:2:0 color space. At the moment, there is no UHD content available that requires 4K/60Hz with 4:4:4 color space, but as more 4K and HDR products and sources, such as 4K Blu-ray players, come to market later this year, these requirements will change. This means that we will see continued changes in the HDMI chipsets and feature sets of processors like the DHC-80.6 in the near future.

Setup

If you aren’t familiar with the basics of Dolby Atmos, Secrets’ Senior Editor Chris Eberle has provided a great introduction in his article: “Dolby Atmos and Auro 3D: The Technology and The Reality.” Before discussing setup on the DHC-80.6, we need to go over the three basic types of height speakers that can be used with Dolby Atmos on the DHC-80.6. The first are traditional height speakers that can be found in a Dolby Pro Logic IIz theater configuration. Height speakers are generally mounted a few feet directly above the front left and right main speakers. Height speakers mounted in the front of the listening room are called Front High and height speakers mounted behind the listening position are called Rear High. In the following speaker layout, speakers 9 and 10 are Front High and speakers 11 and 12 are Rear High.

Integra DHC-80.6 11.2 Surround Sound Processor (SSP) Review

The second height speaker type is referred to as a Top speaker, and this type is installed directly in the ceiling, pointing down into the listening room. Top speakers can be used in three configurations with Top Front speakers being in front of the listening position, Top Middle speakers being parallel with the listening position, and Top Rear speakers being placed behind the listening position.

Integra DHC-80.6 11.2 Surround Sound Processor (SSP) Review

The third type of height speaker is a Dolby Atmos Enabled speaker. These speakers are designed to reflect sound off the ceiling and back down toward the listening position. Dolby Atmos Enabled speakers also come in two types. The first is a completely integrated design that looks like a regular speaker but also contains an upward firing driver for Dolby Atmos. The second is a Dolby Atmos elevation module that just contains an upward firing driver. The elevation module is designed to be placed on top of an existing speaker or installed near an existing speaker. In terms of the configuration options on the DHC-80.6, there is no distinction made between a Dolby Atmos Enabled speaker with a built-in upward firing driver and a separate Dolby Atmos elevation module. Both types are referred to as Dolby Enabled Speakers and they have three placement options. Dolby Enabled Front speakers are placed by the front left and right main speakers. Dolby Enabled Back speakers are placed behind the listening position by the rear or back surround channels. Dolby Enabled Surround speakers are placed on either side of the listening position by the surround channels.

Integra DHC-80.6 11.2 Surround Sound Processor (SSP) Review

As you can imagine with so many speaker options for delivering the Dolby Atmos experience in the listening room, the DHC-80.6 has to support numerous speaker configurations. While you would think that each pair of height speaker pre-amp outputs could be assigned to any position in the room, the options are far more limited and vary based on which speaker type and position is selected for the Height 1 speakers. For example, if the Height 1 speakers are being used for Top Front speakers, then the only options available for the Height 2 speakers are either “Not Use” or “Top Rear”.

If the Height 1 speakers are used for Front High speakers, then there are five options available for the Height 2 speakers including “Not Use”, “Top Middle”, “Rear High”, “Dolby Enabled Speaker Surround or “Dolby Enabled Speaker Back.” If the Height 1 speakers are used as Dolby Enabled Surround or Back speakers, then the Height 2 speakers can’t be used at all. If this sounds confusing, take a look at the following chart which illustrates how the selection of the Height 1 speaker type and position determines the available options for the Height 2 speakers on the DHC-80.6.

Integra DHC-80.6 11.2 Surround Sound Processor (SSP) Review

There are a total of fourteen distinct speaker arrangements supported on the DHC-80.6 when using both pair of height speakers and counting the “Not use” options. As you can see from the previous chart, there are some combinations that are very limited. For example, you can only use Rear High speakers when using Front High speakers. While you can use Top Middle speakers with Front High speakers, if you choose to use Top Middle speakers as your Height 1 speakers, then you can’t use the Height 2 speakers for anything at all. This sounds like an Abbott and Costello comedy moment.

If you decide to bi-amp the front main speakers on the DHC-80.6, the Height 1 speaker pre-amp outputs are used for the main high frequency amplifiers. This leaves the Height 2 speaker pre-amp outputs available for one pair of Dolby Atmos height speakers. The possible configurations are shown in the following table:

Integra DHC-80.6 11.2 Surround Sound Processor (SSP) Review

When the DHC-80.6 is first powered on, an initial setup wizard prompts for a preferred language and then immediately offers the option to set up the AccuEQ system. The microphone for AccuEQ is an inexpensive plastic puck that plugs into the microphone jack on the front panel of the DHC-80.6. The initial AccuEQ setup screen on the DHC-80.6 looks very simple, with only three questions. The first option, “Front Speakers Type”, specifies whether the front speakers are normal or bi-amped. The other two options specify the Height 1 and Height 2 speaker type discussed above. The options are interactive, so making a selection for “Height 1 Speakers Type” changes the available options for “Height 2 Speakers Type.” Once the selections are made, you can press the Enter button to continue with the setup process.

Integra DHC-80.6 11.2 Surround Sound Processor (SSP) Review

While the setup screen is really simple, it is also an example of a very poor user interface. There are actually four setup options with the fourth option being the number of subwoofers connected to the DHC-80.6. You have to know to press the Down Arrow button on the remote to display that option. If you just press the Enter button, the DHC-80.6 will happily progress through the AccuEQ process, assuming that you want to configure two subwoofers. If that wasn’t your intent, you will have to start the setup process all over again to fix the mistake. To be fair, the manual does call attention to the need to scroll down the page. Unfortunately, the only visual clue is the small arrowhead in the lower right-hand corner of the AccuEQ setup interface. Considering the amount of available screen real-estate, I think Integra could improve the user interface to make things a bit more obvious.

The entire AccuEQ process takes less than ten minutes to run and only takes measurements at the primary listening position. AccuEQ shows a graphical representation of the speakers in the room and highlights which speaker is being tested. I was pleasantly surprised to find that it accurately identified channels, distance, and level in my system without any mistakes. When AccuEQ is finished, simply unplug the microphone and the setup wizard presents options for configuring sources, remote control and network.

Despite the noticeable absence of Audyssey room correction, the DHC-80.6 was straightforward to configure and the setup menus were as comprehensive as I’d come to expect on an Integra product. I connected my source devices and plugged the DHC-80.6 into my home network. I was glad to see that I had the latest firmware version. I also downloaded the Integra Remote application onto my iPhone.

In Use

In my typical listening environment, I use a McIntosh MC8207 amplifier and a seven-speaker configuration from Definitive Technology including a pair of BP-3000TL speakers with powered subwoofers for the front mains, a CLR 2002 speaker for the center channel, and four Definitive Technology UIW 94/A speakers for the surrounds and rear channels. To experience Dolby Atmos, I needed to add some height channels to my system. Integra sent along a pair of Onkyo SKH-410 Dolby Atmos Enabled add-on speaker modules. These tiny speakers are 4-3/4"W x 6-1/16"H x 6"D and each contains a 3.25” upward firing cone driver.

Integra DHC-80.6 11.2 Surround Sound Processor (SSP) Review

Definitive Technology generously sent me two pair of their A60 Elevation Modules.

Integra DHC-80.6 11.2 Surround Sound Processor (SSP) Review

The A60 speaker is 6”W x 4”H x 13-1/10”D and is designed to snap onto the top of the Definitive Technology BP-8060ST speaker. The combination of the two turns the BP-8060ST into a Dolby Atmos enabled speaker and the look is totally seamless for owners of the set.

Integra DHC-80.6 11.2 Surround Sound Processor (SSP) Review

In my case, I was using the A60 as standalone Elevation Modules and placing them as needed in my room. Peeking inside the A60, you can see the 3” upward firing driver mounted in a sealed MDF enclosure. The front of the A60 is packed with a foam baffle that helps direct the sound toward the ceiling.

Integra DHC-80.6 11.2 Surround Sound Processor (SSP) Review

All I needed then was an amplifier for the height channels and some Dolby Atmos listening material. I was fortunate that I never sold my Rotel RMB-1095 5-channel amp and my Rotel RMB-1080 2-channel amp when I put the McIntosh MC8207 amplifier into my system. I only needed four channels of amplification, but having the extra two amps allowed me to independently power two pair of height speakers. This came in really handy when listening to just the height speakers by themselves to get a perspective on what the height speakers were actually adding to the listening experience.

I used an Oppo BDP-105 as my primary source device and started with one pair of the A60 Elevation Modules in the Dolby Enabled Front position. Dolby was very kind to send me some Blu-ray titles with Atmos soundtracks along with their own Dolby Atmos Blu-ray demonstration disc. The demo disc contains some extremely convincing material that showcases what can be done with Dolby Atmos. The “Dolby Atmos Unfold Trailer” is a prime example. The trailer begins with a three-dimensional geometric object that unfolds into smaller triangles that separate, move around, and realign themselves into the Dolby logo. The DHC-80.6 makes this demo come alive. It sounded like the triangles were physically in the room, stomping around me and above my head, on their way to become the Dolby “Double D” logo.

Another convincing demo was the “Dolby Atmos Amaze Trailer.” The DHC-80.6 transformed my listening room into a tropical rainforest complete with a dramatic thunderstorm, rain falling from above and fantastic bass from claps of thunder. One of the highlights of this trailer is the sound of a bird taking off from the left of the listening position and flying 360 degrees around the room. The effect was extremely realistic thanks to the Dolby Atmos height channels. This demo also pointed out the importance of speaker placement. For years, I was content to use ceiling-mounted surround speakers for their unobtrusive yet effective sound in my room. In the case of this trailer, it became clear that the surround speakers needed to be placed at ear level in order to effectively anchor the sounds as intended. When I first listened to the “Dolby Atmos Amaze Trailer” with my ceiling mounted surrounds, the sound of the bird taking off from the water was noticeably above me. I grabbed an old pair of surround speakers and placed them at ear level in my room and was delighted at the change. The bird clearly took off from the water to my immediate left and flew around the room. For all my listening tests with the DHC-80.6, I used surround speakers mounted at ear level to ensure that I was listening to an optimal configuration. This had the added benefit that I could repurpose the in-ceiling surround speakers as “Top Middle” height channels for some of my tests.

The Expendables 3

The Expendables 3

My first Dolby Atmos movie was “The Expendables 3.” As an action thriller, the soundtrack offered more than ample opportunities for auditioning the DHC-80.6. Right from the opening scenes, the DHC-80.6 drew me into the action. The sounds of gunshots, helicopters and hand-to-hand combat filled the room. During the attack on the abandoned building, when the tanks are firing at Sylvester Stallone and his friends, the tank rounds sounded like they were traveling from the back of the room right over my head. I would have bet money that much of the effect was accomplished by the height channels.

I could not have been more wrong. Listening to the height speakers by themselves, I was really surprised to find that the height channels only added to the ambiance of the scene. The real work was happening in the surround channels and especially the rear channels. The sound coming from the height channels was mostly soundtrack, ambient fight sounds, and the occasional clatter of falling rubble, all of which added to the overall experience. As for specific effects that made use of the height channels, there was the sound of a knife blade moving overhead and one very cool, if unbelievable, scene of one member of the Expendables team riding a motorcycle up the body of a crashed helicopter and launching into the besieged building. The DHC-80.6 seemed to effortlessly recreate this dynamic soundtrack creating an immersive and theater-like experience in my room.

Teenage Mutant Ninja Turtles

Teenage Mutant Ninja Turtles

My next Dolby Atmos movie was the “Teenage Mutant Ninja Turtles”. The DHC-80.6 delivered another immersive experience for this fun action-adventure. The A60 elevation modules added to the ambiance of the movie and really turned my listening room into a more theater-like experience with sound coming from all around. The best sound effects could be found in the chase scene down the snowy mountainside. At one point I felt like I needed to duck my head as the height channels helped to recreate the sound of the semi-trailer skidding across the mountainside and right over my couch. Once again, this movie showcased extensive use of the rear surround channels and offered some excellent subwoofer demo material.

I tested the DHC-80.6 with two pair of A60 modules in front, front/surround, and front/back configurations. I also tried the A60 and the Onkyo SKH-410 as standalone pairs in the front, surround, and back positions. Both speaker models added to the immersive sound of the DHC-80.6 and were able to recreate the sense of sound coming from above. I also found that I preferred two sets of height speakers in the room for a more spacious effect. What surprised me, however, was that these speakers didn’t always disappear into the listening space for me.

Step Up All In

Step Up All In

This was especially true when listening to the Dolby Atmos soundtrack on “Step Up All In.” I was originally thinking this movie would have little, if any, content in the height channels. It turns out that recreating a dance competition in Las Vegas offered plenty of material for the height channels. The final dance competition takes place on a stage surrounded by multiple-levels of fans cheering on the dancers from above. Dolby Atmos and the DHC-80.6 did an excellent job recreating this venue in my listening room.

I turned off the amplifier for my main channels and was amazed at how much soundtrack, crowd noise, and overall ambient sound was coming just from the height channels. What disappointed me was that I was very aware of the sound coming from the general location of each elevation module. I reconfigured the DHC-80.6 again and used my in-ceiling speakers as “Top Middle” speakers and eliminated the elevation modules. The difference was amazing. The height content blended much more seamlessly with the rest of my speakers and the DHC-80.6 created a wonderfully immersive experience that made me think I was in the crowd watching the dance competition. After trying numerous speaker configurations, what worked best for my room was a pair of in-ceiling speakers in the Top Middle position as well as a pair of speakers mounted in the Front High position.

While I enjoyed sampling the Dolby Atmos soundtracks, what really impressed me was the Dolby Surround upmixer on the DHC-80.6, which creates a 3D surround experience from existing content. Watching scenes from movies like “Skyfall”, “Prometheus” and “TRON: Legacy” was simply addicting. All of these titles sounded much more immersive with improved dynamics and a much greater sense of space and realism. While I was always happy with my 7.1 speaker system, I was completely hooked on the benefits of Dolby Surround and the added height channels. I would have loved to do an A/B comparison against Dolby PLIIx, but Integra no longer includes PLIIx decoding on the DHC-80.6.

I tried using the Dolby Surround upmixer with stereo music, but found the combination not to my liking. I felt that the vocals collapsed too much into the center channel and I ultimately preferred listening to music on the DHC-80.6 in stereo. The DHC-80.6 stereo performance is good but the sense of realism and transparency is not as pronounced as with other processors like the Emotiva XMC-1.

Integra DHC-80.6 11.2 Surround Sound Processor (SSP) Review

From an operational perspective, the DHC-80.6 is easy to use but the interface has not changed much since the previous models. The transparent on-screen overlays still bugged me as they can be hard to read depending on the underlying video image. The remote control is the same design as prior models but is no longer backlit which is quite unfortunate. The DHC-80.6 uses relays so there can be a fair amount of clicking noise if switching between stereo and Dolby Surround decoding.

From a control perspective, Integra has made some nice improvements to the free Integra Remote app, which is available for both Apple iDevices and Android devices. The main interface of the Remote app provides access to power, input, listening mode and finally shows the active listening mode.

Integra DHC-80.6 11.2 Surround Sound Processor (SSP) Review

Integra DHC-80.6 11.2 Surround Sound Processor (SSP) Review

Integra DHC-80.6 11.2 Surround Sound Processor (SSP) Review

The source selections are extensive and include streaming services like TuneIn, Pandora, SiriusXM Internet Radio, Slacker Personal Radio, Aupeo! Personal Radio, Deezer and Spotify.

Integra DHC-80.6 11.2 Surround Sound Processor (SSP) Review

Integra DHC-80.6 11.2 Surround Sound Processor (SSP) Review

Zone selection is very simple from the Remote app and Integra has finally included the ability to play a digital source in Zone 2. The Remote app also allows you to enable the “Network Standby” feature without having to navigate the main setup menu.

I was also pleased that accessing local DLNA music servers on my home network worked without any problems and properly displayed the album art. The interface in the Remote app is also much nicer than navigating the on-screen interface directly on the DHC-80.6.

On The Bench

My standard benchmark tests were done using two-channel bypass mode so that all digital signal processing was off. On tests using the XLR input, I measured the XLR preamp output of the DHC-80.6. On tests using an RCA input, I measured the RCA preamp output of the DHC-80.6. The source device for both analog and HDMI tests was an Oppo BDP-105.

At 1 kHz into the XLR input, THD+N was 0.007970%. We see harmonics throughout the spectrum with the second harmonic at 2 kHz being about 78 dB below 2 VRMS.

Integra DHC-80.6 11.2 Surround Sound Processor (SSP) Review

At 1 kHz into the RCA input, THD+N was 0.023789%. We see harmonics throughout the spectrum with the second harmonic at 2 kHz being about 68 dB below 2 VRMS. The major difference between this and the previous graph is related to the voltage difference. For a power amplifier with the typical minimum gain of 20 (26dB), a 2 VRMS RCA input is required to produce 200 Watts out into 8 ohms. With 2 VRMS balanced as shown in the previous graph, you only have 1 VRMS single ended, which is what runs internally inside the DHC-80.6. In this test, we have 2.06 VRMS single ended with a slight increase in distortion.

For the XLR tests at 2 VRMS, a power amp with a gain 20V/V will have a power output of only 50 Watts, which is why we also supply 5 VRMS tests which will take the power amp to 300 Watts.

Integra DHC-80.6 11.2 Surround Sound Processor (SSP) Review

At 10 kHz into the XLR input, THD+N was 0.008618%. The second harmonic at 20 kHz is about 76 dB below 2 VRMS.

Integra DHC-80.6 11.2 Surround Sound Processor (SSP) Review

At 10 kHz into the RCA input, THD+N was 0.024252%. Compared to the previous test, we see an increase in distortion due the higher 2.05 VRMS single ended. The second harmonic at 20 kHz is about 67 dB below 2 VRMS.

Integra DHC-80.6 11.2 Surround Sound Processor (SSP) Review

The IMD measurement using the XLR input was 0.004382%. We see noise spurs on either side of the fundamentals and a second harmonic at 14 kHz at 100 dB below 2 VRMS.

Integra DHC-80.6 11.2 Surround Sound Processor (SSP) Review

The IMD measurement using the RCA input was 0.016227%. Compared to the previous test, we see an increase in distortion due the higher internal voltage of 2.01 VRMS single ended.

Integra DHC-80.6 11.2 Surround Sound Processor (SSP) Review

Here are the results for 19 kHz, 20 kHz combined test frequencies using the XLR input. There is a visible B-A peak at 1 kHz about 84 dB below 2 VRMS. We see distortion spurs throughout the spectrum. The second harmonics at 38 kHz and 40 kHz are about 82 dB below 2 VRMS (6 dBV).

Integra DHC-80.6 11.2 Surround Sound Processor (SSP) Review

Here are the results for 19 kHz, 20 kHz combined test frequencies using the RCA input. There is a visible B-A peak at 1 kHz about 68 dB below 2 VRMS. We see distortion spurs throughout the spectrum. The second harmonics at 38 kHz and 40 kHz are about 67 dB below 2 VRMS.

Integra DHC-80.6 11.2 Surround Sound Processor (SSP) Review

I measured the frequency response of the DHC-80.6 out to 96 kHz. In analog direct, the response is flat out to about 50 kHz and then we see a very gradual 5 dB roll-off of the high frequencies. The second plot shows what happens in stereo mode with digital signal processing and AccuEQ enabled. The DHC-80.6 downsamples the signal to 48 kHz and applies any room correction filters for each channel. You can see the roll-off of low frequencies for the left channel in the graph below 60 Hz. The signal then abruptly falls off around 24 kHz. This result isn’t surprising since we’ve seen this same downsampling with AudysseyXT32 implementations on other products.

Integra DHC-80.6 11.2 Surround Sound Processor (SSP) Review

I was disappointed to see no other corrections to the left channel in this test. I’ve used Anthem’s Room Correction (ARC) for many years and ARC always made some adjustments in my room for this channel. Anthem’s Room Correction is also able to apply room correction at frequencies up to 96 kHz. I ran the test again with AccuEQ turned off and the graph was indistinguishable from the plot with AccuEQ turned on. In this case, it doesn’t look like AccuEQ is doing anything and the DHC-80.6 is just applying bass management to the channel. For comparison purposes, here’s a look at this same test from the Anthem Statement D2v 3D processor. You can clearly see the inverse room correction curve in the graph with ARC enabled.

Integra DHC-80.6 11.2 Surround Sound Processor (SSP) Review

Now we take a look at the results using one of the HDMI inputs, fed from test discs played on an OPPO-BDP-105. At 1 kHz, and 16-bit/44.1k sampling rate, THD+N was 0.002059% measured from the XLR preamp output. We see several harmonics in the spectrum with the peak at 2 kHz being about 92 dB below 2 VRMS. For all digital tests, the DAC was driven at -5 dBFS and the volume adjusted for 2 VRMS at the output.

Integra DHC-80.6 11.2 Surround Sound Processor (SSP) Review

At 1 kHz, and 16-bit/44.1k sampling rate, THD+N was 0.016826% measured from the RCA preamp output, which is higher than the previous test. We see some distortion spurs as well as harmonics throughout the spectrum with the peak at 2 kHz being about 70 dB below 2 VRMS. As with the analog direct tests, the volume was increased 6 dB to bring the single ended output to 2 VRMS with the same -5 dBFS digital input to the DAC.

The remaining tests are for XLR only.

Integra DHC-80.6 11.2 Surround Sound Processor (SSP) Review

At 1 kHz, and 24-bit/96k sampling rate, THD+N was 0.001757%. We see some distortion spurs as well as harmonics throughout the spectrum with the second harmonic at 2 kHz being about 92 dB below 2 VRMS.

Integra DHC-80.6 11.2 Surround Sound Processor (SSP) Review

At 1 kHz, and 24-bit/96k sampling rate, THD+N was 0.001984% at 5 VRMS. We see some distortion spurs as well as harmonics throughout the spectrum with the second harmonic at 2 kHz being about 81 dB below 5 VRMS.

Integra DHC-80.6 11.2 Surround Sound Processor (SSP) Review

At 1 kHz, and 24-bit/192k sampling rate, THD+N was 0.0017044%. A well-performing DAC is not going to show much change in distortion for a change in sampling rate if the bit depth is kept constant.

Integra DHC-80.6 11.2 Surround Sound Processor (SSP) Review

At 10 kHz, and 16-bit/44.1k sampling rate, THD+N was 0.010366%. We see some distortion spurs in the spectrum with the second harmonic at 20 kHz being about 102 dB below 2 VRMS.

Integra DHC-80.6 11.2 Surround Sound Processor (SSP) Review

At 10 kHz, and 24-bit/96k sampling rate, THD+N was 0.005363% at 2 VRMS.

Integra DHC-80.6 11.2 Surround Sound Processor (SSP) Review

At 10 kHz, and 24-bit/96k sampling rate, THD+N was 0.010700% at 5 VRMS.

Integra DHC-80.6 11.2 Surround Sound Processor (SSP) Review

At 10 kHz, and 24-bit/192k sampling rate, THD+N was 0.002605% at 2 VRMS.

Integra DHC-80.6 11.2 Surround Sound Processor (SSP) Review

The IMD measurement through HDMI at 16-bit/44.1k sampling was 0.001200% at 2 VRMS.

Integra DHC-80.6 11.2 Surround Sound Processor (SSP) Review

The IMD measurement at 24-bit/96k sampling rate was 0.000971%. The second harmonic at 14 kHz is about 111 db below the 60 Hz tone at 2 VRMS.

Integra DHC-80.6 11.2 Surround Sound Processor (SSP) Review

The IMD measurement at 24-bit/96k sampling rate was 0.000831%. The second harmonic at 14 kHz is about 103 db below the 60 Hz tone at 5 VRMS.

Integra DHC-80.6 11.2 Surround Sound Processor (SSP) Review

The IMD measurement at 24-bit/192k sampling rate was 0.002475%.

Integra DHC-80.6 11.2 Surround Sound Processor (SSP) Review

Here are the results for the 19 kHz, 20 kHz combined test frequencies using the HDMI input with 16-bit/44.1k sampling. There is a visible B-A peak at 1 kHz about 106 dB below each test tone at 1 VRMS which is insignificant. For this test, the digital input for both the 19 kHz and 20 kHz test tones is -11 dBFS. This produces two analog tones at 1 VRMS (0 dBV RMS) each. In the time domain, the two 1 VRMS tones have a peak-peak value of a single tone at 2 VRMS.

Integra DHC-80.6 11.2 Surround Sound Processor (SSP) Review

Here are the results for the 19 kHz, 20 kHz combined test frequencies using the HDMI input with 24-bit/96k sampling. We see distortion spurs throughout the spectrum. There is a visible B-A peak at 1 kHz about 110 dB below each test tone at 1 VRMS which is insignificant. The second harmonics at 38 kHz and 40 kHz are about 95 dB respectively below 1 VRMS.

Integra DHC-80.6 11.2 Surround Sound Processor (SSP) Review

Here are the results for the 19 kHz, 20 kHz combined test frequencies using the HDMI input with 24-bit/96k sampling at 5 VRMS. We see higher distortion spurs throughout the spectrum. There is a visible B-A peak at 1 kHz about 79 dB below each test tone at 2.5 VRMS. The second harmonics at 38 kHz and 40 kHz are about 81 dB below each test tone at 2.5 VRMS.

Integra DHC-80.6 11.2 Surround Sound Processor (SSP) Review

Here are the results for the 19 kHz, 20 kHz combined test frequencies using the HDMI input with 24-bit/192k sampling. As in the previous test, there are distortion spurs throughout the spectrum. The second harmonics at 38 kHz and 40 kHz and the third harmonics at 57 kHz and 60 kHz are about 96 dB below each test tone.

Integra DHC-80.6 11.2 Surround Sound Processor (SSP) Review

On the video side of things, the Integra DHC-80.6 passed our standard video tests without any problems.

Conclusions

THE INTEGRA DHC-80.6 11.2 is a High Performance Processor.

Likes
  • Includes Dolby Atmos and Dolby Surround processing to create an immersive and addictive 3D surround experience
  • Excellent free iOS Remote Control application
  • Support for HDCP 2.2 is included on HDMI input 3 and Main Out for future compatibility with copy-protected 4K content. Video passthrough at 4K 60Hz is supported but only in 4:2:0 color space
Would Like To See
  • A more comprehensive Audyssey room correction suite rather than the much simpler AccuEQ room correction which only measures the primary listening position
  • Audyssey DSX processing, Audyssey Dynamic Volume and Dolby Volume to be included
  • Retain high build quality rather than changing to the more typical AVR LSI implementation
  • Moving coil support in the phono stage
  • An upgrade path to HDMI 2.0a and HDR

After listening to Dolby Atmos on the DHC-80.6 in my own home theater, I have to say that I’m hooked and will be making the investment in extra speakers to have an Atmos theater in my home. I enjoyed the immersive sound created by the Dolby Surround upmixer and I was impressed with how it created a more theater-like experience. The DHC-80.6 definitely delivers on the promise of Dolby Atmos.

Integra products have always offered a great mix of leading-edge technology along with outstanding performance at an attainable price. The difficulty with the DHC-80.6 really comes down to overall feature set versus the competition from Marantz and Denon. While the Integra DHC-80.6 has Dolby Atmos and Dolby Surround, it lacks a robust room correction system, has dropped Dolby Volume, and offers no future upgrade path for DTS:X, Auro-3D or 4K 50/60Hz content at 4:4:4 resolution. Given these limitations and the amount of change happening in the industry especially around 4K, HDR and HDMI, I would expect the DHC-80.6 to be an interim model, hopefully replaced by a new version restoring the competitive feature set to the product line.

The author would like to thank Dr. David Rich for his contributions on this article.

The post Integra DHC-80.6 11.2 Surround Sound Processor (SSP) Review appeared first on HomeTheaterHifi.com.

Classé Sigma SSP, Sigma Amp2 and Sigma Amp5 Review

$
0
0
Classé has produced some excellent surround sound processors in the past. They have now introduced a more affordable line of home theater electronics called the Sigma series.

There is a strong focus on sound quality with the Sigma series but there is also a focus on providing it at a lower price point. The Sigma Series is comprised of the Sigma SSP 7.1 channel surround sound processor, the Amp2 two-channel amplifier and the Amp5 five-channel amplifier. The Sigma SSP is not a feature-laden surround sound processor but it does offer a significant number of options for custom audio setup. Classé has also optimized the Sigma SSP for two-channel music play back. Included is an analog pass through mode along with balanced inputs and outputs for the front left and right channels.

John E. Johnson Jr. reviewed Classé’s flagship surround sound processor, the SSP-800 in 2012 and found the sound quality to be extraordinary. We will see if their lower priced Sigma series proves to be extraordinary as well.

Classé Sigma SSP, Sigma Amp2 and Sigma Amp5

Highlights

Classé Sigma SSP, Sigma Amp2 and Sigma Amp5

Sigma SSP

  • Clean, sleek looking compact design
  • Uncluttered rear panel
  • Touch screen controls on the front panel
  • Excellent for two-channel and surround sound
  • Extensive configuration options for each source

Amp2 & Amp5

  • Compact design is easy to handle and situate on an equipment rack
  • Substantial power output in a small package
  • Detailed and powerful sound
  • Styles match the Sigma SSP
Introduction

Classé Audio has been in existence since 1980 and has produced some exceptional pieces of audio equipment over the last four decades. One of the most memorable amplifiers I have listened to and one that I view as being an iconic piece of home audio equipment is the Classé Omega monoblock amplifier. I only listened to Omega monoblocks one time but they left the impression on me as being the best amplifiers I had ever heard.

CLASSÉ SIGMA PROCESSOR REVIEW SPECIFICATIONS

Sigma SSP

Design:

7.1 Channel Preamp/Processor

Processing:

Dolby True HD and DTS Master Audio

Connections:

1.4b HDMI: 7 – Rear Panel Inputs, 1 – Front Panel Input, 1 – Rear Panel Output

Digital Audio Inputs:

3 – Coaxial, 2 – Optical

Analog Audio Inputs:

2 – Stereo RCA, 1 – Stereo XLR

USB Audio:

24bit/192kHz for Connection to a PC or MAC
7.1 Channel RCA Output, Stereo XLR Outputs for L/R Front
Can-Bus Connectivity to other Classé Components, Ethernet

General:

Front Panel Touch Screen
Remote
Analog Pass-Through Mode (Bypasses all Digital Processing)

Dimensions:

3.75”H x 17.00”W x 14.57”D (Excluding Connectors)

Weight:

18 Pounds

MSRP:

$5,000

AMP2

Frequency Response:

10 Hz – 20 kHz, -1dB into 4 Ohms

Output Power:

200W rms into 8 Ohms, 400W rms into 4 Ohms

Harmonic Distortion:

<0.018% @ 1 kHz Balanced Input

Intermodulation Distortion:

>80 dB below Fundamental into 8 Ohms Balanced

Signal to Noise Ratio:

-100 dB at Peak Output into 8 Ohms (AES17)

Overall Dimensions:

3.75”H x 17”.00W x 14.57”D (Excluding Connectors)

Weight:

22.0 Pounds

MSRP:

$3,500

AMP5

Frequency Response:

10 Hz – 20 kHz, -1 dB into 4 Ohms

Output Power:

200W rms into 8 Ohms – All Channels Driven, 400W rms into 4 Ohms – Two Channels Driven

Harmonic Distortion:

0.018% @ 1 kHz all Channels Driven

Intermodulation Distortion:

>80 dB below Fundamental into 8 Ohms SE

Signal to Noise Ratio:

-100 dB at Peak Output into 8 Ohms (AES17)

Overall Dimensions:

3.75”H x 17.00”W x 14.57”D (Excluding Connectors)

Weight:

23.1 Pounds

MSRP:

$5,000 USD

Company:

Classé

SECRETS Tags:

Classé Sigma SSP, Sigma Amp2, Sigma Amp5 Review, Preamplifiers Reviews

Classé has taken a ‘less is more’ approach to the design of the Sigma SSP 7.1 preamp/processor (Pre-Pro). The highest priority in the design is sound quality. They have made no attempted to load it with every type of feature and input/output imaginable. Many surround sound processors have a multitude of costly features and connectivity options that customers might not ever use. There is a ‘wow factor’ that comes from electronics that possess a myriad of bells and whistles but it does not necessarily make them perform any better.

Classé has decided to focus on sound quality and the ability to customize the setup of Sigma SSP. The goal being to provide the best music and movie audio quality at a given price point. The ‘less is more’ approach became evident during my time with the Sigma SSP. Seldom used features are not present. What Classé has done is make the included content the highest quality. My impression of the Sigma SSP is that it would suit a home theater enthusiast who places the highest priority on two-channel audio.

Secrets Sponsor

The Sigma SSP does not have an automatic room correction system to tame room resonances. Nor does it possess the ability to pass 4k video or to decode the new immersive audio codecs (Dolby Atmos, DTS:X, and Auro 3D). However, there are plans for upgrades of the audio and video boards.

The Amp2 and Amp5 are the two amplifier options in the Sigma Series. The Amp2 is a two-channel 200w/channel amp and the Amp5 is a five-channel 200w/channel amp. They are both compact in size but are capable of driving difficult speaker loads. They are both class D amplifiers. This allowed Classé the opportunity to package them in a compact chassis.

Classé has decided to focus on sound quality and the ability to customize the setup of Sigma SSP. The goal being to provide the best music and movie audio quality at a given price point.

Design

The front panel of the Sigma SSP is sleek and clean looking. There are only a couple of buttons on the front panel. The display is actually a 4.4” TFT touch screen, allowing the user to make selections on screen. At only 3.75” tall, there is not much room for buttons on the front panel. It is convenient to have access to the menu system but if you are making a significant number of changes, it does seem easier to use a remote. The front panel screen also allows the user to preview the video that is being output from the unit.

Classé Sigma SSP, Sigma Amp2 and Sigma Amp5

The front panel contains a USB input that is capable of playing music from Apple media devices such as an iPod or iPhone. It also has an HDMI input on the front panel making it convenient for temporary connection of a device. The only other distinct feature on the front panel is the volume control, which is flush with the front faceplate, leading to the clean look.

Secrets Sponsor

The rear panel is quite clean looking as well. There are seven HDMI inputs on the rear panel of the Sigma SSP. The eight-1.4b HDMI inputs on the Sigma SSP are the only video inputs it has. Many receivers and pre-amp/processors continue to have analog video inputs and outputs. If you are like me, they go unused. When it comes to sound quality, picture quality and ease of installation, the benefits of digital connections are significant. This also simplifies the design of the product. It no longer requires a video processing section capable of upscaling and transcoding video content. If I recall correctly, it has been more than six years since I have used an analog video input on a receiver or processor in my home theater. It did not bother me that Classé decided not to include any type of analog video input. I imagine that more manufacturers will follow suit in the future. The Sigma SSP has one HDMI output and one set of audio outputs. Classé designed it for use in a single zone system.

Classé Sigma SSP, Sigma Amp2 and Sigma Amp5

An interesting feature on the rear panel of the Sigma SSP is a set of connectors for CAN-Bus (controller area network) communication. This allows for communication between the Sigma SSP and other Classé components you may have in your system. The communication is over Cat5 cables and each component has an input and output on the rear panel. The CAN-Bus communication can be used to turn connected Sigma series components on and off as well as display their status on screen. The ability to turn connected components on and off is particularly useful. The Sigma SSP does not have trigger outputs on the rear for turning amplifiers on and off.

There is a USB connection on the rear panel that supports 24bit/192kHz audio formats from a PC or Mac. As well, there is an Ethernet port for connecting to your home network. The Sigma SSP is not wireless though, you will need to connect it to a wireless router or bridge with a Cat5 cable. This allows streaming of audio via Apple’s Airplay or DLNA along with IP control and potential firmware updates.

The Sigma SSP has balanced outputs for the front left and right channels and the remaining outputs are single-ended. This is another example of Classé deciding to focus on quality vs. quantity. I asked about the decision to use balanced outputs for only the front L/R channels and Classé provided a good explanation. They wanted an excellent set of balanced outputs for the front L/R channels for two-channel music listening. To keep the total cost within budget they decided to include an excellent set of single-ended outputs for the remaining channels. This was done instead of including a lesser performing combination of single-ended and balanced outputs for the same cost. This logic is consistent with their focus on sound quality, specifically for music listening.

For analog audio, there is a set of balanced and single-ended inputs on the Sigma SSP. When using the analog inputs there is an analog pass through feature, which allows the user to turn off all digital processing. Classé refers to this as digital bypass mode.

Classé Sigma SSP, Sigma Amp2 and Sigma Amp5

The remote that comes with the Sigma SSP is small and does not have many buttons. The design is quite stylish and it has an expensive feel to it. The back appears to be of machined aluminum and it matches the style of the Sigma products. It is only capable of performing basic operations and it will not control any other devices in your system. I inquired about the design of the remote and the response from Classé is that they feel most customers are going to have specific needs for controlling their system. They feel there is no remote they could package with the Sigma SSP that would satisfy more than a small percentage of customers.

They believe that most customers are going to be using a custom control system or are going to want a remote that is specific to their own needs. I started using the Classé remote but it did not take long for me to switch over to using a Logitech Harmony to control the Sigma SSP. Thankfully I had one sitting around collecting dust. It made using the Sigma SSP much more enjoyable.

For those with iOS devices there is a Classé app available to control the Sigma SSP. As previously mentioned, the Sigma SSP is not wireless. You must physically connect it to your wireless home network through its rear panel Ethernet port. Being that I am an Android user, I did not have a chance to test it out. Classé informed me there are plans to release a control app for Android later this year.

I asked Classé about their plans to offer upgrades to the Sigma SSP since it does not decode Dolby Atmos, Auro 3D or DTS:X and it does not pass 4K video. Classé does plan to offer field upgrades to the audio and video boards in the future. It sounded likely that the upgrade to dual DSP’s to handle Dolby Atmos and DTS:X would happen early next year. There are no plans to support Auro 3D. Since the Sigma SSP is an eight-channel product, it would allow for 5.1.2 audio. Classé plans to offer an update to HDMI 2.0 with HDCP 2.2 once UHD Blu-ray comes to market. Being that UHD Blu-ray will be coming to market near the end of the year, there is not much time left. Pricing for upgrades has not been established.

The Sigma Amp2 and Amp5 are class D amplifiers. Classé based the design off the CA-D200 amplifier from their Delta series. The Amp2 is essentially the same as the CA-D200 but in a Sigma Series chassis. The Amp5 has the same power supply and amplifier circuitry as the Amp2 but modified for a five-channel configuration. The class D topology is what allowed Classé to package the amps in a compact chassis that is only 3.75” tall. The front panels of the Amp2 and Amp5 are identical to the Sigma SSP but lack buttons and a touch screen.

Classé Sigma Amp2

Classé Sigma Amp2

The rear panel of the Amp2 has both balanced and single-ended inputs. It has a CAN-Bus communication input and output for connecting to other Classé components. It surprised me to find trigger inputs and outputs on the back, being that they are not present on the Sigma SSP. The Amp2 also has an IR input and output for connecting an IR receiver and daisy-chaining additional devices. For speaker wire connections, it has two sets of robust-looking five-way binding posts per channel. This makes it easy to bi-wire speakers.

Classé Sigma Amp5

Classé Sigma Amp5

The rear panel of the Amp5 has a similar layout, only modified for five channels. Two of the channels have both balanced inputs and single-ended inputs. The remaining three channels have only single-ended inputs. It has only one set of five-way binding posts per channel. In a 5.1 system, you would have the option of using balanced connections for the front left and right channels. Once again, a feature that supports high-end two-channel sound.

The Amp2 produces 200W rms into 8 ohms and 400W rms into 4 ohms with both channels driven. The Amp5 produces 200W rms into 8 ohms with all channels and 400W rms into 4 ohms with any two channels driven. Due to power supply limitations, it is not capable of 400W rms into 4 ohms with all channels driven. I would not expect there to be many situations in a home theater where this would happen for more than a short period of time.

There are some significant advantages to class D amplifiers but there are also some disadvantages. One of the biggest disadvantages is the dead-band-time when switching between positive and negatives halves. The longer the dead band time, the greater the distortion. It does not take a significant amount of dead-band-time to create significant amounts of distortion. This is the reason that Class D amplifiers have typically been relegated to lower end audio components. Recently, this has started to change as manufacturers are designing solutions to the problems with Class D amplifiers. Classé claims to have reduced the dead-band-time to three nanoseconds with the use of digital signal processing. Since there is little distortion, they claim to be using only a small amount of negative feedback.

The Sigma SSP, Amp2 and Amp5 are all rack mountable. Each side panel can be removed, inverted, rotated and re-installed. This leaves a set of ears to mount the components on a rack.

Setup

Setting up the Sigma SSP and getting it connected to my existing components was a relatively easy task. The compact design of it and the Sigma amplifiers make for an easy installation. I always dread having to move my five-channel amp since it weighs about 90lbs. At 23lbs, the Amp5 was a delight to work with.

Being that the rear panel of the Sigma SSP is not jam-packed with inputs and outputs, it is easy to find the connections you need. For sources, I used a satellite receiver, a Samsung over the air HDTV tuner, an OPPO Blu-ray player and a custom-built home theater PC. I connected all the sources to the Sigma SSP with HDMI cables.

During setup of the Sigma SSP, I also proceeded to setup the Sigma Amp2 and Amp5 in my home theater. I connected the Sigma Amp2 to the front left and right channels in my home theater and used the Amp5 for the center and four surround channels. I used the balanced inputs on the Amp2 and the single-ended inputs on the Amp5.

The menu system on the Sigma SSP is straightforward and it is the same whether using the front panel touch screen or the OSD. The configuration of the Sigma SSP can be quite time consuming depending on the level of detail you are after. The basic configuration settings such as labeling inputs, setting crossovers, speaker distances, and speaker levels are an easy task. I only setup one speaker configuration in the Sigma but you do have the option of setting up six different configurations. This is a nice feature if you want to use a different crossover point for your sub for something like two-channel music. Perhaps you might use another configuration if you did not want a sub engaged at all. I am hard pressed to find a use for all six configuration options with my home theater.

The Sigma SSP does not come with an automatic room correction system to tame room resonances. However, it does contain a parametric equalizer that allows for manual correction of acoustic irregularities that may exist in your listening room. Each channel, including the sub has nine bandpass filters that the user can configure based on the response in room. To set it properly, it is necessary to have measurements of noise sweeps taken. This is not something most customers will be able to do themselves and they will require the services of a professional installer. It is quite a powerful tool and a professional installer will be able to attain a superior result. Based on some data previously taken in my room, I did make adjustments at 40Hz and 56 Hz to tame some room resonance. It made a huge difference in reducing the boominess.

In Use

I put the Sigma SSP to use in my home theater for all of my usual activities. This includes watching movies on Blu-ray, watching TV on satellite and over the air, listening to two and multi-channel music, and surfing the internet. I found that the sound quality of the Sigma SSP, Amp2, and Amp5 together was excellent no matter what source material I used. This is the first time I have used class D amplifiers and I must say I am impressed at the sound quality of the Amp2 and Amp5. They always seemed to drive my speakers extremely well. The clarity, detail and control were always exceptional. I did not notice any audible distortion regardless of the levels I drove the system to and no matter how loud it got, the Amp2 and Amp5 were barely warm.

Since the Sigma SSP passes through video without any processing, there is not much to discuss on the video side. I was happy with the video quality from all sources I used and never had any issues. Video sources switched flawlessly every time.

Quite often, I will use my HTPC for watching videos on YouTube and listening to music using a service such as Songza. I do not consider this critical listening; it is mostly just for fun. Typically, it happens when I am entertaining people or just wanting to watch some music videos. With content from the HTPC, I do not engage any type of surround processing – everything is in stereo. I decided to play a YouTube video of violinist Lucia Micarelli performing “Aurora-Kashmir”. I had just recently seen her in concert and was quite impressed. The version I watched appears to be an upload from the Josh Groban Awake DVD. The Sigma SSP and Amp2 did a superb job with it given that YouTube’s sound is less than reference quality. I felt the full emotion of her performance on the violin and the soundstage of the band accompanying her was massive.

Tchaikovsky - 1812

Tchaikovsky – 1812

Next, I switched over to a high-resolution digital download of Tchaikovsky’s 1812 Overture performed by Eric Kunzel and the Cincinnati Pops Orchestra. I had it stored on the HTPC’s hard drive. Generally, I do not spend much time listening to high-resolution audio downloads in my home theater. I usually use my two-channel system, but I wanted to see how the Sigma SSP and Amp2 would perform. As I mentioned previously, Classé optimized the performance of the Sigma SSP for two-channel music, and with this material it did not disappoint. The detail and clarity were phenomenal. The instruments in the orchestra sounded alive. I felt like the playback of this recording on the Sigma components was the best I have ever heard it.

Chris Botti in Boston

Chris Botti in Boston

To see how the Sigma setup would do with some higher quality surround music on Blu-ray, I put Chris Botti in Boston on. I selected the Dolby True HD 7.1 soundtrack for my listening tests. There are many great performances on this disc and I find that I enjoy them no matter how many times I watch them. There are a number of songs that showcase Chris Botti’s talent on the trumpet but a couple that I particularly enjoy are “Hallelujah” and “Cinema Paradiso”. With the Sigma SSP and amplifiers, his trumpet sounded the same as it does live. In “Cinema Paradiso”, he accompanies Yo-Yo Ma and they perform fabulously together. Once again, the Sigma setup had perfect clarity. The violin and cello sounded detailed and rich. The Sigma Amp2 and Amp5 drove my speakers in what seemed like an effortless manner during all the songs I listened to, many at reference levels.

Fury

Fury

I watched a few different movies on Blu-ray during my time with the Sigma SSP and amplifiers. The first movie I watched was Fury, the story of a U.S. tank crew doing battle in Germany during the final days of World War II. I selected the DTS 5.1 Master Audio soundtrack and engaged PLIIx processing in the Sigma SSP for the rear surrounds. The battle scenes in Fury contain extremely powerful audio and the Sigma amplifiers did an outstanding job at driving my speakers. The sound effects were fast and had punch. There is a significant amount of low frequency sound during some of the scenes and the Sigma SSP impressed me with its control. I only performed a small amount of adjustment using the parametric equalizer when I set up the Sigma SSP to reduce room resonances. It seemed to work quite well, as I did not notice a significant amount of resonance or booming that would otherwise exist. With some additional effort into setting the parametric equalizer, I feel like it would rival some of the best automated room correction systems.

American Sniper

American Sniper

Other movies on Blu-ray that I watched in my time with the Sigma Series equipment were American Sniper and Unbroken. American Sniper is the true story of Navy Seal sniper Chris Kyle, who serves in Iraq providing sniper coverage for ground troops and envoys. Both the audio and video on American Sniper are stunning. The soundtrack is a Dolby True HD 7.1 mix and the Sigma SSP and amplifiers handled the audio perfectly. The sound was impactful and the Amp2 and Amp5 handle the dynamics of the battle scenes extremely well.

Unbroken

Unbroken

Similarly, the audio and video on Unbroken are exceptional. Unbroken is the story of Louis Zamperini – a World War II bombardier who becomes a P.O.W. after his plane crashes in the South Pacific. The audio is a Dolby 7.1 True HD mix that is immersive and feels very realistic. Once again, the Sigma SSP and amplifiers handled the audio perfectly. The sounds of airplanes and gunfire were powerful and detailed.

Conclusions

THE CLASSÉ SIGMA has Amazing Sound Clarity and Produces Huge Amounts of Power.

Likes
  • Classé optimized the Sigma components for two-channel music playback. The sound quality is extremely good with any material but two-channel playback stands out.
  • The Sigma SSP and Sigma amplifiers are compact in size and easy to handle. They produce a significant amount of power for their compact size.
  • They have a sleek looking design that is free of clutter.
  • There is a touch screen on the front panel of the Sigma SSP, allowing access to the setup menu.
  • There are extensive audio setup options on the Sigma SSP for each source.
Would Like to See
  • The Sigma SSP is not capable of decoding the new immersive audio codecs such as Dolby Atmos or DTS:X. Nor is it capable of passing 4K/UHD video. However, Classé will be offering upgrades.
  • The remote control included with the Sigma SSP does not have many functions. It is not a universal remote capable of controlling other devices.
  • An automatic room correction system is not included. Audio setup of the Sigma SSP will be difficult for many owners and the services of a professional installer will be required.

The Sigma SSP, Amp2 and Amp5 setup performed superbly during the time I had them. The audio quality was first-rate whether used for music or movies. When used for two-channel music, the Sigma SSP and Amp2 sounded detailed and clear. For multi-channel music and movies, the sound was immersive and impactful. If two-channel audio is a high priority in a surround sound processor then this may be the setup for you.

A key factor in enjoying the Sigma SSP is having it installed and setup properly from the start. Owners need to pay close attention when choosing a remote or a control system, setting the speaker configurations and adjusting the parametric equalizer to tame room resonances. I can see this being a daunting task for inexperienced owners and the services of a professional installer will be required. Even for an experienced home theater enthusiast, it might difficult to get the parametric equalizer set properly to produce the best sound possible. This is of course a factor in the purchasing decision. The good news is that Classé products are typically sold by dealers that offer these types of services. Having dealer support will also make the future installation of upgraded audio and video boards convenient for the owner.

I would encourage any home theater enthusiast who is interested in high quality two-channel audio and the ability to customize to give the Sigma SSP, Amp2 and Amp5 an audition.

The post Classé Sigma SSP, Sigma Amp2 and Sigma Amp5 Review appeared first on HomeTheaterHifi.com.

Marantz AV8802 11.2 Surround Sound Processor (SSP) Review

$
0
0
Secrets of Home Theater and High Fidelity - Best Of Awards 2015
The AV8802 is the top-of-the-line 11.2-channel processor / preamp from Marantz. It includes support for Dolby Atmos as well as the latest Dolby Surround upmixer, which can create a 3D surround experience from a stereo or multichannel soundtrack.

Marantz includes the full version of the Audyssey Platinum suite which features Audyssey MultEQ XT32 room correction. The AV8802 also supports Auro-3D via an optional paid software upgrade and it can be hardware upgraded to the AV8802A, which provides full support for HDMI 2.0a, HDCP 2.2, Rec. 2020 color gamut, and 4K HDR video. The AV8802 delivers an immersive theater-like experience and is a major update to the prior flagship Marantz AV8801 processor.

Marantz AV8802 Processor

Highlights

Marantz AV8802 11.2 Surround Sound Processor (SSP)

  • Includes Dolby Atmos and Dolby Surround processing to create an immersive 3D surround experience.
  • Includes the Audyssey Platinum room correction suite (Audyssey MultEQ XT32, Dynamic EQ, Dynamic Volume, Sub EQ HT, and LFC) and Audyssey DSX processing.
  • Auro-3D decoding and the Auro-3D upmixer are available with a paid upgrade.
  • DTS:X immersive surround processing will be offered as a no-charge upgrade.
  • Significantly improved analog output path with improved signal to noise ratio over the AV8801.
  • Support for HDCP 2.2, HDMI 2.0a, HDR, Rec. 2020 color gamut, and 4K 60 Hz video passthrough in 4:4:4 color space is provided via a low cost hardware upgrade (nominal charge for one-way shipping).
Introduction

Marantz has a rich history of building hi-fi products since the 1950’s. Their merger with Denon to create D+M Holdings back in 2002 has resulted in product lines that are both feature rich and faithful to the original musical heritage of the company. The Marantz AV8802 is their latest flagship processor / preamp and it builds upon the feature set and design of the previous flagship AV8801, which I reviewed two years ago.

MARANTZ AV8802 PROCESSOR REVIEW SPECIFICATIONS

Processing

Design:

11.2 Channel Preamp/Processor (SSP)

DACs:

AKM AK4490 32-Bit/192kHz

ADC:

AKM AK5358B

DSP:

Four 32-bit Analog Devices ADSP21487 Processors

Dolby® and DTS® Surround Sound Processing:

Including Dolby Atmos and Dolby Surround

Audyssey DSX®:

Processing

DTS:X:

Processing (No charge future upgrade)

Audyssey Platinum Suite:

(MultEQ XT32, Dynamic EQ, Dynamic Volume, Sub EQ HT, LFC)

Auro-3D Processing:

(Optional $199 upgrade)

Video Upconversion:

(1080p and 4K) for Analog and HDMI Sources

3-Zone:

Operation

Connections

HDMI 2.0 Audio/Video Switching:

8 In (Includes 1 front-panel input), 3 Out

HDMI 2.0a with HDCP 2.2:

Available with AV8802A Upgrade

Component Video Switching:

3 In, 2 Out

Composite Video Switching:

5 in, 2 out (Includes front-panel input)

Digital Audio Inputs:

2 Optical and 2 Coaxial

Analog Audio Inputs:

7 RCA, 1 XLR, 1 Phono, (1) 7.1 Multi-channel

13.2 Channel Pre-outs (RCA and XLR):

Including 2 Independent Subwoofers

USB Ports (2) for Audio Playback:

From USB Storage Devices

Ethernet Port:

For Wired Network Connection

Bluetooth:

Wi-Fi Support

RS-232C, Remote IR (1 in):

Remote Control (1 in, 1 out), and 12 Volt-triggers (2 out)

1/4″:

Headphone Output

2nd Zone (Stereo Audio, HDMI, Composite, Component):

3rd Zone (Stereo Audio)

General Features

4K/60p and 3D Video:

Pass-through

Wi-Fi RemoteApp for Apple:

or Android Devices

HD Radio:

AM/FM Tuner

Remote:

Control

Dimensions w/o Antenna:

7.3″ H x 17.3″ W x 15.3″ D

Dimension with Antenna:

9.8″ H x 17.3″ W x 16.1″ D

Weight:

30 Pounds

MSRP:

$3,999 USD

Company:

Marantz

SECRETS Tags:

Marantz, Marantz AV8802, Surround Processor, Preamplifier, Dolby Atmos, Auro-3D, Dolby Surround, DTS:X

While both processors support 11.2 channels, the AV8802 now includes support for the immersive object-based Dolby Atmos surround technology and Marantz offers a license upgrade to Auro-3D for $199. Marantz will also offer a free upgrade to DTS:X, which is the competing 3D surround format from DTS. I really enjoyed the Auro-3D demonstrations that I had experienced at CEDIA 2014 and CES 2015, and I was looking forward to seeing how the AV8802 handled both formats in my own home theater.

Design

The exterior of the Marantz AV8802 looks identical to that of the AV8801, with the same clean lines and simple control interface. The front panel only has a power button and two large control knobs, one for volume control and the other for input selection. In the center of the AV8802 is the trademark porthole display that shows the current input selection and volume or tuner band and station.

The porthole display is accented with a small blue ring which is illuminated when the AV8802 is on. The center portion of the front panel is made from brushed aluminum, and the left and right side panels are made from curved resin which gives the processor its refined appearance.

Marantz AV8802 Processor

Opening the door at the bottom of the AV8802 reveals a large LED display, which shows the current input source, processing mode, signal type, HDMI status, and zone and channel indicators. To the left of the display are buttons for directly controlling audio processing options such as Audyssey Dynamic EQ and Dynamic Volume. To the right of the display is a standard set of cursor buttons that allow for easy navigation of the AV8802 setup menus as well as its multi-media interface.

Directly under the display are buttons for the various input modes, HDMI output selection, and zone selection. At the bottom of the AV8802 is the headphone jack, the microphone jack for Audyssey, an HDMI port, and a USB port. In the lower-right corner of the AV8802 is an auxiliary input, which provides analog audio inputs and a composite video input. The front panel is otherwise identical to that of the AV8801 with the exception that there is now a separate button for Audyssey DSX which replaces the Zone 4 input button. The AV8802 drops support for a fourth zone.

The rear panel of the AV8802 is quite a bit different from that of the AV8801. The first thing that I noticed was that the four port 10/100 Ethernet hub was no longer included. While I liked this feature, it was definitely a luxury and Marantz needed the space for more goodies. There are fifteen balanced XLR and unbalanced RCA preamp outputs, which include two pairs of height channels, one pair of width channels, and two independent subwoofer channels.

 - Blu-Ray Movie Review

Marantz has included a copper-plated chassis on the AV8802 and the rear panel is silk-screened in black with inputs having a sold black background while outputs have a checkered background. The AV8802 processor supports eight HDMI 2.0 inputs and three HDMI 2.0 outputs, which can be operated simultaneously or independently. This should be more than enough to handle the HDMI devices in a typical home theater with plenty of room for expansion.

Like the AV8801, the AV8802 processor supports a full complement of analog audio and video inputs with three component video inputs, five composite video inputs, one 7.1 multi-channel input, seven sets of stereo analog RCA inputs, and one stereo XLR input. The AV8802 supports four digital audio inputs (2 coaxial and 2 optical). The AV8802 includes a second USB input on the rear panel, which can be used with a USB storage device or your favorite Apple iDevice.

In place of the Ethernet hub, Marantz now includes built-in support for Bluetooth and Wi-Fi networking and two antennas are included which can be mounted to the top rear corners of the processor. This does add about 2.5” to the height of the AV8802 but eliminates the need for the RX-101 Bluetooth receiver. Marantz has also included one Ethernet port so that you can directly connect the AV8802 into your home network.

The remaining connections on the AV8802 back panel allow for antenna connections for the AM/FM/HD tuner. The AV8802 includes one IR input, one set of remote control jacks, and an RS-232 jack, which can be used to control the AV8802 with an external control system. Two 12-Volt DC Triggers are also included, which allows you to turn on another device, such as an external amplifier for multi-zone operations.

Marantz AV8802 Processor

The AV8802 comes with an updated backlit remote.

From a technology perspective, the AV8802 supports Dolby Atmos and speaker configurations up to 7.2.4 with two pair of height channels. The latest Dolby Surround upmixer is included to synthesize an immersive 3D surround experience from a stereo or multichannel soundtrack. The Auro-3D upgrade, which supports an Auro-3D 9.1 channel configuration with dual subwoofer outputs, or an Auro-3D 10.1 channel configuration with a single subwoofer output and a Voice of God (VOG) overhead speaker, can be purchased for $199.

Unlike their competition at Onkyo and Integra, the Marantz engineers chose to incorporate Dolby Atmos and keep the Audyssey Platinum suite in the AV8802 by using four 32-bit Analog Devices ADSP21487 DSP chips to perform all the intensive processing.

With the Audyssey Platinum Suite, the AV8802 gets the latest Audyssey MultEQ XT32 room correction technology and Audyssey Dynamic EQ. Marantz also includes Audyssey Sub EQ HT, which allows the AV8802 to individually adjust the level and delay of both subwoofer outputs.

The AV8802 supports Audyssey Pro, which allows a professional calibrator the ability to measure up to 32 positions in the room and adjust the target sound curves using a graphical interface on a PC. The Audyssey LFC (Low Frequency Containment) in the AV8802 attempts to contain low frequency sounds that can penetrate walls and ceilings and disturb your neighbors.

The AV8802 does drop support for Dolby PLIIz and PLIIx processing, but replaces the formats with the Dolby Surround upmixer. Marantz still includes Audyssey DSX and DTS Neo:X 11.1-channel processing. Audyssey DSX processing starts with 5.1/7.1 channels and a DTS, DTS-ES, or DTS-HD mix and adds the front-wide channels and/or the front-height channels, if present, to deliver up to an 11.1-channel mix.

DTS Neo:X processing starts with stereo, 5.1/6.1/7.1 channels or a DTS, DTS-ES or DTS-HD mix and delivers up to an 11.1-channel mix using both the front-height and front-wide channels. The front-wide channels on the AV8802 are used for the Audyssey DSX and DTS Neo:X formats and for native content encoded with Dolby Atmos. They are not supported with the Dolby Surround upmixer or Auro-3D.

On the video side of things, the AV8802 uses the ADV7850 and ADV8003 video signal processors from Analog Devices. The video processors can handle everything from on-screen display (OSD) overlay, audio return channel (ARC), 3D, and scaling of SD and HD content up to a 4K resolution of 3840×2160 at 24/25/30/50/60 Hz. The AV8802 also supports passthrough of 3D and 4K video signals but in 4:2:0 color space.

If you are wondering what happens with 4K HDR (high dynamic range) content, HDMI 2.0a, and the upcoming UHD Blu-ray format, rest assured that Marantz has you covered. The AV8802 was designed to be upgraded to support the latest HDMI 2.0a standard. If you purchased an AV8802, you can send it to Marantz at your cost and they will upgrade the processor to an AV8802A at no charge and ship it back to you for free.

The AV8802A includes a brand new HDMI board that upgrades all the HDMI ports on the AV8802 to support HDMI 2.0a, HDCP 2.2, HDR, Rec. 2020 color gamut, and 4K 60 Hz passthrough in 4:4:4 color space. That’s quite the upgrade for the price of shipping the AV8802 to a Marantz service center and it sure beats buying a whole new processor. The AV8802A is shipping from Marantz and is now the replacement model of the AV8802 for new purchases of the processor as of fall 2015. This means that the AV8802A will be ready to support the UHD Blu-ray format when it comes to market later this year.

Marantz AV8802 Processor

Marantz improved the design of the AV8802 in several key areas. The HDAM (Hyper Dynamic Amplifier Module) circuitry is upgraded to HDAM-SA2, which Marantz also used to improve the quality of the XLR outputs and lower the overall noise floor.

A Cirrus Logic CS2100 clock generator was used to reduce jitter. The DAC was upgraded to an AKM 4490, which supports native DSD. Marantz also borrowed design concepts for the transformer in the AV8802 from the Marantz PM-11S3 reference stereo integrated amplifier and used four custom Nichicon 10,000μF capacitors in the AV8802 to ensure adequate power reserve.

From an internal perspective, Secrets’ Dr. David Rich offered this analysis on the design of the AV8802:

“The AV8802 is similar in design to the AV8801 in the analog path but a significant improvement has been made to the output circuitry. The output circuitry is now a pair of fully discrete, fully complementary, current mode opamps per channel. The first discrete opamp is wired as a unity gain buffer (10 transistors) and interfaces between the Renesas R2A15220FP LSI and the RCA output jack. The output also goes to the positive output pin of the XLR (pin 2).

The other discrete opamp is wired as a unity gain inverter (14 transistors) and is connected from the output of the non-inverting buffer to the negative output pin of the XLR (pin 3). Current draw for the 26 discrete buffers is +/- 320mA.

The buffers are powered by a +/- 12V DC power supply. The unregulated rails for the discrete output buffers are produced by a separate transformer winding which would have had the function of supplying the power amp in an AVR. For the AVR the transformer winding would be at a much higher voltage.

RCA and XLR output anti-pop on power up muting function is performed by relays.

The signal to noise ratio of the AV8802 is improved over the AV8801 with the output stage redesign. The AV8801 output stage had a gain of two. The AV8802 output stage is now unity gain. The noise from the volume control block, which is the dominate noise source in the analog signal path, is not increased by the output stage in the AV8802. The signal at the output of the DAC, which is before the volume control, is doubled in the AV8802 to compensate for the gain reduction at the output.

The Analog Devices ADSP21487 DSP chips are used in the AV8802. Each ADSP21487 performs 2700 32 bit MLFOPs (Mega Floating-Point Operations per Second). MFLOP is a figure of merit for DSP performance.

Four DSPs are used in used in the AV8802. It is easy to pipeline DSPs in a Surround Sound Processor since different functions are assigned to different DSP. For example, ATMOS decoding could occur in one DSP, room correction in another, bass management in a 3rd and Dolby® TrueHD decode in the 4th.

The ADSP21487 has an on board Asynchronous Sample Rate Converters (8 channels). In the measurements, we see the fundamental has less FM sideband indicative of the reduction of jitter on the HDMI clock. Unfortunately, we see several spurs uncorrelated to the fundamental in these spectra. This may indicate some correlated jitter between the clocks of the 4 DSPs but this is just one of several possible explanations.

The number of DSPs used in the AV8802 and the computational power of each is the result of the addition of ATMOS decoding and the need to process 11.2 channels instead of the standard 7.1.

The DAC is changed from a TI PCM1795 in the AV8801 to the AKM AK4490 in the AV8802. The worst case signal to noise declines from 120dB to 115dB but worst case distortion improves from 0.001% to 0.0006%. The distortion measurements are for a full scale signal at a data rate of 44.1k samples /sec. The AKM AK4490 supports DSD. The schematic shows data signal marked DSD coming from both chips associated with HDMI and USB.

The ADC remains the AKM AK5358B.

A +/- 7V power supply is used for the analog audio circuits outside the output buffer. This supply is derived from its own transformer winding. This supply powers the Renesas R2A15220FP LSI chips (two are required given the additional height channels), SSI opamps and other analog circuitry is at +/-7V. The DACs and ADC power supply is down regulated from the +7V supply. The fine line analog CMOS technology in the DACs and ADC is limited to a 5V supply.

All digital circuits are supplied from a large 5V digital switching power supply. These are locally down regulated by 11 switching DC to DC converters to the sub-blocks of this very complex piece of electronics. All the digital chips dissipate approximately 40 Watts which makes high efficiency switching power supplies mandatory. “

Setup

In order to enjoy 3D surround formats like Dolby Atmos, you need to have at least one pair of height speakers in the listening room with two pair being ideal. The AV8802 supports traditional height speakers that you might find in a Dolby PLIIz configuration, in-ceiling or top speakers, and of course Dolby Atmos enabled speakers which have upward-firing drivers to reflect the sound off of the ceiling and towards the listener. If you aren’t familiar with the basics of Dolby Atmos and Auro-3D, Secrets’ Senior Editor Chris Eberle has provided a great introduction in his article: “Dolby Atmos and Auro-3D: The Technology and The Reality.”

The number of speaker configurations that the AV8802 supports is impressive. Options start with a 5.1.2 speaker configuration and expand to a 7.1.4 speaker configuration, and even a 9.1.2 speaker configuration, which includes front-wide speakers.

Speaker configurations can include up to four subwoofers and unused channels can even be used to bi-amp the front main channels. While all of this sounds overwhelming, Marantz has made the AV8802 a dream to set up by continuing to enhance their on-screen setup assistant. I simply connected the AV8802 to my TV with an HDMI cable, turned on the AV8802 and the TV, and followed the on-screen directions.

The first part of the setup assistant guides you through connecting the AV8802 to the amplifiers and connecting the speakers to the amplifiers. During the connection process, the power amplifiers need to be turned off. The on-screen directions are very clear and cover the basics of proper speaker wiring as well as speaker placement in the listening room.

The setup assistant helps you to select the speakers that are present in your system, and for each speaker selected, it asks you to specify the connection type of RCA or XLR. The setup assistant also shows you where to connect the cable from the amplifier to the AV8802. Marantz has even included a set of speaker labels so that you can mark each cable during the process.

Out of the box, the AV8802 does not come with the Auro-3D upgrade installed, so I initially configured the AV8802 in a Dolby Atmos configuration with a pair of Front-Height speakers and a pair of Top-Middle in-ceiling speakers. Once the speakers are connected and the amplifiers turned on, the AV8802 plays a few musical notes to help identify all the channels.

This is a really elegant touch and allows for finding problems in the speaker configuration before starting room correction. The setup assistant then walks you through the Audyssey room calibration process. I mounted the Audyssey microphone to a tripod, connected the microphone to the AV8802, and started the measurement process. If you don’t have a tripod, Marantz includes a cardboard microphone stand which you can assemble to get the job done.

The Audyssey calibration process verifies the speaker configuration as measured from the primary listening position, and also checks the subwoofer levels. For my setup, I was using a GoldenEar Technology TritonCinema One system, which features a pair of Triton One speakers with built-in subwoofers. I connected the subwoofer outputs of the AV8802 to the LFE inputs on the Triton One speakers.

Since Marantz has included Audyssey SubEQ HT technology, the Audyssey setup process verified that each subwoofer was playing at around 75dB before starting the calibration process. I proceeded with the calibration process, and after completing eight sets of measurements, the AV8802 created the Audyssey room correction filters. The last steps in the process are to disconnect the microphone, and decide on enabling Audyssey Dynamic EQ, which I did for all inputs. I also made one manual change to the Audyssey settings for my configuration, which was to set the Front Left/Right speakers to Large, which is the recommended configuration for the Triton One speakers.

The setup assistant then walks you through making a connection to the internet and verifies the connection by tuning the AV8802 to an internet radio station. The last step in the setup process is to connect each of your source devices to the AV8802. The setup assistant prompts you to select each source and specify the type of video and audio connection. I connected my satellite DVR, an Oppo BDP-105 and my AppleTV to the AV8802 and was finally done with the setup process. The entire process took about half an hour and was very straightforward.

I used the AV8802 for a while just with Dolby Atmos, but was eager to add the Auro-3D functionality. The Auro-3D upgrade costs $199 and can be purchased from the Marantz web site. Once the upgrade is authorized by Marantz, an upgrade message will appear when the AV8802 is powered on, or you can check for a feature update in the “Setup/General /Firmware” menu. Once the Auro-3D feature firmware is downloaded and installed, the setup assistant opens back up, and walks you through the Auro-3D setup.

Marantz AV8802 Processor

On the AV8802, Auro-3D requires two sets of height speakers, specifically Front -Height and Surround -Height speakers. In my case, I already had the Front-Height speakers in my configuration and I was able to use the Top-Middle speakers as Surround-Height speakers for Auro-3D. If you are wondering how I was able to do this, I was using a pair of GoldenEar Technology Invisa HTR 7000 speakers as my Top-Middle speakers.

The driver in the HTR 7000 is angled towards the listening position, so they work beautifully for both Dolby Atmos and as Surround-Height speakers for Auro-3D. In my listening room, the Top-Middle speakers are also placed closer to the sides of the room, so that was another plus. I answered “yes” and went on to the next step.

I should point out that the only height speakers that are common between Auro-3D and Dolby Atmos are the Front-Height speakers. Auro-3D does not support Top-Front, Top-Middle, or Top-Rear speakers and it does not support any Dolby Atmos enabled speakers or Dolby Atmos elevation modules.

All the speakers used for Auro-3D must be direct-radiating speakers, so keep this in mind if you are thinking of building a home theater compatible for both formats. Marantz will be publishing a future firmware upgrade that will allow the Rear Height channels to be shared between all three 3D surround formats. This means that a room can be configured for Front-Height and Rear-Height and the speakers will be compatible with Dolby Atmos, Auro-3D and DTS:X.

The next question asks about the Auro-3D Top Surround or Voice of God (VOG) channel, which is a single optional speaker mounted directly above the listening position. If you want to use the VOG channel on the AV8802, then you give up having independent support for two subwoofers since the VOG channel connects to the Subwoofer 2 pre out. In my case, I didn’t have this channel, so I continued on with the setup.

Marantz AV8802 Processor

The next step is a question about surround back channels. Auro-3D doesn’t use surround back channels, but they will be used when listening to non-Auro-3D formats like Dolby Atmos or Dolby Surround. In my case, I have surround back speakers, so I answered “yes.”

Marantz AV8802 Processor

With the questions out of the way, you’re done setting up Auro-3D, but you still have to go back through Audyssey room correction to re-measure the new configuration. In my case, I could argue that I didn’t really change anything, but the AV8802 will not be able to apply the Audyssey technology unless the room is re-measured. The setup assistant walks you back through the entire Audyssey process. The only difference is that the room layout pictures are updated to reflect the new Auro-3D speaker configuration.

Marantz AV8802 Processor

As my last step in the setup process, I downloaded the Marantz Remote App to my Apple iPad.

In Use

In my listening environment, I used a 7.1.4 GoldenEar Technology Triton One system with a pair of Triton One front speakers with powered subwoofers, a GoldenEar SuperCenter XXL center channel, two pair of GoldenEar Invisa HTR 7000 as surround / top-middle height and rear surrounds, a pair of GoldenEar Aon 2 speakers for surrounds, and a pair of GoldenEar SuperSat 3 as front height speakers.

I used a McIntosh MC8207 amplifier for my main and surround channels. To power the height channels, I used a Rotel RMB-1095 5-channel amp and Rotel RMB-1080 2-channel amp. I only needed four channels of amplification, but having the extra two amps allowed me to independently power two pair of height speakers. This came in handy when listening to just the height speakers by themselves to get a perspective on what the height speakers were actually adding to the listening experience.

I used an Oppo BDP-105 as my primary source device and started using the Marantz AV8802 configured only for Dolby Atmos, with a pair of Front-Height and a pair of Top-Middle speakers. I was already sold on Dolby Atmos after my experience with the Integra DHC-80.6, so I was really looking forward to hearing the combination of the AV8802 and the GoldenEar Triton One system.

American Sniper

American Sniper

Dolby Atmos is all about creating an immersive listening experience. In “American Sniper,” Clint Eastwood tells the story of U.S. Navy SEAL sniper Chris Kyle. The soundtrack offers plenty of opportunity to experience Dolby Atmos. From the deep rumbling bass of tanks, to the sounds of helicopters filling the room, to the frightening decay of sniper fire echoing across the listening room, the AV8802 drew me into the action. As a dust storm approaches, the AV8802 effortlessly filled the room with the smothering sound of whipping sand. The sound track was incredibly engaging and helped to tell the tragic story of this American Hero.

Unbroken

Unbroken

In the opening scenes of “Unbroken,” the AV8802 transformed my listening room into a dramatic air battle with the sounds of attacking aircraft and exploding ordinance. The AV8802 drew me into the amazing life of Olympian Louis Zamperini and his unforgettable story of survival and forgiveness. The AV8802 had no trouble handling the most dynamic of scenes, like the plane crashing into the ocean.

My experience with the AV8802 continued to enforce how much I liked the added dimension of the height channels. While it’s very cool to have overhead effects like rain storms and plane flyovers, the vast majority of the time the benefit comes from the added ambiance that’s been added to the listening room. That ambiance can come from the soundtrack itself, or it could just be the sound of the ocean and the wind which adds to the dramatic effect of being lost at sea for 47 days in “Unbroken.”

I have been fortunate to experience a number of fantastic Dolby Atmos titles on the AV8802, including “Gravity”, “Insurgent”, “The Age of Adaline”, and “Mad Max Fury Road.” In combination with the GoldenEar Triton One system, the AV8802 brought all of these movies to life with an immersive theater-like ambiance, a huge soundstage, natural dialog, and outstanding detail. The AV8802 handled the most dramatic sound effects, dynamic movie scores, and the quietest moments with ease.

While I enjoyed sampling the Dolby Atmos soundtracks, I was also impressed with the Dolby Surround upmixer on the AV8802, which creates a 3D surround experience from existing content. The upmixer created a much more immersive presentation, with improved dynamics and a much greater sense of space and realism. I found this to be the case with some of my favorite movies and television shows.

My impressions of Dolby Atmos and the AV8802 at this point were very clear. I loved the ambiance that the height channels added to my listening room and I was dying to experience Auro-3D. I reconfigured the AV8802 for Auro-3D with my Top-Middle speakers reconfigured as Surround-Height speakers and reran the Audyssey setup.

Listening to the Auro-3D demo disc at this point was simply incredible. Music and movie clips sounded amazing and exceedingly natural, and I immediately found myself wanting more Auro-3D content.

Souvenir

Tchaikovsky “Souvenir”

I picked up a copy of “Souvenir” from TrondheimSolistene (the Trondheim Soloists). The disc is available from Amazon and 2L in Norway. The 9.1 channel Auro-3D presentation is simply stunning. The gorgeous sound of Pyotr Illyich Tchaikovsky’s “Souvenir de Florence” filled the room and transported me to the Selbu Church in Norway to experience this amazing chamber orchestra. The sound of the string instruments was so natural and the height channels provided a lovely ambiance. This is an outstanding demo disc and it also contains soundtracks mixed in 5.1 DTS-HD MA 24/192 kHz, 7.1 DTS-HD MA 24/96 kHz, as well as a 2.0 LPCM track recorded in 24/192 kHz.

The AV8802 sounded great with all types of music and I appreciated how well the Audyssey Dynamic EQ processing worked at all volume levels. Since Dynamic EQ is referenced to the standard level used for mixing movies, the Reference Level Offset must be adjusted in order to properly apply the correct amount of equalization. Options for the Reference Level Offset range from 0 dB for movies, 5 dB for classical music, 10 dB for TV or jazz, and 15 dB for pop and rock music.

I found that Dynamic EQ overly compressed the sound for my tastes unless I properly adjusted the Reference Level Offset. Unfortunately, it was extremely frustrating that there was no quick way to adjust the Reference Level Offset without a lengthy trip through the Audio Setup menu. Marantz offered me two alternatives to make this process simpler. The first was to use the Smart Select function of the remote, which allows for the creation of up to four presets.

Each preset can select input source, volume, sound mode, Audyssey options, and even channel levels and picture adjustments. The second option was a third-party remote app called DeRemote for Denon and Marantz. The $5 app is available for iOS devices and offers extensive control of many Denon and Marantz AV receivers and processors, including control of the Audyssey settings.

The Auro-3D music presentations were definitely a whole new experience. Having the front height channels in the configuration, whether for Auro-3D or Dolby Atmos, also opens up a wide array of processing options including Audyssey DSX, Neo:X as well as the Auro-3D upmixer. The AV8802 will display an on-screen menu, which allows you to scroll through the available sound modes that are available for any given source and speaker configuration, so you can explore the formats to your liking.

Marantz AV8802 Processor

The AV8802 also offers a very useful “Info” display which will show the current sound mode, input signal, Audyssey settings, input signal channels, and the active speakers. This display illustrates the compromises that are made with the speaker configurations between Dolby Atmos and Auro-3D. For example, here is what happens on the AV8802 when a 5.1 Dolby Digital soundtrack is played using the Auro-3D upmixer.

You’ll notice that the Surround Height channels are engaged, but no information is sent to the rear channels. I found myself missing the rear speakers since I was used to experiencing sound coming from behind my listening position. In this case, I preferred the sound of the Dolby Surround upmixer over the Auro-3D upmixer.

Marantz AV8802 Processor

Here’s what happens when a Dolby Atmos movie is played on the AV8802 with an Auro-3D speaker configuration. The surround back channels are engaged, but the surround height channels are not used at all. I found that this compromised the sound effects that were intended to go directly overhead.

Marantz AV8802 Processor

To get around these limitations, I decided to just try manually changing the speaker layout in the “Speakers/Amp Assign” menu. With this menu, it is a simple matter to reselect a different speaker layout, Front Height and Top Middle in my case, and the AV8802 will use the new speaker configuration.

Marantz AV8802 Processor

Unfortunately, there is one big problem with this approach. Look at what happens when I listen to a Dolby Atmos soundtrack after manually changing the speaker configuration from the Auro-3D configuration. The input signal is properly identified as Dolby Atmos, and the channels are all there as expected including Top Middle. The downside is that all the Audyssey processing is gone, which defeats the entire point of having room correction in this case.

Marantz AV8802 Processor

The only solution is to rerun the Audyssey setup one more time in order to correct for the configuration change. If you do happen to change the speaker layout and change your mind, it is a simple matter to just return the speaker configuration to what you started with, and the Audyssey settings will be back to normal. After living with the AV8802 for an extended period of time, I found that I preferred having the AV8802 configured for Dolby Atmos and then I would manually change the configuration if I wanted to explore Auro-3D.

I would like to experience a lot more Auro-3D content, but at this point there is a limited supply. I found the benefits of Dolby Surround and Dolby Atmos far outweighed having the convenience of supporting both formats at the expense of losing channels between the configurations. I would like to see Marantz offer the option of two independent configurations for both formats and maintain two separate Audyssey configurations. When Marantz releases the firmware update to support Front-Height and Rear-Height speakers across Dolby Atmos, Auro-3D and DTS:X, this will become a non-issue as long as you can accommodate that speaker configuration.

From a video perspective, the AV8802 did not display any handshake problems when changing resolutions on my satellite box or when changing inputs to another HDMI source. I used the AV8802 in passthrough mode which is the default configuration. We will talk more about the video performance in the benchmark.

Operationally, the AV8802 is very easy to use and similar to the AV8801. The remote that comes with the AV8802 gets the job done, but doesn’t have the best backlighting. The AV8802 is DLNA 1.5 certified, and supports Apple AirPlay and Bluetooth. The AV8802 also supports a wide array of audio formats including WMA, MP3, WAV, MPEG-4 AAC, FLAC, ALAC, AIFF and DSD. It also supports network streaming services like Pandora, SiriusXM, Spotify and Vtuner. If all that isn’t enough, Marantz offers a very nice remote app for both Apple and Android.

I should also note that Marantz now plays digital sources in Zones 2 and 3 which is a welcome improvement over the AV8801.

On The Bench

My standard benchmark tests were done using two-channel bypass mode so that all digital signal processing was off. On tests using the XLR input, I measured the XLR preamp output of the AV8802. On tests using an RCA input, I measured the RCA preamp output of the AV8802. The source device for both analog and HDMI tests was an Oppo BDP-105. For the analog tests, the input level was 2.2 VRMS into the XLR inputs of the AV8802. The volume was adjusted for 2 VRMS at the XLR outputs of the AV8802.

At 1 kHz into the XLR input, THD+N was 0.001692%. We see a few harmonics throughout the spectrum with the second harmonic at 2 kHz being about 95 dB below 2 VRMS.

Marantz AV8802 Processor

At 1 kHz into the RCA input, THD+N was 0.001629%. We see a few harmonics throughout the spectrum with the second harmonic at 2 kHz being about 95 dB below 2 VRMS. The volume was increased 6 dB to bring the single ended output to 2 VRMS with a 1.1 VRMS signal level applied to the RCA input. The major difference between this and the previous graph is related to the voltage difference. For a power amplifier with the typical gain of 20 (26dB), a 2 VRMS RCA input is required to produce 200 Watts out into 8 ohms. With 2 VRMS balanced as shown in the previous graph, you only have 1 VRMS single ended, which is what runs internally inside the AV8802. In this test, we have 2.07 VRMS single ended with no increase in distortion which is excellent.

For the XLR tests at 2 VRMS, a power amp with a gain 20V/V will have a power output of only 50 Watts, which is why we also supply 5 VRMS tests which will take the power amp to 300 Watts.

Marantz AV8802 Processor

At 10 kHz into the XLR input, THD+N was 0.007151%. The second harmonic at 20 kHz is about 81 dB below 2 VRMS.

Marantz AV8802 Processor

At 10 kHz into the RCA input, THD+N was 0.002672%. Compared to the previous test, we see a decrease in distortion despite the higher 2.07 VRMS single ended. The second harmonic at 20 kHz is about 94 dB below 2 VRMS. The third harmonic at 30 kHz is about 88 dB below 2 VRMS.

Marantz AV8802 Processor

The IMD measurement using the XLR input was 0.000617%. We see noise spurs on either side of the fundamentals and a second harmonic at 14 kHz at 114 dB below 2 VRMS.

Marantz AV8802 Processor

The IMD measurement using the RCA input was 0.001066%. The performance is worse compared to the previous graph due to the higher internal voltage of 2.03 VRMS single ended.

Marantz AV8802 Processor

Here are the results for 19 kHz, 20 kHz combined test frequencies using the XLR input. There is a visible B-A peak at 1 kHz about 91 dB below 2 VRMS. We see distortion spurs throughout the spectrum. The second harmonics at 38 kHz and 40 kHz are about 106 dB below 2 VRMS (6 dBV).

Marantz AV8802 Processor

Here are the results for 19 kHz, 20 kHz combined test frequencies using the RCA input. There is a visible B-A peak at 1 kHz about 89 dB below 2 VRMS. We see distortion spurs throughout the spectrum. The second harmonics at 38 kHz and 40 kHz are about 101 dB below 2 VRMS.

Marantz AV8802 Processor

I measured the frequency response of the AV8802 out to 96 kHz. In analog direct, the response is flat out to about 50 kHz and then we see a very gradual 5 dB roll-off of the high frequencies. The second plot shows what happens in stereo mode with digital signal processing and Audyssey XT32 enabled. The AV8802 downsamples the signal to 48 kHz and applies any room correction filters for each channel. You can clearly see the inverse of the room correction curve in the plot. The signal then abruptly falls off around 24 kHz. This result isn’t surprising since we’ve seen this same downsampling with the AudysseyXT32 implementation in the AV8801.

Marantz AV8802 Processor

Now we take a look at the results using one of the HDMI inputs, fed from test discs played on an OPPO-BDP-105. At 1 kHz, and 16-bit/44.1k sampling rate, THD+N was 0.000927% measured from the XLR preamp output. We see several harmonics in the spectrum with the peak at 2 kHz being about 101 dB below 2 VRMS. For all digital tests, the DAC was driven at -5 dBFS and the volume adjusted for 2 VRMS at the output.

Marantz AV8802 Processor

At 1 kHz, and 16-bit/44.1k sampling rate, THD+N was 0.001287% measured from the RCA preamp output, which is slightly higher than the previous test. We see some distortion spurs as well as harmonics throughout the spectrum with the peak at 2 kHz being about 103 dB below 2 VRMS. As with the analog direct tests, the volume was increased 6 dB to bring the single ended output to 2 VRMS with the same -5 dBFS digital input to the DAC.

The remaining tests are for XLR only.

Marantz AV8802 Processor

At 1 kHz, and 24-bit/96k sampling rate, THD+N was 0.001165%. We see some distortion spurs as well as harmonics throughout the spectrum with the second harmonic at 2 kHz being about 102 dB below 2 VRMS. In the measurements, we can see the benefits of the Asynchronous Sample Rate Converters in the ADSP21487 DSPs. We see the fundamental has less FM sideband indicative of the reduction of jitter on the HDMI clock. Unfortunately, we see several spurs uncorrelated to the fundamental in these spectra.

Marantz AV8802 Processor

At 1 kHz, and 24-bit/96k sampling rate, THD+N was 0.002056% at 5.0 VRMS. We see numerous distortion spurs as well as harmonics throughout the spectrum with the third harmonic at 3 kHz being about 81 dB below 5 VRMS.

Marantz AV8802 Processor

At 1 kHz, and 24-bit/192k sampling rate, THD+N was 0.001435% at 2 VRMS.

Marantz AV8802 Processor

At 10 kHz, and 16-bit/44.1k sampling rate, THD+N was 0.002299% at 2 VRMS. We see some distortion spurs in the spectrum with the second harmonic at 20 kHz being about 90 dB below 2 VRMS.

Marantz AV8802 Processor

At 10 kHz, and 24-bit/96k sampling rate, THD+N was 0.001714% at 2 VRMS. We see numerous distortion spurs in the spectrum with the second harmonic at 20 kHz being about 92 dB below 2 VRMS.

Marantz AV8802 Processor

At 10 kHz, and 24-bit/96k sampling rate, THD+N was 0.003578% at 4.95 VRMS. We see numerous distortion spurs in the spectrum with the second harmonic at 20 kHz being about 78 dB below 5 VRMS.

Marantz AV8802 Processor

At 10 kHz, and 24-bit/192k sampling rate, THD+N was 0.002308% at 2 VRMS. We see numerous distortion spurs in the spectrum with the second harmonic at 20 kHz being about 91 dB below 2 VRMS.

Marantz AV8802 Processor

The IMD measurement through HDMI at 16-bit/44.1k sampling was 0.000515% at 2 VRMS.

Marantz AV8802 Processor

The IMD measurement at 24-bit/96k sampling rate was 0.000385%. We see numerous distortion spurs in the spectrum with the second harmonic at 14 kHz being about 118 db below the 60 Hz tone at 2 VRMS.

Marantz AV8802 Processor

The IMD measurement at 24-bit/96k sampling rate was 0.002144% at 5.19 VRMS. We see similar results with the second harmonic at 14 kHz being about 112 db below the 60 Hz tone at 5 VRMS.

Marantz AV8802 Processor

The IMD measurement at 24-bit/192k sampling rate was 0.002324% at 2 VRMS.

Marantz AV8802 Processor

Here are the results for the 19 kHz, 20 kHz combined test frequencies using the HDMI input with 16-bit/44.1k sampling at 2 VRMS. There is a visible B-A peak at 1 kHz about 89 dB below each test tone at 1 VRMS which is insignificant. For this test, the digital input for both the 19 kHz and 20 kHz test tones is -11 dBFS. This produces two analog tones at 1 VRMS (0 dBV RMS) each. In the time domain, the two 1 VRMS tones have a peak-peak value of a single tone at 2 VRMS.

Marantz AV8802 Processor

Here are the results for the 19 kHz, 20 kHz combined test frequencies using the HDMI input with 24-bit/96k sampling at 2 VRMS. We see distortion spurs throughout the spectrum. There is a visible B-A peak at 1 kHz about 94 dB below each test tone at 1 VRMS which is insignificant. The second harmonics at 38 kHz and 40 kHz are about 98 dB respectively below 1 VRMS.

Marantz AV8802 Processor

Here are the results for the 19 kHz, 20 kHz combined test frequencies using the HDMI input with 24-bit/96k sampling at 5 VRMS. We see higher distortion spurs throughout the spectrum. There is a visible B-A peak at 1 kHz about 80 dB below each test tone at 2.5 VRMS. The second harmonics at 38 kHz and 40 kHz are about 81 dB below each test tone at 2.5 VRMS.

Marantz AV8802 Processor

Here are the results for the 19 kHz, 20 kHz combined test frequencies using the HDMI input with 24-bit/192k sampling at 2 VRMS. As in the previous test, there are distortion spurs throughout the spectrum. The second harmonics at 38 kHz and 40 kHz are about 99 dB below each test tone.

Marantz AV8802 Processor

On the video side of things, the AV8802 passed all our standard tests except for the chroma-multiburst test, which indicated a loss of very fine detail when the internal video processor is used. By default, the video processing is turned off and the AV8802 is in bypass mode, so this will not be an issue for most users.

Conclusions

THE MARANTZ AV8802 is the best 11.2-channel processor that I’ve used this year and is highly recommended.

Likes
  • Immersive 3D surround experience
  • Audyssey Platinum Suite
  • Really easy to use and configure with settings that can be changed per input
  • Dolby Atmos and optional Auro-3D
  • Hardware upgradeable to HDMI 2.0a, HDCP 2.2, Rec. 2020, HDR
  • Includes Apple and Android control app
Would Like To See
  • The ability to store two independent sets of speaker configurations and Audyssey calibrations for Dolby Atmos and Auro-3D
  • More flexibility in sharing channels between Dolby Atmos and Auro-3D
  • A popup menu that allows for the configuration of Audyssey parameters
  • An option in the control app for Apple and Android to modify the Audyssey parameters, especially the Reference Level Offset for Dynamic EQ
  • A remote with a better backlight
  • TEXT

The Marantz AV8802 is a great benchmark for a flagship A/V preamp/processor. It is loaded with state-of-the-art functionality and yet the AV8802 is incredibly easy to use and configure. The inclusion of Dolby Atmos and Dolby Surround is a given in the marketplace today, but the inclusion of an option for Auro-3D and a future upgrade path to DTS:X is reassuring to the consumer, especially at a time when a format war over 3D immersive sound formats seems inevitable. The fact that Marantz has already planned for a hardware upgrade to make the AV8802 ready for HDMI 2.0a and 4K HDR is also an enormous plus, and once again shows a commitment to the consumer.

After experiencing Dolby Atmos and Auro-3D in my own home theater, I can’t imagine having a theater without some type of height channels. The AV8802 easily delivers on the promise of 3D audio formats by creating an immersive, theater-like experience. I applaud Marantz for making the coexistence of formats like Auro-3D and Dolby Atmos possible. They still have room for improvement in managing the Audyssey configurations across the 3D formats, and it might be nice if they offered the ability for more user control over speaker assignments. Some of the issues of speaker compatibility are definitely owned by Dolby and Auro Technologies, but over time, we will hopefully see all these formats happily coexist. I am definitely looking forward to seeing more Auro-3D coming to the marketplace.

If you are looking for a new 11.2 channel processor, the Marantz AV8802 is a sure bet. Its only competition currently comes from other products in the Marantz and Denon product lineup, but that gives the consumer some choice in terms of feature-set and budget. In the future, the folks at Emotiva may give the AV8802 some serious competition if they bring an 11.2 channel version of the XMC-1 to market. For now, the Marantz AV8802 is the best 11.2-channel processor that I’ve used this year and is highly recommended.

The author would like to thank Dr. David Rich for his contributions on this article.

The post Marantz AV8802 11.2 Surround Sound Processor (SSP) Review appeared first on HomeTheaterHifi.com.

Datasat RS20i Surround Sound Processor Review

$
0
0
The Datsat RS20i is a high end surround sound processor that can decode and drive up to sixteen discrete channels of fully balanced audio.

It is very flexible in terms of set up options. The RS20i includes the full version of Dirac Live room correction which is among the best room correction packages on the market. This is the best sounding surround processor I have reviewed to date.

Datasat RS20i Surround Sound Processor

Highlights

Datasat RS20i Surround Sound Processor

  • Includes all the latest surround formats
  • Superior product design
  • Rock-solid audio performance
  • Extreme flexibility – grows with system, upgradeable
  • Direct, RF, Network or Serial Control only (no IR Remote)
  • Logical but complex user interface
Introduction

Datasat was part of DTS® (Digital Theater Systems) from its inception in 1991 up until they spun off as the cinema branch in 2008. This means that Datasat was there with DTS as they developed their audio codecs. And they were part of the team that helped expand their technology to over 30,000 commercial cinemas worldwide.

DATASAT SURROUND SOUND PROCESSOR REVIEW SPECIFICATIONS

Processing:

Design:

16 Channel Preamp/Processor

DACS:

Burr-Brown PCM 4104

DSP:

Analog Devices SHARC (x 9!)

Dirac Live:

Room Correction

EQ:

31 Third-octave Bands plus 3 Full Parametric Bands per Channel, Shelving, High and Low Pass

Dolby and DTS Surround Sound Processing:

DTS:X ready, Auro (13.1) and Dolby Atmos

Video Upconversion:

None (pass-through only)

Connections:

HDMI 2.0:

4 In and 1 Out

Digital Audio Inputs:

2 x DB25 Female (8 channels each), 2 x Toslink, 1 x Coaxial

Analog Audio Inputs:

8 Balanced via Female DB25, 2 x Stereo Single Ended via RCA

Microphone Input:

With Phantom Power for Spectrum Analyzer Function

Digital audio out:

16 Channels Via 2 Male Db25

Analog Audio Out:

16 Channels via 2 Male DB25

Front-panel USB input:

Firmware Updates

Rear Panel USB input:

Music Playback

Ethernet and RS 232:

For Network and Control Functions

Triggers:

Fully Programmable

General Features:

3D:

Video Pass-through

Control:

System Compatibility

VPN Control Via PC:

Mac and Android

Dimensions:

5.6” H  x 17.4” W x 17.63” D

Shipping Weight:

36 Pounds

MSRP:

$ 23,170

Company:

Datasat

SECRETS Tags:

Datasat, Datasat RS20i, Surround Sound, Surround Sound Processor, Processor Reviews

This means that cut their teeth mastering movie soundtracks and building commercial cinema systems. They even won an Oscar in 1996 for scientific achievement!

The Datasat RS20i is a commercial piece at heart. It has been scaled down slightly for domestic use. It’s still a large component but with a clean, modern look. The RS20i’s case is full of high end components. Plus it has the full version of Dirac Live room correction and can handle up to 16 channels. I’ll be putting it through its paces below to see how it stacks up.

Design

This may be the most outrageous home theater product I have ever reviewed. Don’t get me wrong as I mean this in the nicest way possible.

Please allow me to explain: The RS20i is not an inexpensive product, but it is well worth the cost in my opinion.

I have reviewed my share of other high end products before. Some of these products I would classify as overpriced. That’s because they weren’t very innovative or particularly great sounding. They were just expensive mostly because of the name on the faceplate or due to some other perceived value.

Other high end products may have been over designed. The price may have been fair for what was provided but they could be viewed as sloppily designed and inefficient in this regard. Perhaps the design engineer was just throwing expensive components at the problem.

Datasat RS20i Surround Sound Processor

The Datasat RS20i represents a different kind of high end product – the kind where the price is reflective of the quality of the product and especially its performance. The RS20i’s case really is packed with more technology than anything I have had in my system before. But I do not view the RS20i as over-designed. Instead, I see it as “appropriately designed”. That is to say that the Datasat engineers tackled each design decision, each and every part of the circuit with the best circuit design and componentry they could apply at the time.

That’s one reason why the RS20i has 9 DSP chips. You need that many for all the channels but also to maintain pristine and full range sound with the large amount of processing that is going on.

The volume controls are all analog. This is a difficult and costly approach. The volume control is handled this way primarily so you don’t lose bit depth which happens when you have a digital volume control. Lost bit depth reduces the S/N ratio. Very few multi channel products use all analog volume controls and I know of no others that do this with 16 available channels like the Datasat.

The RS20i also has full Dirac Live room optimization/correction built in. Dirac Live is a high end room correction system that not only corrects for proper frequency balance but also manages to correct certain impulse response anomalies. Dirac is typically limited to no more than 8 channels, but the version in the RS20i is a unique version of the system that is made exclusively for Datasat. Not only can this version handle up to 16 channels (24 with the expansion card), but it allows the calibrator to set the crossovers before running the correction routine.

Datasat RS20i Surround Sound Processor

Like many of the other room correction systems on the market, Dirac Live samples the response in numerous seating locations and attempts to optimize the results throughout the room’s seating areas. Measurements are typically taken at nine different positions for this purpose but you could measure more locations in a big theater.

Another excellent feature with Dirac Live is that the calibrator can tune the system to custom target curves. This isn’t normally done to create a unique or “voiced” sound but can be used by the calibrator to tailor the correction more closely to a difficult room. I will talk more about this in the Set Up section of this review, but the basic idea is that you can’t realistically overcome every anomaly in a room while simultaneously ensuring reliable performance of your components by not overdriving your speakers or your amps.

The RS20i allows an unprecedented degree of control beyond that by including a 31-band third-octave graphic EQ along with a three-band parametric EQ on each channel. These EQ’s are “stackable” meaning that they can be applied simultaneously and I used them to effectively tweak the performance in my room.

This unit can also accommodate up to 4 discrete subwoofers, each with their own equalization, delay and impulse correction.

There are 20 memory slots to store settings for various sources, types of material or just for those users who enjoy playing around with the system’s settings and saving their work to be called up on demand. I would never need this many slots myself, but I could see having a few different ones to use for movies, classic movies (with re-eq), music, gaming, stereo and maybe mono sources.

The RS20i is a modular design that can be updated through expansion slots or through replacement of some of the core modules in the case. This is most useful to add new features. One such option is that the HDMI card is an expansion slot and plans are in the works to offer an upgrade card that can handle 4K video with wide color gamuts. The RS20i is also ready for the latest upgrades to include the new audio formats such as Dolby Atmos and DTS:X. I will be getting the Atmos expansion card soon and will do a future update to this review in regards to this enhanced capability.

Let me run through a few more of the incredible things about the RS20i that are further evidence of its superior engineering and that really set it apart from the competition:

  • The all-analog volume controls are balanced and not single-ended.
  • The RS20i can process all 16 channels while maintaining a sampling frequency of 96 kHz at all times.
  • The sample rate continues at 96 kHz even with Dirac Live and the other EQ’s engaged.
  • It is now Dolby Atmos and DTS:X ready.
  • DAC section uses fully balanced OPA 1632 op-amps.
Setup

The RS20i is a commercial product at heart. One example of this is that it uses DB 25 breakout cables for many of its digital inputs and outputs as well as all of its multi channel analog inputs and outputs. Hook ups in this case are by way of break out cables that are supplied with the unit when purchased. These connections are typical for professional mixer boards and similar applications.

In terms of the RS20i, this allows for the massive number of connection possibilities while maintaining the product at a domestically useful form factor (i.e., not too large). In other words, if you tried to have all these connections on a single chassis, the back panel would be humungous. The DB 25 connections allow this high degree of connectivity in a reasonably sized product.

Datasat RS20i Surround Sound Processor

All analog connections over the DB 25 connectors are balanced connections. You can use simple, inexpensive adapters to convert from the provided balanced XLR’s to unbalanced RCA’s which is what I did for some of my older sources but this is not actually necessary as Datasat has available breakout cables with unbalanced RCA’s as well.

This product is designed primarily for use in a high end dedicated theater. One reason I say this is that it lacks an IR remote control interface. Most buyers of the RS20i have advanced control systems in their theaters so the idea of excluding the IR remote does not impact Datasat’s typical customers in any meaningful way.

As mentioned previously, the RS20i has Dirac Live room correction built-in. This is indeed a luxury product and most buyers of an RS20i will have their dealers install and calibrate their systems. In my case, an engineer from Datasat flew in and set up the unit in my theater. This gentleman impressed me greatly with his knowledge of the product, his background in the industry and his ability to quickly calibrate the system to a high level of performance.

The first thing we did was get the product installed in my equipment rack. We connected the sources, amps, and my front projector to begin with. (An aside, the RS20i has but one HDMI output. This meant I had to switch out cables every time I wanted to change from the flat panel to the front projector. I would have used my old HDMI splitter, only I gave it away a few years ago. So I just manually switched out the cables when necessary.)

Datasat RS20i Surround Sound Processor

Once we got it all hooked up, it was time to calibrate the audio via Dirac Live. Take a look at the before image we obtained prior to calibration. This is the main left channel frequency response. I used to have a great sounding room and then we remodeled with new carpeting, new furniture, new window coverings and by refinishing the fireplace. Now I have this massive peak in the low bass. At least the response above about 250 Hz is still excellent.

Datasat RS20i Surround Sound Processor

Now take a look at the after response. Looks good, right? Well not so fast. One concern I have with the default Dirac target curve is that it tries to do too much. What I mean by this is that it tries to do things with the response that aren’t always possible or desired.

One example is that the processor is trying to fill suckouts at 48 Hz and 80 Hz. This is not a good idea as it may potentially overload the subwoofer and/or amplifier. Also, Dirac wants to push my tweeters to be more or less flat out to beyond their native response. I view this as less of a concern because there isn’t much material above 10 – 12 kHz on most soundtracks but it still bothers me that the tweeter could be over driven in this way.

The full Dirac Live version that is included with the RS20i allows the calibrator to adjust the target curve and we would have used this functionality to tweak the target curve in my system. The only problem was, I didn’t have enough time that day for this to happen. Well, lucky for me, I have the ability to run my own test curves and then I used the RS20i’s “stackable” EQ’s to allow the suckout continue somewhat, to let the low bass increase a little bit above flat due to room reinforcement and also to let the tweeters roll off naturally.

It is super cool that you have this kind of flexibility with the RS20i. But also, if you don’t have the testing equipment and skills that I have, you could still accomplish the same things by sending your own target curve to Datasat. They can use your custom target to update the correction remotely, email you back the revised data file and then you can load it into the RS20i memory. This new curve could then be saved in one of the 20 available memory slots. And let me tell you that the good folks at Datasat are quick responders to every request I made – about as quick and precise of any company I have worked with.

A couple of additional points – I do not have a control system in my theater so I connected the RS20i to my home network (via a wireless bridge) and then controlled it using an HTC One phone via a VPN app. The RS20i can be controlled this way but not wirelessly, it needs to be hard wired to your home network (or you might use a wireless bridge as I did).

Datasat RS20i Surround Sound Processor

Lastly, the Datasat RS20i has a large and very useful color touch screen display which is emulated on the VPN app. Whether I used the front panel or the app, I had complete control of the product. I found the organization of the menus to be very logical and the degree of control you have is the most flexible I have ever seen in a consumer product.

In Use

We are in the midst of a new golden age of movies. This goes for movies of all kinds, but especially in terms of movies with significant special effects. The ongoing improvements in film-making technology mean that we have a huge number of movies these days that really let you get away from it all better than ever. I love being able to spend a few hours living a fantasy – it’s good for my psyche!

The incredible performance of the Datasat RS20i facilitated my decadence and during the time I had the RS20i in my system, I enjoyed a skein of great movie releases unlike anything I can recall. Like I said, movies are improving all the time and the RS20i was able to wring out the best in every movie I watched.

This made the RS20i a movie (and Blu-ray) watching machine of the highest caliber. Sure I listened to music through the RS20i, but that was only during short interludes while waiting to fire up the next movie. Day in and day out, the RS20i provided me more overall satisfaction through its performance than any other product I have ever had in my system.

I was able to really kick back and enjoy the material without obsessing about the sound quality. Everything I played through the RS20i simply sounded “right”. You may know what I mean if you have been at this for a time. Even great products may sound thin one day, lush the next, constantly begging for you to tweak the channel levels or make other adjustments. Not the Datasat RS20i. Once it was set up and dialed in, this bad boy simply sounded “right” every time I fired it up. And it was head and shoulders better sounding than any other surround processor I have had in my system.

One thing that stood out was how the sound held up at all volume settings. I’m especially talking about low levels. I think this must be due to the analog volume controls in concert with the low noise floor and low distortion. Any time I came home from the office and fired up the nightly news, I would find myself listening sometimes at the lowest volume settings I have used in a long time. I didn’t think about it much until those times when I would suddenly realize the volume was really low. But I could still hear everything – the voices, the music, the environmental sounds, etc. The low volume clarity was incredible. This ability to sound great at very low volumes was in my view a very telling sign of the amazing quality of the circuit design and execution inherent to the RS20i.

Datasat RS20i Surround Sound Processor

Then there were all the great movies I auditioned. These were mostly Blu-ray discs and I felt quite fortunate to have the Datasat RS20i in the system during a time when there were so many exciting films to enjoy. I’m talking about movies such as Interstellar, Insurgent, Jurassic World, Avengers Age of Ultron, San Andreas and Furious 7 to name a few.

Each one of these movies offered me the opportunity to take a little sojourn from reality and it was the RS20i that made this happen better than any other processor I have reviewed to date.

Secrets Sponsor

One specific example stems from me attending CEDIA Expo in Dallas during the review period. I was a little surprised that more than 90% of the movie demos I saw at the show included a clip or two from Mad Max Fury Road. But maybe I shouldn’t be too surprised by this as it is a great movie, an excellent piece to demo a system and it was one of the few discs that had a Dolby Atmos mix to evaluate.

Mad Max

Mad Max

So I wound up seeing and hearing Mad Max many times on some truly excellent systems. By the end of the show, I felt that I really knew what this movie should sound like. And it was the first movie I watched on my system after getting home from CEDIA. This movie sounded better over my system than any of the times I heard it at CEDIA Expo. I’m chalking that up to the Datasat RS20i.

All the bombastic moments were even more epic than ever. From the war drums, to the massive guitar sounds all the way through to the growling engines, this was definitely something very special. Certainly, the bass was strong and clean. The treble was likewise extended, but the part of it all that stood out for me was the ability of the Datasat to sort all the sounds in the most complex parts and then throttle back when necessary to let the subtler sounds flow uninhibited during the quiet scenes. I was literally blown away by what I heard. The RS20i was the shining star of my system!

Secrets Sponsor

So now I’ve mentioned the greatness of movies in general and I’ve mentioned some specific movies I enjoyed recently but there was one movie that brought it all together during the Datasat RS20i review. Laugh all you want, but the movie that rounded out all my positive impressions was Spy.

Spy

Yes, I am talking about the comedy with Melissa McCarthy in the lead role. I watched this near the end of the evaluation period. It struck me as something where I could hear all the positive qualities of the Datasat RS20i. So like many of the other movies I mentioned above, Spy had excellent action sequences that were immersive with exceptional transients and strong bass response.

But the reason I say that it brought everything together is because this movie kinda sorta had it all. The placement of discrete sound effects was spot on. And I was taken aback by the musical soundtrack by Theodore Shapiro. This movie really did have it all and the Datasat RS20i let it shine.

On the Bench

The Datasat RS20i had the best bench test results I have ever gotten when testing a surround sound processor or receiver. This is a testament to the excellent engineering and substantial execution inherent in the product.

Datasat RS20i Surround Sound Processor

The above plot is the analog frequency response taken from the left channel in to the left channel out. All processing was turned off. The response was very flat from infrasonic to nearly 46 kHz, at which point the filters kicked in.

Datasat RS20i Surround Sound Processor

This plot shows a 1 kHz test signal at 2 volts. The THD+N was incredibly low at 0.0006%.

Datasat RS20i Surround Sound Processor

This is an intermodulation distortion (IMD) test with simultaneous 19 kHz and 20 kHz test signals at 2V output. Also tested on the analog inputs, the sympathetic tone at 1 kHz is reported as the B to A peak, and it was 102 dB below the test signals.

Datasat RS20i Surround Sound Processor

Here is another IMD test with 60 Hz and 7 kHz test signals. Over the analog inputs, the IMD distortion measured just 0.0009% at 2V output.

Datasat RS20i Surround Sound Processor

Now we see a 1 kHz sine wave test via the HDMI inputs at a sampling rate of 16 bit and 44.1 kHz. The THD+N at 2V out was just 0.00085%.

Datasat RS20i Surround Sound Processor

With 19 kHz and 20 kHz digital test signals at 16/44.1, the B-A peak was 102 dB below the test signals.

Datasat RS20i Surround Sound Processor

Under the same testing parameters, the IMD tested at just 0.0007%.

Datasat RS20i Surround Sound Processor

Again through the HDMI input, the THD + N at 1 kHz and 2V out was just 0.00081%. The signal in this case was a 24-bit 96 kHz test signal.

Datasat RS20i Surround Sound Processor

In this 19 kHz, 20 kHz test, the B-A peak at 1 kHz was minus 105 dB below the test signal.

Datasat RS20i Surround Sound Processor

Finally, the IMD test at 24/96 and 2V is 0.0002%!

Conclusions

Datasat RS20i Surround Sound Processor

THE DATASAT RS20I is Quite an Accomplishment.

Likes
  • Excellent measured performance
  • Upgradeable
  • Flexible interface
  • Top tier room correction
  • Pristine and reliable audio performance
Would Like To See
  • Dual HDMI outputs
  • RF Remote capability

The Datasat RS20i is quite an accomplishment as far as I am concerned. The engineering and manufacturing behind this amazing product are of a very high caliber. It comes ready for up to 16 discrete channels and can be easily expanded to 24 channels. It has a modular architecture and can be upgraded for most every new audio or video format that comes along. This makes it about as future-proof as any other product on the planet.

It is equally at home in a moderate system as it is in a super high end custom dedicated theater. And I have come to find out that the Datasat RS20i is apparently the top choice among Hollywood A-List stars when outfitting their personal screening rooms.

But what it all comes down to is the actual performance. Well the RS20i just so happens to have the best bench test results I have ever gotten from a surround processor or receiver. So you know the RS20i gives you great measured performance. And this equates to the best subjective performance I have ever enjoyed. I did not hear one single thing out of the RS20i that I would characterize as a flaw. Quite the contrary, everything I heard from this product was simply correct-sounding and so clean and pure of tone that it was actually hard to believe.

The only negatives I have would be some of the quirky design decisions like no IR remote and the use of DB 25 breakout cables. But to me these ultimately contributed to the endearing nature of this product that just marches brilliantly to the beat of a different drummer.

My final opinion is that I now hold the Datasat RS20i at the pinnacle of surround processors. It will stay there until something else come along and knocks it off its perch. I’ll let you know when that happens, but for now the Datasat RS20i is the best surround processor I have ever heard. Period. Case closed.

The post Datasat RS20i Surround Sound Processor Review appeared first on HomeTheaterHifi.com.


Yamaha Aventage RX-A3050 Receiver Review

$
0
0
The RX-A3050 is Yamaha’s flagship Audio-Video Receiver (AVR), boasting no fewer than nine power amplifier channels, 11.2 output capability and every bell and whistle known to man. This receiver has every improvement and feature one could wish for in a state-of-the-art product.

Yamaha Aventage RX-A3050 Receiver

Highlights

Yamaha Aventage RX-A3050 Receiver

  • Powerful amplifier sections (150 wpc)
  • Dolby Atmos & DTS:X are included
  • Yamaha YPAO room correction
  • DTS-HD Master Audio capable
  • Shielded chassis construction
  • 4K video capable (native or up-converted)
  • Audio quality near that of high-end separates
Introduction

Yamaha, with their “Aventage” line, has an advantage (no pun intended) over their competitors. In addition to being a global competitor in consumer electronics, they have also been a global leader in the manufacture of musical instruments since 1887 when Torakusu Yamaha built his first reed organ. Having the experience of actually making concert quality pianos, string instruments, woodwinds, brass, and drums, one would think that Yamaha would know how to voice their consumer electronics to make them sound lifelike.

In 1973, Yamaha began producing its first commercial stereo amplifiers, and the audio reproduction line has steadily grown, culminating in the current Aventage RX-A3050, intended for the home theater market.

I have listened to and owned a variety of audio-video receivers including models from Sony, Denon, Onkyo, Harmon-Kardon and of course, Yamaha. Each has its own specific strengths and weaknesses. But the Yamaha products that I’ve owned through the years have consistently surprised me with their sound quality.

Yamaha, to their credit, is honest enough to provide power ratings from 20 to 20KHz with two channels driven (150 W @ 8 ohms with 0.06% THD). Many AVR makers are not nearly so honest. Of course, the power rating would fail to meet Yamaha’s claim with all nine channels simultaneously driven, but that specification is probably not relevant. Aside from brief transients like explosions, you’ll never hear output from all nine channels.

Yamaha Aventage RX-A3050 Receiver

The Yamaha slogan is “Sharing Passion and Performance.” How well have they met that slogan with this product? Stay tuned.

YAMAHA RECEIVER REVIEW SPECIFICATIONS
Amplifier Channels:

9.2

Rated Output Power:

165w @ 8 Ohms (2 Channels Driven @ 1 Khz)

Rated Output Power:

150w @ 8 Ohms (2 Channels Driven @ 20-20 Khz)

Maximum Output Power:

230w @ 8 Ohms (1 Channel Driven @ 1 Khz – Jeita)

Dynamic Output Power Per Channel:

175/220/295/410w @ 8/6/4/2 Ohms

Front Inputs:

Hdmi/usb/analog Stereo/composite Video

HDMI In/out:

7/2 (v2.0a W/hdcp 2.2)

Optical Digital Audio In/out:

3/0

Coaxial Audio In/out:

3/0

Analog Audio In/out:

9 (front = 1)/0

Phono Input:

1

Component Video In/out:

3/1

Composite Video In/out:

5 (front = 1)/1

Preamplifier Out:

11.2 Channels

Headphone Output:

1

AM/FM Tuner:

Yes

On-screen Display:

Graphical User Interface

Scene:

Scene Plus (12 Sets)

App Control:

iOS/Android

Web Browser Control:

Yes

Remote Control Unit:

Included & Preprogrammed

Zone 2 Audio Output:

Pre-out & HDMI

Zone 3 Audio Output:

Pre-out

Zone 4 Audio Output:

HDMI

Powered Zone:

2/3

Zone Video Output:

HDMI/Component/Composite

Zone HDMI:

Yes (advanced Hdmi Zone Switching)

Zone B Output:

HDMI

Zone Gui:

Yes

RS-232c Interface:

Yes

+12 Volt Trigger Output:

2

Remote IR In/out:

1/1

Party Mode:

Yes

Standby Power Consumption:

≤ 0.1 Watt

Auto Power Standby:

Yes

Eco Mode:

Yes

Size:

10.1″ H x 17.1″ W x 18.6″ D

Weight:

39.9 Pounds

MSRP:

$1,999.95 With Free Shipping From usa.yamaha.com

Company:

Yamaha

SECRETS Tags:

Yamaha, Aventage, RX-A3050, RX-A3050 Receiver, Receiver Review

Surround processing modes of the Yamaha include:

Cinema DSP (HD3) – Digital Signal Processing (DSP) is common on all current AVRs. Dolby Pro Logic, Dolby Digital, and DTS were originally designed for use in very large theaters. The Yamaha Cinema DSP algorithms modify the processing to provide the audio experience of movie theatre sound in the much smaller listening room of your own home.
DSP effects (23) – Yamaha has taken the trouble to actually measure the sonics of numerous venues. The DSP effects attempt to recreate the sonics of these venues in your listening room. By selecting a DSP setting, you can hear your music in a stadium, an auditorium, a cathedral, or a small club.
CDialogue Level Adjustment – This feature allows the listener to compensate on the fly for center dialogue channels that have been recorded at too loud or too soft a level for the ambient movie sound.
Virtual Presence Speaker – To get the best effect from the DSP effects modes, a second pair of front speakers are normally required. These effects speakers are located above and behind the right and left front speakers. Many don’t have the space or the equipment for additional physical speakers, so Yamaha offers the “virtual presence speaker” setting to create the sonic impression of having these additional speakers, even when none exist.
Virtual Surround Back Speaker – Many listeners don’t have the luxury of being able to place speakers behind the listening position due to walls or furniture. With the virtual-surround back speaker feature, Yamaha uses DSP to synthesize the effects of having rear speakers behind the listeners even when no physical speakers are present.
Dialogue Lift (with no presence speaker required) – This technology uses DSP to make the center dialogue channel appear to come from a higher elevation than the actual center speaker. This is useful for those who must place their center speaker significantly below the screen. As claimed, this feature works with only a three-speaker front array.
Silent Cinema – DTS and Dolby Surround audio is reproduced with the feeling of listening to a full surround system, but on headphones. This can be used for late-night listening without disturbing household members or neighbors.
Virtual Cinema Front – For those who can only use three front speakers, this “virtual cinema front” technology uses DSP to create a surround sound field using only the front three speakers.
Dolby Atmos (5.1.4-ch or 7.1.4-ch with external amp) – To recreate height effects, the Dolby Atmos system uses up to four in-ceiling speakers. This can also be synthesized if the physical speakers are not present.
Dolby True HD – This allows the playback of lossless audio using the Dolby codec.
Dolby Digital Plus – DD+ or E-AC-3, as it is also known, is a method of playback for multi-channel digital audio.
Dolby Pro Logic IIx – This can take two-channel stereo, Dolby Surround, or Dolby 5.1 material and up-convert it to 6.1 or 7.1 surround sound.
DTS:X – Interprets metadata from properly encoded media to add spaciousness to the soundscape, regardless of how many or how few speakers are available.
DTS-HD Master Audio – This is a codec that allows lossless reproduction of soundtracks via Blu-ray discs.

Audio features of the Yamaha include:

Pure Direct (with video on) – This mode bypasses all the DSP circuitry and just forwards whatever audio is being fed to the receiver.
Compressed Music Enhancer (helpful with MP3 material) – This feature expands the dynamics of lossy codecs such as the dreadful MP3.
High-Resolution Music Enhancer – This feature is intended to improve the sound of FLAC encoded music files.
YPAO Multi-Point Measurement (R.S.C., 3D and angle measurement) – YPAO is “Yamaha Parametric Acoustic Optimizer.” R.S.C. stands for “Reflected Sound Control.” This feature allows one to use the supplied microphone to assess the sound of the listening room (and from multiple locations & heights, if desired). The DSP then removes the room echoes from the audio signals, allowing the listener to hear the original acoustic of the recording rather than having the sound of the listening room superimposed.
YPAO Volume – This allows more or less implementation of the YPAO corrections.
Adaptive Dynamic Range Control – This allows activation or defeat of low-volume listening dynamic range correction.
A.R.T. Wedge – ART, in this context, stands for anti-resonance technology. This is intended (through chassis design and a fifth foot on the bottom of the receiver) to minimize audio contamination by external vibrations.
Bi-Amp audio capability (put those unused amps to use!) – This allows otherwise-unused receiver channels to bi-amplify speakers fitted with bi-wire terminals.
Audio delay from 0 to 500 milliseconds – This allows proper synchronization of audio with video.
192/24 DACs for all channels (ESS Technology ES9016S SABRE32™ Ultra DAC + ESS Technology ES9006A SABRE™ Premier Audio DAC) – This ensures that if higher-resolution audio is available on future movie soundtracks, that the receiver can still decode the soundtrack.

Video features of the Yamaha include:

4K Ultra HD Pass-through and upscaling via 4K 60p 4:4:4 – This allows current 1080p video to be upscaled to 4K if your television or projector can handle it. It also assures that if 4K home video discs become common, the receiver can play them.
HDMI 3D pass-through – This allows movies encoded with 3-D content to play properly.
HDMI Audio Return Channel – (high definition multimedia interface) – HDMI 2.0a enables a device to use a single HDMI cable, to send audio data and video data to an A/V receiver without the need for any separate audio connection.
HDMI upscaling – via both analog to HDMI and HDMI to HDMI Deep Color/x.v.Color/24Hz Refresh Rate /Auto Lip-Sync

Connectivity features of the Yamaha include:

Yamaha MusiCast (for zones 2-4) – Allows the use of MusiCast wireless speakers in other rooms to be driven by the receiver.
Wi-Fi with Yamaha’s Wireless Direct – This provides an alternate way to wirelessly connect your receiver with your smartphone or tablet. Being a peer-to-peer connection, Wireless Direct doesn’t require an existing wi-fi home network.
Apple AirPlay – is a proprietary protocol developed by Apple that allows wireless audio/video/screen/photo streaming between devices.
AAC Bluetooth – AptX Audio Coding is a method of streaming various audio formats (MP3, AAC, WMA, etc.) via Bluetooth connection.
DLNA via Ethernet – “Digital Living Network Alliance” is a protocol that allows one to stream audio and video over a local network (usually Ethernet-connected).

Design and Setup

The RX-A3050 is ruggedly built and cleanly designed. The front cover flips down to reveal the microphone input and a variety of convenience inputs for things like video games and USB media. Additional controls can also be accessed from the front panel.

Yamaha Aventage RX-A3050 Receiver

There are a total of nine built-in power amplifiers with volume-controlled preamp-outputs for an additional two. Inputs and outputs are clearly labeled, and given enough space on the panels that even gorilla-pawed users (like myself) can successfully make connections without barking knuckles.

The only convenience that I wanted, and didn’t have, was a built-in switchable set of LED lamps that would light up the rear panel when trying to make connections. Having to read tiny print upside down and in the dark can be irritating.

The instructions are clear, and there is an included “quick setup guide” that will assist in initial setup. What does it all mean? Basically you can spend as little or as much time as you want setting up the receiver and still get good sound!

Yamaha Aventage RX-A3050 Receiver

The remote control is conveniently laid out with most features readily available. The Yamaha control app for smart phones and tablets mimics most of the remote’s functions. The remote can also be programmed to control other devices such as DVD/Blu-Ray players or displays. Although the remote is plastic, it seems well balanced and the buttons are large enough to avoid confusion during use.

Yamaha Aventage RX-A3050 Receiver

Yamaha Aventage RX-A3050 Receiver

Calibrating the receiver to your room is as easy as placing the microphone at your listening position and plugging the mic into the receiver’s front panel. A stand is included in the box but I chose to use a camera tripod instead to place the mic at ear level. The on-screen display then automatically asks to run the Yamaha Parametric Room Acoustic Optimizer (YPAO). The software plays a series of tones (runs spouses & pets from the room), then adjusts frequency response, speaker distance and speaker phase for the best sound. This process also homogenizes disparate sounding speakers for a more uniform sound field. And may I say that the process WORKS! This technology has definitely benefitted from its multiple generations of improvement. What comes out now is far, far better than what room correction software used to be capable of.

Yamaha Aventage RX-A3050 Receiver

In Use

Now the question that audiophiles want an answer to is “how does it sound?” AV receivers have long been the red-haired stepchildren of high-end audio, and for good reason. They have yet to equal the sound quality of a separate preamplifier and amplifier combination.

Most AV receivers have little trouble powering sensitive easy-to-drive loudspeakers. But when asked to pair with low impedance speakers or those with complex crossovers, low to mid-priced AV receivers have been not merely inadequate, but woefully so. The RX-A3050 however will drive low impedance and difficult speakers just fine and without strain. I’ll speak later of the receiver’s performance in stereo only.

For movie soundtracks, there is absolutely nothing to complain about with the big Yamaha. It provides an immersive sound stage with clean steering as sound sources sweep the room. And it does so with no discontinuities between speakers! This is highly valuable since my fronts, sides, heights, and rears are differently sized, and from different manufacturers. Without YPAO, the speakers sing like an out of tune and unrehearsed choir. With YPAO, they sound alike and indistinguishable from one another. A neat piece of work, that!

Movies used to assess the receiver included:

John Carter

John Carter

I selected this movie due to its heavy use of computer-generated imagery (CGI) effects and dialogue presented at low volume levels. Despite the large dynamic range between the softer and louder bits like explosions, the receiver separated out the details nicely, allowing the dialogue to remain understandable despite background noise.

Avatar

Avatar

In keeping with the CGI animation theme, I selected Avatar. Here, I was looking for edge artifacts (as I’ve seen on some projectors) due to the rapid motion of on-screen objects. The video was as clean as I’ve seen for this movie and even better than what I’ve seen on some commercial digital projectors.

Jurassic World

Jurassic World

To check out the subterranean bass chops of the RX-A3050, I went straight to my Blu-Ray copy of Jurassic World. When the dinos mix it up at the mall, the Yamaha let the torso-shaking loose! The RX-A3050 obviously does not edit the bass effects channel. When there’s bass to be had, the Yamaha provides it in spades!

For music, the conclusion is less clear. The RX-A3050 does present a wide and deep sound stage with two channel material. It can sound very, very good, but compared to my usual analog-only components, the Yamaha still lacks the last bit of verisimilitude that separates “listening to a stereo” from “listening to music.” Why is this? Is it the DAC? Is it the multitude of digital circuits leaking digital noise into the analog signal path? Is it that the power amplifiers of AVRs are still not as muscular as those of “stereo only” gear? Could it be a combination of these things?

I don’t know the answer. But I do know that my analog preamplifier and two mono block power amplifiers are still better at making music sound like a live performance. But I must also say that the Yamaha RX-A3050 sounds an order of magnitude better than any previous AVR that I’ve heard. If I didn’t have the analog preamplifier and mono block power amplifiers that I’ve got, I could be perfectly happy with the Yamaha for both stereo and movies.

Music that I used to evaluate the Yamaha included:

Blood, Sweat, and Tears debut album (remastered in SACD):

Blood, Sweat, and Tears

Blood, Sweat, and Tears “Blood, Sweat, and Tears”

This is one of my favorite albums of all time, and the SACD surround version added quite a bit of enjoyment to some of the tracks. The high-resolution SACD-Stereo, however, is my favorite and seemed to provide the cleanliness and ease of my old vinyl record with even better dynamic range.

On this album, the RX-A3050 throws a wide and deep sound stage, but the midrange lacks the “you are there” impression that my preamp/amplifiers combination gives. Don’t get me wrong – if I lacked the high-end stereo rig, I’d think that the Yamaha was heaven. It’s only in comparison that I prefer the other gear, and even then only by a slight margin.

The HarmOrgan SACD from 2L11 audio of Norway:

HarmOrgan

Iver Kleive and Sigmund Groven“HarmOrgan”

The 5.1 SACD soundtrack gives a real feeling for the size and shape of the cathedral where the recording was made. The RX-A3050’s surround rendition of this disc is far superior to the stereo presentation (even in high-resolution stereo). The size of the cathedral is apparent from the Yamaha’s presentation, and if you close your eyes, you can forget that you’re listening at home. Listening to this disc through my stereo gear fails to provide an equivalent experience.

Conclusions

Yamaha Aventage RX-A3050 Receiver

THE YAMAHA RX-A3050 is a fair priced receiver, also highly future-proof.

Likes
  • Simple setup makes installation a pleasure
  • The YPAO room correction is effective and unobtrusive
  • The soundstage is wide and deep for stereo listening
  • The muscular amplifiers don’t give up with difficult speakers
  • For movie soundtracks, I’ve heard nothing better
Would Like To See
  • Wireless connectivity for all surround speakers

Compared to other equipment that I’ve had the pleasure to audition in this price range, I find the Yamaha RX-A3050 to be not only fairly priced, but also highly future-proof. This makes the investment an easier choice since it won’t have to be replaced as soon as a less expensive model without the advanced features of this receiver.

So for cinema sound, I can find no flaw whatsoever in the Yamaha. It does everything one could hope for and more. It is the best cinema sound receiver that I’ve heard to date. So ultimately, I’d have to say that if 50% or more of your listening is for movie soundtracks, you just can’t do any better than the Yamaha RX-A3050. If, on the other hand, your primary goal is the best possible stereo sound, other equipment may better serve you, although probably at a far higher cost.

That said, the continuous improvement in Yamaha’s AVR sound makes me wonder how much better the Yamaha A-S series (stereo) integrated amplifier line has become. If there is a corresponding improvement in these products, then they may be one of the most underrated lines on the market…

Background Information

Gear used with the Yamaha RX-A3050 for this review:

Axiom M-80 R&L front speakers (run both full-range and small with c/o @ 60 Hz.)
Axiom VP-100 center channel speaker (run small & c/o @ 100 Hz.)
Infinity Primus P152 side surrounds (run small & c/o @ 100 Hz.)
Klipsch KB-15 rear surrounds (run small & c/o @ 100 Hz.)
Roland Edirol MA-100 self-powered height speakers (run small & c/o @ 100 Hz.)
(2) PowerSound Audio XV-15 self-powered subwoofers run in stereo configuration
Yamaha MusiCast wireless zone 2 / 3 speakers
Room treatments by ATS

Comparison electronic equipment for stereo listening:

Emotiva XSP-1, generation two preamplifier
Emotiva XPA-1L, generation one mono block amplifiers
Yaqin VK-2100 tube hybrid integrated amplifier

The post Yamaha Aventage RX-A3050 Receiver Review appeared first on HomeTheaterHifi.com.

Theta Casablanca IV Surround Sound Processor Review

$
0
0
Announcement: Benchmark Analytics by John Johnson
The Casablanca platform dates back to 1996. Designed with an upgradeable architecture, Theta has offered continuous hardware and software upgrades to stay current with the demands of the A/V technologies.

Version IV brings with it an improved jitter reduction block, an updated HDMI card that allows 4k video to pass through, and a big increase in DSP horsepower, required to feed the compute hungry algorithms of Dirac Live, the RoomEQ technology Theta has adopted. Add to this Theta’s excellent build quality, and you have the makings of a reference caliber product.

I had high expectations for the sonic performance of the CB IV. How did it perform? Read on.

Theta Casablanca IV Surround Sound Processor Review

Theta continues to deliver on the promise of “no Casablanca left behind” by offering an upgrade path that goes all the way back to the first version, which was launched in 1996! This level of commitment is rare in the industry.

Version IV brings with it Dirac Live RoomEQ technology, which operates at an industry leading 96kHz. The processor requires some patience and know-how to setup. Once it’s dialed in, the sonic presentation is absolutely delightful. Highly recommended!

Highlights

Theta Casablanca IV Surround Sound Processor

  • Upgradeable architecture
  • Continued investment in the Casablanca platform
  • State of the art Dirac Live RoomEQ technology operating at an industry leading 96kHz
  • Excellent build and sound quality
  • Designed and built in Montebello, California
Introduction

In a 2002 article in the The Audio Critic, Dr. Floyd Toole, then Vice President, Engineering for Harman Industries wrote: “The room is the final audio component. Rooms audibly modify many aspects of sound quality. Dr. Toole went on to say, “Accurate high-resolution in-room measurements along with acoustical corrections and equalization are necessary to deliver truly good sound to listener’s ears in homes and in studios.” [Theta Casablanca IV user manual]

THETA SURROUND SOUND PROCESSOR REVIEW SPECIFICATIONS

Processing

Design:

12-Channel Preamp/Processor

DACs:

Full Balanced DACs; 4 Options

Xtreme D-3:

6-Channels, 24-bit, 192kHz, TI PCM-1792A

Xtreme D-2:

4-Channels, 24-bit, 96kHz, TI PCM-1704

Superior II:

3-Channels, 24-bit, 96kHz

Premium:

4-Channels, 24-bit, 96kHz

ADC:

20-bit, 48 kHz, Delta-Sigma

RoomEQ:

Dirac Live Operating @ 96 kHz

Dolby and DTS:

Surround Sound Processing

A/V Connections

HDMI:

4 1.4a Compatible Inputs; 1 Output

Digital Audio Inputs:

4 Coaxial (RCA), 4 Optical (Toslink), 1 AES/EBU (XLR), 1 USB for Dirac Live

Analog Audio Inputs:

6 Stereo Pairs (RCA)

Digital Outputs:

1 Coaxial (RCA); 1 Optical Toslink; Optional 12-Channel AES/EBU (XLR)

Analog Outputs:

2 Stereo Pairs (RCA); Up-to 12 Balanced Channels Based on DAC Configuration (XLR)

Control

RS-232:

1 DB9 and 1 RJ45 Connector (Rear Panel); Support for Multiple Baud Rates (4,800, 9,600, 19,200, 38,400, 57,600, 115,200)

IR receiver:

Front Panel IR Window; 3.5mm Stereo Phone Jack (Rear Panel)

Triggers:

4 12VDC Triggers (Rear Panel); 3.5mm Mono Phone Jacks

General Features

4k and 3D:

Video Pass-through

Remote:

Control

Dimensions:

7.5”H x 19”W x 16”D

Weight:

43 Pounds

MSRP:

$23,115 (8 Channel Configuration with 1 Xtreme D-2 and 1 Premium DAC Card); +$1995 for Optional 12-channel AES/EBU Digital Output Card; Individual DAC Cards: $4,995 for Xtreme D2/D3, $3,125 for Superior II, $1,875 for Premium

Company:

Theta

SECRETS Tags:

Theta, Theta Casablanca IV, Surround Sound Processors, SSP, Preamplifier

Last year during CES, I made a stop by the Theta suite to check out the Casablanca IV. A demo was on as I walked in; I sat and listened. Most tradeshow demonstrations are lackluster, in large part due to the less than ideal room conditions. This was not the case here; the bass in particular stood out. Two subwoofers, flanking the side of the listening area, were producing taut and impactful bass, and they blended seamlessly with the other loudspeakers.

A key ingredient in this mix was Dirac Live, the RoomEQ system that Theta had adopted for the Casablanca platform. I had heard of and read about Dirac Live before, but this was my first time listening to a system utilizing this technology. The processor could support up to 12 EQed channels with Dirac Live algorithms operating at an industry leading 96kHz. The next thought was obvious … get a Casablanca IV to review.

Design

A quick glance at a CB IV might give the impression that not much has changed from the CB III HD. The exterior changes are indeed small, although they are noticeable. Adorned on the faceplate is the updated version of the Casablanca, IV in this case; accompanying this change are backlit logos of Dirac Live and Jitter Jail II on the window panel.

Theta Casablanca IV Surround Sound Processor Review
PR3 post-processing Card

The biggest changes lie inside. At the heart of the CB IV is the PR3 post-processing card. The PR3 uses a mix of DSPs and FPGAs for audio processing, and it significantly ups the compute power of the CB IV. The compute hungry algorithms of Dirac Live, operating at 96kHz, consume much of the processing power. Algorithms to decode and process a plethora of audio formats consume additional processing cycles.

A USB port is provided to interface with the Dirac Live calibration software that runs on a PC. The high communication speed supported by this interface provided for quick communication between the PC and the CB IV; RoomEQ systems that rely on RS232 communication are typically sluggish in comparison. The input stage of the PR3 also contains Theta’s Jitter Jail II circuit block; this is Theta’s updated proprietary jitter reduction mechanism.

Theta Casablanca IV Surround Sound Processor Review

Theta has provisioned for two filter banks for Dirac Live. Presently, only one bank is active. One can assume that the second filter bank will be activated through a FW update.

The HDMI card includes four inputs that are v1.4a compliant; one HDMI output is offered. A product in this class should offer at least six inputs and two outputs. Like its predecessor, the CB III HD, the CB IV offers no video processing; the audio is stripped off from the HDMI feed and processed, and the video is passed through. 4k and 3D video formats pass through just fine.

Most of the time, I observed no handshake issues with various sources connected to the CB IV over HDMI. There were a few occasions where my projector, a JVC DLA-RS4910, locked up and required a power cycle. This projector’s HDMI receiver is somewhat temperamental, and I am inclined to fault the JVC for these lockups.

Theta Casablanca IV Surround Sound Processor Review

The Premium, Superior and Xtreme D-2 DAC cards remain in the mix. ATI did announce the Xtreme D-3 DAC earlier this year as future upgrade option for the CB; this card should be shipping by the time this review gets published. The Xtreme-D-3 will utilize TI’s PCM1792; this is the same part used on Theta’s standalone DAC offering, the Generation VIII Series 3.

Setup

The CB IV does not include any video processing and there is no provision for an on-screen display interface either. Setup must be done on the unit aided by the VFD. One can navigate the menu using the remote or via buttons on the front panel, which I found to be both easier and faster. Referencing the manual was a common occurrence for me during the first few weeks; thereafter, I became quite familiar with the menu structure and was able to navigate the menu system with relative ease.

Secrets Sponsor

In terms of loudspeaker configuration, the CB is unique. Each input can have an independent configuration. Additionally, Dirac Live and Jitter Jail can be enabled/disabled independently for each input. With this setup flexibility comes the potential of long setup time including many button presses. Theta has certainly given this part good thought. To ease this process, macros are offered to copy settings from one input to another set of inputs. In my case, I used the same loudspeaker configuration for all the inputs. Once I completed setting up one input, it was just a matter of copying its settings to the remaining inputs through the “copy” macro.

Theta provides a fairly comprehensive RS232 protocol for controlling the Casablanca. Baud rates up to 115,200 are supported. The current published manual is Rev 1.01, which was last updated for the CB III HD. I was told that the command set is being updated for the CB IV. There are a few commands that I would like to see get added. One request is for a command to present the source in its native format; in effect, the surround mode processing would get disabled and the same number of channels as the source signal would get output.

Another command would allow one to switch between the two Dirac Live filter banks that Theta has provisioned for; at present only one filter bank is supported, so this will hopefully come with the FW update that enables this capability. A couple of nice to have commands would allow one to toggle Dirac Live and Jitter Jail II, which will be useful for a quick A/B comparison; this can be, however, be done presently on the CB IV a couple of different ways with some effort.

iRule is the control system that I use, and I configured it to control the CB IV. The serial connection was made via the Global Cache GC-100. Designing a page with the controls I wanted to use, including some macros, did not take much time. When in use, I did run into some reliability issues; the GC-100 would occasionally freeze up, requiring a power cycle. Note that I have used the GC-100 with another processor before without any issue.

iRule “Feedbacks” for the Casablanca

iRule “Feedbacks” for the Casablanca

Conversations with iRule and Global Cache ensued; iRule mentioned that they had heard of similar cases with some other HW and they suggested that I insert Global Cache’s iTach IP2SL, an updated model, into the mix. I followed their suggestion and the lockups disappeared; I had reliable control of the CB IV over RS 232!

“Feedbacks” are a mechanism in iRule to read and display the value or state of a variable. The left image shows the set of variables that can be queried via iRule; once read, iRule formats the result for display in an iRule panel. With the absence of an OSD interface on the CB, “Feedbacks” provide a convenient way of monitoring the state of the CB. Through this interface, I found an anomaly with the reported sample rate; quite often, the value that iRule displayed did not match the sample rate of the incoming signal.

At first, I thought this to be an issue with iRule. I then looked at the sample rate reported on the VFD; it too was incorrect at times, and iRule and the CB did not always agree. There is no audible consequence here as the CB IV processes all signals at 96kHz; it will be nice if the correct incoming sample rate gets reported.

Theta Casablanca IV Surround Sound Processor Review
iRule panel for the CB IV

Another feedback provided via iRule is called “Sound Field”. At times, this displays the audio format of the incoming signal; at other times, it displays the processing mode being applied in the CB IV. I could not find a way to read the format of the input signal separately from the processing mode that was applied to it. It would be nice if Theta provided separate variables to decouple the audio format from the processing mode.

This feedback also alerted me to behavior of processing mode’s persistence; the CB would reset the synthesized processing mode to the default value any time it re-locked the signal. This meant that if I changed the processing mode and I skipped a track, the setting would revert to the default setting. I got used to this, however, my preference would have been for the modified setting to persist until the input was changed or the unit was power cycled.

Dirac Live Setup

The Dirac Live calibration process is driven via Dirac’s software that is available for download through Dirac’s website. First time users are required to go through a simple registration process. An activation key, which is included with the CB IV, is required to sign in. Once logged in, the SW, available for both Mac and PC platforms, can be downloaded and installed.

A USB microphone ships with the CB IV along with a CD containing calibration data for it. The first time the SW is launched the matching calibration data file can be loaded into the SW; subsequent sessions do not require this step unless one switches to a different microphone. The CD that I received contained several calibration data files, each named based on the serial number of the microphone; I had to match the file on the CD with the serial number on the microphone.

This was not a big deal, however, it would have been nice to only receive the file relevant for my microphone. The storage space on the CD could also be better utilized by providing the setup files to install the Dirac Live Calibration SW.

Secrets Sponsor

Accompanying the microphone is a small tripod stand. Aided by some props, mostly some boxes in my case, it can be positioned at the measurement locations. It is not very convenient though. I ended up buying a desk boom microphone stand. The arm length and height adjustability gave me enough range to position the microphone on my home theater seats.

A two-page guide describing crossover optimization through Dirac Live is included with the CB IV. This will eventually make its way into the CB IV’s manual, which is downloadable from Theta’s website. The combination of the two provides the relevant information and flow for the CB IV and Dirac Live setup/calibration.

Many folks, including myself, have a habit of ignoring manuals. In this case, I gave it a good read. I also found some additional reading material useful. MiniDSP’s user manual for their audio processors supporting Dirac Live was a good read; while there are some feature and user interface differences, the description in the setup portion is largely applicable. Robert’s review of the Emotiva XMV-1 is another recommended read. Finally, folks who are inclined to dig into the inner workings of Dirac Live can read the following 2 articles on Dirac’s website: “Dirac Live – Technical Description” and “On Room Correction and Equalization Of Sound Systems”.

The Dirac Live Calibration SW does not offer any capability to set the speaker size (crossover frequency), distance or level settings for the loudspeakers; these must be set on the CB IV. To set the levels, Theta provides the AIX Test Disc that contains the test tones. There are some test signals available on the CB; one is, however, encouraged to use the AIX disc to exercise the entire playback chain.

While I appreciate the bundling of the AIX Test Disc, I would have preferred having the capability of setting these parameters integrated with the Dirac SW. The SW already has the capability of sending a test signal to each loudspeaker, and it comes with a calibrated microphone; it’s just a matter of standardizing on an interface that allows the SW to set these parameters. Even if Dirac does not want to automate this portion, providing an interface to measure and enter the values manually would still be a welcome addition. Note that the crossover module in the CB IV gets bypassed during Dirac Live calibration.

Theta Casablanca IV Surround Sound Processor Review

The first step in the calibration SW involves selecting a loudspeaker configuration; 5.1, 7.1 and Custom are three options. The Custom option is to be used to create channel mappings between the Dirac SW and the CB IV. The first column shows hard-coded string names for the Dirac SW output channels. The corresponding channels that they get mapped to on the CB IV are selectable by the user.

One can play a test signal to verify that the channels are mapped correctly. The fifth column is a checkbox to specify whether the corresponding channel is a subwoofer. I am not sure why this is necessary as the string name already indicates this. The last column has a slider; this is grayed out. Presumably this option is available when one runs Dirac’s SW version on a Mac or a PC.

ALT

ALT

Note that the 5.1 and 7.1 configurations only route the bass signal to the SUB1 channel. If one has multiple subwoofers, up to 4 are supported, connected to independent DAC output channels, the custom configuration is to be used. In this case, the same bass signal gets routed to each subwoofer; each subwoofer gets its own EQ treatment. There is no option to EQ the subwoofers together.

This, I feel is an important omission, as the interaction of multiple subwoofers is what should get EQed. My setup utilizes 4 subwoofers. At first I tried to EQ them independently, and then I tried them together. The latter configuration yielded far better results; I’ll discuss this further later in the review. Dirac/Theta should consider offering this as an option while retaining independent settings for level and distance parameters.

Once the loudspeaker/subwoofer configuration is set, a level check is to be performed for each channel to ensure that the signal to noise ratio is adequate for the measurement process. This is accomplished by playing test signals through the SW, adjusting volume on the CB IV in conjunction with the input gain of the microphone, until the level indicator turns green in the SW.

The interface for this is quite intuitive, however, this is another step that I feel should get automated. Again, all the components are there for the SW to initiate a feedback loop where each channel is measured and the volume/microphone gain is adjusted to dial the levels into the desired range. In fact, this should just tie in with setting the loudspeaker levels in the first place.

Theta Casablanca IV Surround Sound Processor Review

Measurements at nine different locations are required. Dirac has a nice illustration of microphone positions with different viewpoints. The first measurement must be performed at the primary seating location; the remaining positions are shown as a guideline and need not be adhered to.

Dirac does recommend spreading the microphone positions even if the listener wants to optimize for the primary seat. This allows the algorithm to view how the response changes with position, which is then used to determine what is and isn’t to be corrected. The central measurement is always given the highest weight. I used the “couch” view to guide me through the measurement positions.

With the measurements done, it is time to define a target curve and optimize the filter coefficients. A default target curve is provided which covers a correction range of 15Hz-19.9kHz. The default curve does not target a flat frequency response; there is boost at the lower frequency and a gentle roll off at the high frequencies. Many psychoacoustic studies, including one done at Harman, have found a shape such as this to be preferred by listeners.

Theta Casablanca IV Surround Sound Processor Review
Preferred in-room loudspeaker (black) and headphone (cyan) target response curves. Dotted lines indicate the upper/lower limits of bass/treble adjustments. (Image provided by Todd Welti)

The in room response measurement for each loudspeaker can be used to determine the crossover frequency. This crossover frequency must be entered into the CB IV once the calibration process is complete. Again, it would be nice to do this through the SW!

Dirac Live does not perform any bass management. This is why the above step of entering the crossover frequency into the CB IV is required; without this, bass content in the LCR/surround loudspeakers would not get mixed in with the LFE channel … it would be lost. The CB IV supports a Linkwitz-Riley crossover with 4th order low-pass and 2nd order high-pass slopes. To make the response roll-off at 24dB per octave, adjustments must be made to the target response curve; this applies to everything but the subwoofer, which gets a 4th order roll-off through the CB IV.

Tailoring the target response is accomplished by dragging the orange dots to the desired location. Double clicking on an existing dot, deletes it; double clicking at a location where a dot does not exist, creates a new dot. The SW does some curve fitting using the dots to come up with an overall target response curve. If the space is coarsely sampled, the curve fitting may yield some undesirable inflections in some regions.

This can be remedied by inserting additional orange dots, which, if necessary, can then be dragged to the desired location. The image below shows the altered default target curve for my front left/right loudspeakers. I added two points: one at 80Hz, the crossover frequency, and the other at 40Hz, which is an octave lower, and therefore expected to be 12dB lower in level than the point at 80Hz, to get a 2nd order roll off.

Theta Casablanca IV Surround Sound Processor Review
Modified target response (orange curve) for the LR channels.

Placing the dots at precise locations is a bit cumbersome. I rarely got the dot positioned at the exact location, often settling for a position that was close enough. Also, when adding a dot, it was difficult to perfectly align the mouse position with the target response curve; in such cases, the curve could shift ever so slightly. This would not have been audible, but I would have liked to be able to do this precisely through the GUI.

Also, repeating this for multiple channels added time. The SW allows for a convenient alternative; the response curve can be loaded from a text file. Even with this method, the points did not get positioned at the exact locations that I specified; they were pretty darn close though.

Once the target response curves have been set for each loudspeaker, the filter optimization can be carried out. The first time I did this, I used an old laptop and it got a really good workout … the processing took a long time to complete. As I was going to be playing around with the SW a good bit, it was time for a replacement machine, which when put into service, fared much better in this regard.

There were two issues that I ran across with the new laptop. One time the SW crashed after the measurements were made. I had not saved the measurements at this point, so I had to redo them. Another time, I suddenly started to see spurious measurements after the first location had been measured. Going back to the level check section, I saw the SW was displaying an excessive level on all loudspeakers, even though no test signal was playing. Re-seating the USB cable solved this problem. I don’t believe these issues had to do with the laptop, but it is hard to say. Both issues were observed only once.

ALT

ALT

Theta Casablanca IV Surround Sound Processor Review

Measured and corrected average spectrums for the center, left/right and subwoofer respectively. The big peak at about 32Hz in the left/right channel measurement corresponds to a room mode. The corrected response tracks the target response closely. Note that Dirac can apply a generous boost to the signal, which could be problematic in some systems. Dirac should consider providing a user settable boost limit in the calibration SW.

Dirac Live’s default correction covers pretty much the entire audible bandwidth. Two markers are provided to set the frequency limits. The region to the left and right of the markers is displayed in a darker color; in this range, the filters are inactive. To alter the range, one can drag the markers, or “curtains” as Dirac call them. The first time I tried to move the markers, they would not budge.

It turned out that the orange dots at the frequency extremes were preventing this; these define the frequency range over which Dirac Live operates and the “curtains” cannot be drawn inside this range. To reduce the upper limit, for example, I had to delete the rightmost orange dot. This then allowed me to draw the “curtain” in from the right; the new limit was imposed by the next in line orange dot. Another option to set the frequency limits is via the text file interface.

Theta Casablanca IV Surround Sound Processor Review

Default target response with a split at the upper frequency extreme for the left and right loudspeakers.

While playing with the “curtains”, I noticed something peculiar: at times the target response curve for a loudspeaker pair would split. An example of this can be seen in the figure above. I asked Dirac if this was expected behavior and they said “yes”. They explained that to prevent a discontinuity at the “curtain” limit, the optimization routine imposes a constraint requiring the target response to line up with the measured response. This was indeed the case with my measured response; hence the split.

Theta Casablanca IV Surround Sound Processor Review

Before/after impulse response for the center channel.

The rising response at the low-end of the frequency spectrum is attributable to the same cause. This looks worse than it is in practice, as the crossover filters in the CB IV will attenuate this region. Even so, the combined result does not yield a perfect 4th order roll-off. I tried to lower the limit, but I found the SW to be quite temperamental; either I saw little to no change or the SW crashed. I did find an option in the text file to engage an additional low-pass filter. I played with this parameter to see if I could use it to counter the rise in response; this helped, but the result was still not as smooth as I would have liked. Knowing that the crossovers in the CB IV would be active, I stayed with the default behavior in the bass region. It will be nice if Dirac is able to address this.

Once the Dirac Live calibration is complete, John recommends doing another level check and adjustment. I followed his recommendation. The loudspeaker levels typically required a minor adjustment; the subwoofer level on the other hand had to be dialed down a few notches.

In Use

My first impression of Dirac Live was mixed. The midrange showed promise; the treble was a bit polite, and the bass region, an area where I expected Dirac Live to shine, sounded a touch anemic. With multiple subwoofers at my disposal and Dirac Live’s customization options, I was optimistic that I could achieve a much better result.

I have been a fan of using multiple subwoofers for quite some time. For the last few years, I have been using four subwoofers. With previous RoomEQ systems, I had always EQed them together. Actually, EQing them separately had not been an option in those systems. This was the first time that each subwoofer got EQed individually.

Placement of four subwoofers along the sidewalls. (Image provided by Todd Welti.)

Placement of four subwoofers along the sidewalls. (Image provided by Todd Welti.)

During this time I was working on a Q&A with Todd Welti and Kevin Voecks from Harman; the topic, “Multiple Subwoofers: Benefits & Setup”. Todd is well known for his work on studying the benefit of multiple subwoofer configurations. In this Q&A, he describes several configurations that he found to work well in rooms.

I had been meaning to re-position my subwoofers for quite some time, and I found this a good opportunity to act on this. Using a single DAC output, I hooked the four subwoofers in a mono configuration using a combination of XLR splitters and daisy chaining. An unfortunate consequence of this was that I lost the capability to set independent delays for each subwoofer. I still had independent phase and level control, as these were available on each subwoofer.

Of the several rank ordered configurations, I decided to go with the one shown above. While this configuration did not rank the best, from a seat-to-seat variation standpoint, I picked it for two reasons: I could accommodate the subwoofers at these locations in my room; the delta between the distances to the subwoofers from the primary listening position was small. I then set the levels and played with the phase controls, which I found were best left at the default positions. For in-room measurements I used AudioTools, an iOS application that provides a fairly comprehensive set of test and measurement tools at a modest price. Next up was a Dirac Live calibration, and it was time to listen again.

What a difference! Out came an assortment of movies with deep bass: Pacific Rim, Interstellar and Need for Speed to name a few. The anemic bass I had heard before, transformed into deep and taut bass; this was by far the best bass I had heard in my room. To be sure that the improvement I was hearing did not just come from subwoofer re-positioning, I did some listening with and without Dirac Live. From listening to the system without Dirac Live engaged, I was able to hear a clear difference: the richness in the bass was simply absent without Dirac Live.

The midrange also received a noticeable uplift. This was particularly true with male vocals, where there was some added warmth. In comparison, male vocals sounded a little coarse without Dirac Live. A few high-resolution recordings that I purchased during the review were Elton John’s, “Goodbye Yellow Brick Road”, on Pure Audio Blu-Ray, Tom Petty’s 24bit/96kHz re-mastered albums, “Into the Great Wide Open” and “Full Moon Fever”, and Mark Knopfler’s “Tracker” mastered at 24bit/192kHz.

The last two artists’ recordings I purchased from HDTracks; they ended up on my Mac Mini music server. The vocal reproduction on both recordings was smooth, with just the right amount of warmth, and grain free. The same was true with movie soundtracks where dialog intelligibility improved, particularly with male voices. Every time I did a comparison with and without Dirac Live, I quickly returned to the “on” setting as I found its sound so much more inviting.

Note that there is a noticeable level difference, -8dB in my case, when Dirac Live is engaged. There is no way to adjust this amount on the CB IV; this can be adjusted on Dirac’s SW implementations. The level difference can make an A/B comparison between Dirac Live on/off difficult, as the louder sound with Dirac Live disabled might influence your judgment; though this was not the case for me. According to Dirac, this is done to provide headroom in order to avoid digital clipping. A level matched comparison can be done quite easily on the CB IV though, as level and Dirac Live settings (on/off) can be set independently for each input.

Moving on up in frequency, I found the treble to posses a relaxed quality. Over time, this polite presentation left me wanting a bit more sparkle at the top end. At first I tried boosting the treble using the acoustic controls on my front and center loudspeakers; after this I tried to boost the target response curve instead of using the loudspeakers’ acoustic control; finally I experimented with the upper correction limit in Dirac Live.

The first two changes had the expected result of boosting the treble, and this helped. What I found to work best, however, was the 3rd option. Here I played with a few cutoff options for the front loudspeakers in the 1kHz to 4kHz range. The cutoff frequency I found to work best was around 1kHz. This also lets the loudspeakers “do their thing” in the upper registers. I modified the default target response curve to be flat in the 500Hz to 1kHz range; the boost at the lower end stayed intact. When compared to the default range, this combination yielded a good overall balance while also providing a touch more air and detail with string instruments.

Jitter Jail II made a subtle, yet positive improvement in this department as well. I am curious what additional improvement the XTreme D3 DACs might bring to the table. Interestingly enough, some female vocals also benefitted. This was the case with Patricia Barber’s voice on the wonderfully recorded Café Blue album, a DSD download from Acoustic Sounds, which had more body with Dirac Live’s filters optimized for the limited range.

Two-channel music still dominates my collection and I often engage a synthesized surround sound mode. The CB IV includes the usual assortment of modes that are offered by Dolby and DTS. A few additional modes like Matrix and Special Matrix are also provided. The Matrix mode routes the sum of the left and right channels to the center channel; the surround signal is mono and it comes from the difference of the left and right channels.

Special matrix is similar to Dolby Pro Logic with more surround activity. Both modes play louder than Dolby PL IIx and adjusting the volume was necessary when comparing them. I tried these two modes on several music genres and found a few cases where Special Matrix produced a fairly enveloping soundfield that I liked with some Electronic music; in most cases, I found its over-ripe activity in the surround channels to be distracting.

Dolby PL IIx Music was the synthesized mode I gravitated towards most of the time. This mode continues to provide the best tonal and soundstage balance compared to most of the synthesized mode offerings that I have tried. Using this mode in conjunction with the “Center Width” and “Dimension” settings, I have been able to tailor the sound to my taste. The CB IV provides the “Center Width” and “Panorama” controls; both are settable via serial commands. A notable absence here is the “Dimension” control, which I like to play with; with this parameter, one can adjust for a deeper or shallower surround sound field.

When playing with the “Center Width” parameter, which I often switch between “3”, the default value, and “7”, which disengages the center channel, I found that the change did not always take effect. If I were to change the processing mode, and then switched back, the updated value from before took effect. I hope that Theta is able to resolve this bug as well as expose the “Dimension” control via a FW update.

The CB IV does accept 192kHz signals, however, when presented with a signal sampled at this frequency, Dolby/DTS processing is unavailable. I noticed this one-day while I was playing back a high-resolution recording. Switching between “Stereo” and “DP PL IIx” modes on the CB IV produced a slight audible change, though the center and surround channels were inactive.

According to John Baloff, the limitation comes from the TI chip that sits ahead of the sample rate converter. This chip prevents the signal from being down-converted to work with the Dolby/DTS processor that presumably operates at 96kHz or lower. It is not clear whether this stems from a HW limitation or whether a FW update can address this. I use Channel D’s Pure Music, running on a Mac Mini, as my audio playback engine. A sample rate ceiling can be set in Pure Music; this I set to 96kHz. Tracks sampled at a higher rate automatically got down-sampled, which made the synthesized modes available on the CB IV.

A few months into the review I observed an anomaly: loud pops coming out of one of my surround speakers. This would happen randomly and the amplifier would subsequently shut down. At first I thought that the fault lay with the amplifier; after some experimentation, I traced the problem to the DAC output of left-side surround loudspeaker. I had some unused channels on my third DAC card; with John Baloff’s help, I was able to reroute the surround signals to this DAC card … no difference.

Close to packaging and shipping the CB IV back to Theta for further inspection, I decided to re-download the Dirac filters. Viola … problem fixed! I suppose some non-volatile memory, where the Dirac filter coefficients were stored, got corrupted. This issue has not re-surfaced.

Timbre matching is another important piece of a surround sound system. The “Lichtmond 3, Days of Eternity” Blu-ray is an aural and visual delight. The 3D visuals, which make generous use of negative parallax, are extremely creative, and the accompanying 7.1 soundtrack is extremely enveloping. There is an Auro 3D track as well, which I was of course not able to try out. I have an itch to try this out on a CB IVa someday! Voices often pan around the speakers and the seamless movement breaks if one is drawn to timbre differences across different loudspeakers.

All my loudspeakers have the Revel pedigree, so they share a characteristic sound; they are not identical loudspeakers though. Even if one used identical loudspeakers, differences in room placement alone would affect the sound. With Dirac Live in the mix though, the voice pans were extremely good. If I paid close attention, I could still hear slight differences as the voices moved from one loudspeaker to the next, however, there was marked improvement with Dirac Live.

On The Bench

By John Johnson

All distortion measurements were made within an 80 kHz bandwidth. Coax cables were used for the analog measurements, and an AES/EBU (XLR) cable was used for the digital measurements.

First, let’s go over the analog tests for a baseline to compare with digital processing.

At 1 kHz, distortion was a very reasonable 0.008%, at 2 volts output.

Theta Casablanca IV – Bench Tests

Using 19 kHz and 20 kHz, there was a -97 dB 1 kHz B-A peak, which is inaudible. All other distortion peaks were below -90 dB. At this level, the peaks would be just barely audible if the volume is loud.

Theta Casablanca IV – Bench Tests

IMD was a very low 0.001%, an excellent result. This is arguably the most important test. High IM results in loss of detail and midrange congestion.

Theta Casablanca IV – Bench Tests

In the Distortion vs. Frequency Response, the audible band stayed within 0.001% and 0.005%.

Theta Casablanca IV – Bench Tests

Distortion vs. Output Voltage showed a sharp knee at 7 volts, and the second knee at 24 volts. This was into 100 kOhms. The sharp knee represents the end of the portion of the useful output. After that, distortion rises very quickly. Clipping occurred at 26 volts.

Theta Casablanca IV – Bench Tests

The analog frequency response was flat out to 10 kHz, where it began to rise, with the maximum at 65 kHz, before dropping precipitously.

Theta Casablanca IV – Bench Tests

Now for the digital tests. Using 16/44.1 sampling, distortion was 0.005%, which was a bit higher than the analog test. There were 21 harmonic peaks, but they were all lower than -90 dB.

Theta Casablanca IV – Bench Tests

Using 24/96 sampling, distortion declined marginally.

Theta Casablanca IV – Bench Tests

With 19 kHz and 20 kHz sine waves, the B-A peak at 1 kHz was buried in the noise floor, and in general, there were less distortion peaks than at 16/44.1.

Theta Casablanca IV – Bench Tests

IMD at 24/96 sampling was 0.012% and 2 volts output.

Theta Casablanca IV – Bench Tests

The frequency response at 24/96 was flat to 20 kHz and down 0.5 dB at 48 kHz.

Theta Casablanca IV – Bench Tests

At 24/192 sampling, response was similar to 24/96 sampling. This is because the Casablanca uses 24/96 sampling for all digital signals, including Dirac room correction.

Theta Casablanca IV – Bench Tests

The bench tests were very good, and the Casablanca IV would be a wise investment because it is built to be upgradeable by switching out cards in its slots. So, the processor could add all the new codecs as they are developed. It is also extremely flexible, allowing outputs to be assignable to such things as five discrete subwoofers.

Conclusions

THE CASABLANCA platform continues to lead the premium surround sound processor market by offering both hardware and firmware upgrades.

Likes
  • Upgradeable hardware
  • Dirac Live RoomEQ operating at 96kHz
  • New Xtreme D3 DAC card (not reviewed) offers more channels and improved performance at the same price as the Xtreme D2 DAC card
  • Excellent build and sound quality
  • Excellent technical support
Would Like To See
  • Tighter integration between the Dirac Live SW and the CB IV
  • Ability to EQ multiple subwoofers together with independent distance/level control
  • Support for multiple Dirac Live filter banks
  • Desktop configuration tool
  • Synthesized surround modes with 192kHz signals

I thoroughly enjoyed my time with the CB IV. The improvements brought about by Dirac Live were impressive: bass reproduction elevated to a level I had never heard before in my room; dialog intelligibility improved, as did the consistency of timbre across my loudspeaker array. I never felt the urge to disengage Dirac Live. RoomEQ systems are not always met with warm embrace. If you are in this camp, I highly recommend auditioning a CB IV at a dealer, and I hope that your opinion on deploying this technology in your system will change.

In as much as I loved what Dirac Live did to the sound of my system, it fell short in one area: ease of use. I would like to see better synergy between Dirac and Theta. A number of steps could stand automation and a number of parameters could be set via Dirac’s SW, obviating the need to set some parameters on the processor and some through the calibration SW. Some aspects of the user interface in the calibration SW could also be refined.

I would also welcome a desktop configuration utility from Theta to setup the inputs and modes on the Casablanca. A product at this price point will likely get setup by a dealer, so most customers are unlikely to experience the setup process; still, dealers, and folks like myself, would appreciate steps from both companies that would make this process easier.

When questions arose, I always found an adept hand at both Theta and Dirac. At Theta, I interfaced with John Baloff and Sanjay Durani; together they form one of the best technical support teams in the industry. I exchanged several emails with these gentlemen and even talked to Sanjay on the phone a few times. These folks know their stuff, and they take great pride in the work they do. I certainly appreciate their help. At Dirac, I exchanged several emails with Flavio Fellah who answered several technical questions related to the SW and Dirac’s algorithms. The responses were prompt, and I did not get the feeling that I was receiving special attention.

The price of entry into this platform is high. I would love to see ATI bring a 96kHz implementation of Dirac Live to a lower cost offering; perhaps the resurrection of the Casanova platform or integration into a top of the line B&K processor, another brand that ATI owns. A processor with a price point closer to Anthem’s D2V 3D, which is an excellent value, would certainly appeal to a broader market segment.

For anyone who is able to afford this price point, the CB IV should be at the top of the audition list. This is an excellent sounding processor with a bright future. Theta is now shipping the updated DAC cards. The CB IVa upgrade, announced earlier this year, should be available next year; this upgrade will add support for the new 3D audio formats.

Theta also announced the CB E, which will support more than 12 channels, although there will be a new chassis for this model. Anyone invested in this platform or looking to invest in this platform should find comfort with these announcements; ATI, the brand owner, is showing strong commitment to keeping this platform at the forefront of the premium processor market. Highly recommended!

With the Theta CB IV SSP and Dirac Live, bass reproduction elevated to a level I had not experienced in my home theater!

Associated Equipment

Speakers: Revel Ultima Studio2/Voice2, Revel Performa M105 (surround channels)
Subwoofers: Revel B15a (pair), Paradigm Studio Sub 12 (pair)
Amplifier: Classe CA-M300/CA-2300, Proceed AMP5
Optical Media Playback: OPPO BDP-105D
Music Server: Apple Mac Mini; connected to SSP via Bryston BUC-1 USB converter
Projector: JVC RS4910
Screen: Steward StudioTek 130 G3
Cables: AntiCables, Pangea, Blue Jeans, Monoprice
System Control: iRule
Power: PS Audio Power Plant Premier and P10
Acoustic Treatment: ASC SoundPlanks/Iso-Wall/Soffit/TubeTraps, Vicoustic Multifuser DC2

The post Theta Casablanca IV Surround Sound Processor Review appeared first on HomeTheaterHifi.com.

Audioengine B1 Bluetooth Music Receiver Review

$
0
0
Secrets of Home Theater and High Fidelity - Best Of Awards 2015

Audioengine B1 Bluetooth Music Receiver Review Highlights

This neat little product connects to your audio system in a snap, adding the latest version of wireless Bluetooth connectivity. It uses Bluetooth 4.0 protocols and the aptX codec. These technologies extend the range up to 100′ and make for superior audio reproduction. The B1 has a very nice internal DAC as well but you can even bypass that and feed an SPDIF signal to your own DAC via the optical digital output. The sound from the B1 far exceeds most every other Bluetooth audio product I have tried, offering a high quality of reproduction to go along with the amazing convenience of the wireless hook up.

Audioengine B1 Bluetooth Music Receiver Review

Audioengine B1 Bluetooth Music Receiver Highlights Summary

  • Quick setup
  • Solid build quality
  • Universal Bluetooth compatibility
  • Rejuvenated my small bedroom system
  • Excellent midrange response
  • Slightly etched treble

Introduction to the Audioengine B1 Bluetooth Music Receiver Review

Audioengine opened for business in 2005 with their first product being the A5’s. These were powered bookshelf speakers that were warmly received by consumers. Over the ensuing 9 years, Audioengine has continued to develop and sell low-cost high quality products in the loudspeaker, subwoofer and accessory categories.

AUDIOENGINE B1 BLUETOOTH MUSIC RECEIVER REVIEW SPECIFICATIONS

  • Bluetooth 4.0 Audio with aptX Codec
  • Inputs: Bluetooth (up to 100′ range)
  • Outputs: Stereo Analog RCA and Digital Optical (SPDIF)
  • Analog Output: 2V Max
  • Analog Output Impedance: 57 Ohms
  • DAC: AKM AK4396
  • S/N Ratio >100 dB
  • THD+N <0.02% (1 kHz)
  • MFR: 10 Hz – 20 kHz, ± 0.5 dB
  • Native Bit Depth: 24-bit
  • Dimensions: 1.0″ W x 4.0″ W x 3.5″ D
  • Weight: 1 Pound
  • MSRP: $189 USD
  • Audioengine
  • SECRETS Tags: Bluetooth, Audioengine, Audio Accessories

One area where they are particularly well known involves a number of wireless audio products that they have brought to market. These started with the Wx series of wireless adapters. I personally used a W1 for several years as the interface for my outdoor system and was impressed by its performance and reliability.

Now Audioengine is continuing to up their game with the B1 Bluetooth receiver. This compact little accessory uses the latest aptX Bluetooth protocol to boost its range and offer high quality audio over the somewhat maligned Bluetooth interface. So the big question here is “will an audiophile be able to really enjoy music over Audioengine’s newest Bluetooth receiver?”


Design and Setup of the Audioengine B1 Bluetooth Music Receiver

The Audioengine B1 Bluetooth receiver is a small audio accessory that adds Bluetooth playback capabilities to any audio system. It comes complete with everything you need – a USB power supply, stereo RCA interconnects and a microfiber carry bag.

Audioengine B1 Bluetooth Music Receiver Review

The component itself is housed in a solid aluminum case that is around the size of a standard deck of cards. There is a bright blue “Pair” LED light on the front. The swivel antenna is also on the front.

In back, you have the micro USB power input jack, an SPDIF digital out and an analog output via high quality, gold-plated RCA’s. That’s all there is to it.

Set up is as simple as you can get. Connect the analog outs to an available input on your preamp, amp or powered speakers. Or you could bypass the internal DAC and connect the optical out to an optical input on your DAC or receiver. The Audioengine B1 outputs a native 24-bit 48 kHz signal when connected this way. Then you connect the power input and the unit is ready to play.

Audioengine B1 Bluetooth Music Receiver Review

When you connect a Bluetooth player wirelessly, the handshake is automatic – you don’t need a password. This is the way it should be as far as I am concerned. Plus, there are no drivers or special downloads required.

The B1 uses the latest Bluetooth aptX codec which is specifically designed for music playback. The B1 also has special circuitry and a precision-tuned antenna to extend its wireless range. Audioengine therefore claims a playback range of up to 100 ft (30 m). I was not able to get that much range in my house but it did play music in the adjacent room about 30 – 50 feet away. That is not bad at all but I am not sure how important it is to play music from a long range. Wouldn’t you want to be close enough to the system to actually hear the music after all?


The Audioengine B1 Bluetooth Music Receiver In Use

When I got the B1 in, I was already in the midst of several other reviews and did not have time to start on it right away. So I put it in my daughter’s bedroom system at first. I wanted to let her play around with it for a little while.

She already had an older, inexpensive Bluetooth receiver that we replaced with the B1. In all honesty I had forever been disappointed with the sound of her system. She and her friends usually play back their music either over the older Bluetooth receiver or off the analog outputs on their phones or iPods. The sound over Bluetooth was always grainy and fragile. Via analog, the sound would be closed in and lifeless.

The Audioengine B1 instantly changed all of that. It sounded like a whole new system! All of a sudden the sound was dynamic, extended and much more lifelike. It may have been the aptX technology but I think the B1’s DAC’s were at least an equal part of the amazing transformation I heard. The exact reason for this improvement really wasn’t all that important to me. All that really mattered was the incredible boost in performance that changed my attitude from thinking we needed to replace her system to an attitude that hey, this was a pretty darn good system now!

I later moved the B1 into our big system to give it a real run for its money. Of course the little B1 would be tested much more deeply with my high resolution main system. So there were two areas where I heard very minor weaknesses in the unit’s performance.

The highs and some percussive transients were a little etched sounding with an overall tonal balance that was slightly thin and tilted up. Also the bass was not as extended as bass played through my reference DAC. These were not major problems. The thinness was slight and easily lived with while the bass was lacking only the very deepest extension but was still a decent foundation, clean and properly proportioned especially good for Bluetooth.

Audioengine B1 Bluetooth Music Receiver Review

I noted the above weaknesses at first when listening to Talking Heads “Naked” which was ripped in Apple lossless to my iPod Touch from a Redbook CD. The above were the only downsides of the Audioengine B1 that I heard while the biggest plus in the sound was the all important midrange. The B1 served up smooth, balanced mids with a vibrant character that was hard to turn away from. I was mostly quite impressed with what I heard.

Audioengine B1 Bluetooth Music Receiver Review

Another CD I ripped in lossless to the iPod was Lorde “Pure Heroine”. I can’t get enough of this album and I thought it would be a fine torture test for the B1’s bass response. The bass here left nothing to be desired. Sure it wasn’t as extended as the bass I get from my reference DAC but you wouldn’t have known that short of a direct comparison. Again, the treble and transients were somewhat etched and forward but it was not objectionable. It in fact added some extra excitement to what I was hearing.

Audioengine B1 Bluetooth Music Receiver Review

Then I went in for a highly regarded audiophile recording with Bill Berry and his Ellington All Stars “For Duke”. This quality recording showed its pedigree with the smoothest, best balanced sound from all the music I tried that day.

Now we were finally getting somewhere! The sound on this record was nearly all one could ask for, smooth and natural with a solid and stable stereo image. Cymbals floated with a natural attack and decay. The acoustic bass had a realistic timbre. The Audioengine B1 also preserved the front to back stage depth which was an unexpected feat for a Bluetooth receiver. I was impressed.


Conclusions about the Audioengine B1 Bluetooth Music Receiver

I am very glad I had a chance to evaluate the Audioengine B1. I will be hanging on to it methinks. It is an excellent product to use when you are having a gathering or party and you want people to be able to share their music. It is also a handy way to quickly fire up some music with no hassle. When using the B1, your phone, tablet or iPod becomes your remote control which is pretty sweet as well.

Audioengine B1 Bluetooth Music Receiver Review

I now wonder, “Has Bluetooth finally come of age?” The answer is definitely “Yes!” Please don’t take that too far. I am fussy about audio and I personally wouldn’t use the B1 for serious listening. There were some very minor shortcomings with the sound that would keep it from filling that role for me. But it is great for background music or at parties like I wrote above.

My closing thoughts are that the Audioengine B1 is fairly priced, easy to set up and use, adding Bluetooth connectivity to any audio system. The sound is smooth, grain-free with a warm and welcoming midrange. I recommend it for anybody who wants to take advantage of the latest Bluetooth technology and get some pretty good sound in the process.


The post Audioengine B1 Bluetooth Music Receiver Review appeared first on HomeTheaterHifi.com.

Marantz AV8802/AV8802A Processor DTS:X Upgrade Review

$
0
0

Marantz AV8802 Processor

Introduction

When I reviewed the Marantz AV8802 processor late last year, I mentioned that Marantz was planning on offering a free upgrade to DTS:X, which is the competing 3D surround format from DTS. While the AV8802 was already an amazing product with support for Dolby Atmos and optional Auro-3D, the inclusion of DTS:X would definitely round out the processing options. At the time, there was also plenty of uncertainty as to whether DTS:X would play nicely with the speaker layouts needed for Dolby Atmos and the Auro-3D format. This past April, Marantz delivered on their promise to release a free upgrade to several of their receivers and processors and that upgrade added DTS:X processing to the AV8802 and AV8802A models. I had the opportunity to play with the upgrade and I wanted to share my impressions.

Setup

First of all, I have to give Marantz high marks for making this a very approachable upgrade. With the AV8802 connected to my home network, the processor displayed a new firmware notice announcing the new functionality. It estimated a 55 minute install time which I found to be accurate. The suggested link to the Marantz site also provided much more detailed information on the upgrade.

Marantz AV8802 DTS:X Firmware Announcement

If I didn’t have the time to update at that moment, Marantz thoughtfully included an option to offer a reminder or to update when the AV8802 went into standby. This type of user interface design is exceptional in an AV product and I appreciated it.

Marantz AV8802 DTS:X Firmware Upgrade Interface

So what happened after the upgrade, you ask? If I didn’t know better, the AV8802 seemed completely unaffected by the upgrade. There were no further prompts after turning the AV8802 back on and everything just seemed to function as before. Behind the scenes, the DTS:X upgrade removed the DTS Neo:X processing capability from the AV8802 and added support for the DTS:X object-based format and the DTS Neural:X upmixer. It also added two new surround parameters.

Secrets Sponsor

The first option is Dialog Control which is designed to allow the listener to adjust the volume of dialog in movies and vocals in music so they can be heard more easily. Since DTS:X treats sound, such as dialog, as objects, the dialog volume can be adjusted independently without having to increase the volume of other sounds coming from a particular speaker. The feature only works with DTS:X audio bitstreams that are enabled for this feature. The second surround parameter is named DTS Neural:X and it controls whether non-object-based audio is optimized for the speakers connected to the AV8802. I should also point out that this firmware upgrade added support for one more speaker configuration that is compatible with Dolby Atmos, DTS:X and Auro-3D. That configuration uses Front Height and Rear Height speakers.

In Use

I have taken for granted by now how many Blu-ray movies come with a DTS-HD Master Audio soundtrack. I was used to the AV8802 decoding a DTS-HD Master Audio bitstream and then applying the Dolby Surround upmixer to utilize the height speakers in my home theater. With the DTS:X upgrade installed, the AV8802 no longer offers Dolby Surround as an option when processing any DTS soundtracks; instead, it offers the DTS Neural:X upmixer. The overall concept is the same and Neural:X does a very convincing job of filling the room with immersive sound using any DTS, DTS-HD Master Audio or PCM soundtrack.

Marantz AV8802 Neural:X Sound Mode

While I loved the fact that the AV8802 could now offer two new processing formats, I was disappointed that I could no longer decode a DTS soundtrack and apply the Dolby Surround upmixer. It worked before this firmware upgrade, and in my opinion, it should work after. I remember using Dolby Pro Logic IIx for years with DTS soundtracks, so I hoped this wasn’t a licensing issue. Marantz confirmed that this restriction will be removed in a couple of months in a future firmware update and that there was no licensing issue!

Secrets Sponsor

I was pleasantly surprised to find that the AV8802 supports DTS:X and Neural:X using whatever speaker configuration is used with the AV8802. In my case, the DTS Neural:X processor had no trouble making my Front Height and Top Middle speakers come to life. I appreciated that the AV8802 information overlays provided so much information about the input signal, sound processing and active speakers.

Marantz AV8802 Neural:X Supporting Atmos Speakers

Ex Machina Movie Cover

Ex Machina

The first Blu-ray released with a DTS:X soundtrack was “Ex Machina,” an intelligent science fiction drama that explores the boundaries between man and machine and artificial intelligence. The AV8802 had no trouble decoding the DTS:X input signal passed from my Oppo BDP-105 Blu-ray player. The soundtrack sounded superb, but was surprisingly limited in its use of the height channels. With the exception of a couple of scenes, much of the benefit of the height channels was in adding to the ambiance of the film which definitely helped to draw me into the story.

When processing a DTS:X soundtrack, the AV8802 shows the input signal as DTS:X, which is similar to the display when processing a Dolby Atmos soundtrack.

Marantz AV8802 DTS:X Display

The number of Blu-rays offering the DTS:X format is still very limited compared to the wide array of Dolby Atmos titles that are available. This leaves the DTS Neural:X upmixer as the primary change that most users will experience after this firmware upgrade. While the sound from DTS Neural:X was definitely immersive, it still sounded different from Dolby Surround. If you want to sample both Neural:X and Dolby Surround today, there is a way to accomplish this by sending PCM to the AV8802. I changed the HDMI audio processing on my Oppo BDP-105 to PCM, which tells the player to decode the bitstream and then send multi-channel high-resolution PCM to the AV8802.

Marantz AV8802 PCM with Neural:X
Marantz AV8802 DTS:X Display

Making this change exposes both Neural:X and Dolby Surround in the sound option menu.

Marantz AV8802 Neural:X and Dolby Surround Coexisting using PCM
Marantz AV8802 DTS:X Display

At this point, you can compare the upmixers and form your own opinion as to which you like better. I listened to some familiar portions of “Skyfall” that I typically use for reference, and I was surprised at the differences in the approach. In the bike chase across the roof of the Grand Bazaar, the Dolby Surround upmixer presented mostly ambient sounds and soundtrack in the height channels, while the Neural:X upmixer also included additional motorcycle sounds which added to the perception of the bikes racing on the rooftops. As the subway train crashes into the tunnel, the Neural:X upmixer included more content from the surround channels in the height channels, so there was more sound from above as the train crashes through the room. I enjoyed both presentations a lot and I especially liked the option to select one or the other.

The only drawback to using the PCM approach is that it doesn’t allow a DTS:X or Dolby Atmos soundtrack to be decoded natively in the AV8802. For that, you have to set the Blu-ray player to pass a bitstream.

Conclusions

THE MARANTZ AV8802 was Already an Amazing Product With Support for Dolby Atmos and Optional Auro-3D, the Inclusion of DTS:X Would Definitely Round Out the Processing Options.

Likes
  • Free upgrade to the latest DTS:X and DTS Neural:X processing
  • Easy and convenient installation
  • Support for existing Dolby Atmos speaker configurations
  • Additional Front Height and Rear Height speaker configuration with support for Auro-3D, DTS:X and Dolby Atmos formats.
  • Option to compare upmixers using multi-channel PCM
  • Future firmware upgrade to allow DTS soundtracks to be processed with Dolby Surround
Would Like To See
  • Lots more DTS:X titles

I really appreciated that Marantz has included the latest DTS:X and DTS Neural:X formats as a free upgrade to their reference AV8802 and AV8802A processors. Offering this type of upgrade helps protect consumer investment and is a good thing for an industry that all too often encourages obsolescence. While I enjoyed listening to a DTS:X soundtrack, I would like to see much more content become available before encouraging the upgrade. I am thrilled that Marantz is planning to restore the ability to process DTS soundtracks with Dolby Surround.

The post Marantz AV8802/AV8802A Processor DTS:X Upgrade Review appeared first on HomeTheaterHifi.com.

Yamaha R-S202 Stereo Receiver Review

$
0
0
Rooted in technology and expertise with a music heritage that runs over 125 years deep the R-S202 was created from years of experience and technological expertise in receiver design.

The distinguishing “new” feature for this stereo receiver is the addition of Bluetooth technology for streaming music. Coupled with Yamaha sound quality and an attractive price, the R-S202 can be a young audiophiles (I’m talking to you, college boy) ticket to Musicville.

Yamaha R-S202 Stereo Receiver - Front View

Highlights

Yamaha R-S202 Stereo Receiver

  • Improved circuitry design
  • Bluetooth® for streaming from your favorite music server
  • Full 40 station FM/AM preset tuning
  • Brushed aluminum faceplate and clean design
  • Speaker selector for dual systems
  • Easy to use remote
  • Headphone jack
Introduction

I know we have a tendency to focus on high-end, multi-channel receivers with Dolby Atmos and complex bass management schemes, but let’s not lose sight of the final goal: Enjoying the music. Yamaha has been making receivers for many decades and when I was in college, you could always spot the Yamahas on the racks at the audio shop because that had orange fluorescent displays. Of course, back in the days, stereo was King and CO2 tape decks were the rage. The R-S202 carries on that Yamaha tradition of great sound at an affordable price and has been updated for streaming via Bluetooth.

YAMAHA RECEIVER REVIEW SPECIFICATIONS
100w/channel:

(8 ohms, 40 Hz-20 kHz, 0.2% THD)

40 stations:

AM/FM preset tuning

Bluetooth streaming:

(2.4 GHz spectrum)

2 speaker:

System Setup

Company:

Yamaha

SECRETS Tags:

Yamaha, Stereo Receiver, Receiver Reviews 2016

Design

It has been a long time since I reviewed a stereo receiver. No DAC, no bass management, no GUI for speaker setup, no distance or speaker leveling software, no video processing, no sound processing, just stereo. The front panel is simple and uncluttered.

Yamaha R-S202 Stereo Receiver - Power Button

Sporting large push buttons for tone controls and input selection, small buttons for presets, tuning FM mode and memory and speaker selection, the R-S202 has a clean faceplate in black brushed aluminum. In the back of the unit you get analog inputs for a CD player and 2 more unassigned for other devices. There is a set of line/outs for recording in the analog domain. The spring clips allow for 2 sets of speakers (A/B or A+B).

Yamaha R-S202 Stereo Receiver - Front Buttons

The clips will accept bare wire up to 16 gauge and pin terminals. At this price point, that’s not unexpected. The fluorescent display is easy to read from across the room and is white, not the orange like from the 80’s. The black brushed aluminum face is clean and looks smartly dressed. If you use the headphone jack, you must turn off the speakers by deselecting speakers A/B.

Yamaha R-S202 Stereo Receiver - Remote

The plastic remote is fairly basic with a myriad of tiny buttons that are not backlit. It also has the ability to control a Yamaha CD player. Be aware, there is no App to control the R-S202, so you will either love the remote or replace it with a Harmony.

Secrets Sponsor

The updated feature of this receiver is Bluetooth. Being able to stream my music from phone makes this product step up to another level. I know that many of you have streaming devices that already feed into your home systems, but for someone starting out into the first foray into having quality system, this simplifies a lot of things.

Setup And In Use

It has been so long since I have set up a stereo system, that I had almost forgotten the simple joys of listening to music in 2 channels. All you really “need” to enter musical Nirvana is a receiver like the R-S202 and some inexpensive (I did not say cheap) speakers. Some new Elacs Debut B5s would pair well with this receiver. So would other nice bookshelf speakers like Pioneer SP-BS22-LRs, Zu Audio Cubes or Omens, if you have the coin. We live in an age where for under $500 you can get a nice entry level sound system. With many of the newer generation of budding audiophiles going off to school this fall, why not have a killer sound system on the cheap?

Yamaha R-S202 Stereo Receiver - Rear View

Setting up the R-S202 only took me a few minutes to wire up a spare pair of speakers I had lying around and I was streaming music in no time. Pairing my iPhone 6 to the receiver was quick and easy. There was a certain feeling of liberty not having to set speaker levels and distances, fiddling with bass management, or running an auto-EQ program. And once I had the speakers positioned correctly for imaging, it was just me in my favorite chair listening to some great music.

Secrets Sponsor

The first impression I had with this receiver was with its ability to reproduce the full range of the music. I was surprised that the sound had very good bass. The middle range was full without over emphasis and the treble was sweet, without harshness. I ended up hooking my Revel F12s up to the Yamaha and the sound quality was still very good. The F12s have two 8inch woofers/tower and the R-S202 had no trouble driving them to very loud levels.

The Doors

The Doors “Riders on the Storm”

Here are some examples of the music I tested with the R-S202. The Doors: Riders on the Storm, with it hopping bass line, wide soundstage with thunder from over the horizon, tinkling rain and Morrison’s unmistakable voice, I have listened to this song over many years and find it relaxing and intimate. This is great headphone stuff, but on a good stereo sound system, it can still transport you back in time.

The R-S202 did not overplay any specific frequencies, but provided a detailed natural soundscape. I could easily detect the quiet whisper of Jim singing along with himself. Bass was virile, but controlled and not overpowering. When I compared the Bluetooth stream with the CD version, it was difficult to tell the two apart.

Giovanni Gabrieli

Giovanni Gabrieli “The Glory of Gabrieli”

Giovanni Gabrieli (1557-1612) wrote secular and sacred antiphonal music for the Cathedral of San Marco in Venice. The two choir lofts face each other in the chancel and are separated by a 40 foot space. The acoustics in that church are phenomenal. Instruments, correctly positioned, can be heard with perfect clarity at distant points. A single string player could be set against a large group of brass players and still sound perfectly balanced.

In Ecclessis has two boys choirs (left and right), one men’s choir and a full set of brass players in between. The R-S202 was able to cast a believable soundstage with depth and width, capturing the true acoustic space as recorded by those remarkable CBS engineers. The reverberation and seven second decay were well reproduced by the Yamaha.

Streaming Pandora via my iPhone was also quite enjoyable. Because there is no video processing with the R-S202, my phone provided the video interface I need to navigate through the music. Simple and convenient, I spent hours listening to music that fit my mood. I found the reception of the FM tuner to be mediocre at best. I live 35 miles north of Boston and was not able to pull in as many stations as my Emotiva UMC-200 could. Maybe a better antenna than the one supplied would help.

Conclusions

With its Ease Of Use And Bluetooth Technology, THE YAMAHA R-S202 Makes a Great Choice for The Budding 2 Channel Enthusiast

Likes
  • Good sound quality
  • Easy setup
  • Bluetooth
  • Bass quality is solid and punchy
Would Like To See
  • Backlit remote
  • Apt-X Bluetooth
  • Better FM reception

So, with my few weeks of having the R-S202 in the equipment rack, I was able to relive a bit of my youth and enjoy the sounds of plain old vanilla stereo again. I had almost forgotten what a simple pleasure it was to setup two speakers and just listen to music. No fancy DSP or bass management schemes. No APP to download. Just hookup a CD player or turntable and listen to the music. Bluetooth streaming is easy, convenient and sounded fine for everyday listening. Yamaha has taken a decent stereo receiver and made it eminently more useful and enjoyable. I recommend this receiver if you are starting out as a newly initiated audiophile. It is easy to use and easy on the ears. At this price, why would you say no?

The post Yamaha R-S202 Stereo Receiver Review appeared first on HomeTheaterHifi.com.

Arcam AVR850 Surround Receiver Review

$
0
0
The Arcam AVR850 stands out as one of the best sounding receivers that I have ever had in my system.

It is compatible with the latest audio and video formats while it includes one of the best room correction packages on the market. The built-in amplification provides plenty of power for most any system. The independent bench tests I conducted indicated that the unit was very conservatively rated and the distortion profiles are incredibly good for a surround receiver. All this adds up to excellent performance with surround sources as well as with two-channel music!

Highlights

Arcam AVR850 Surround Receiver

  • Dolby Atmos 7.1.4 included
  • DTS:X ready
  • 4K and 3D video passthrough
  • Dirac Live room correction
  • 7-channel Class G amplification
  • Free iOS control app available
Introduction

The 2015 CEDIA Expo was in Dallas where the HQ of Sound Organisation is located. SoundOrg is an importer and distributor of high quality stereo and home theater products. Arcam is one brand they handle.

They had opportunities for press and dealers to come to their office and preview a number of new products. One major demo I heard that evening was of the Arcam AVR850 surround receiver. They were making a big deal out of this receiver. They played some different clips of various sources, most of them featuring Dolby Atmos.

Arcam AVR850 Surround Receiver - Front View

Though the setting was better than a show room floor, I still felt that the receiver just wasn’t being shown in its best light. So I requested a review sample of the Arcam AVR850 to review on my own personal system. Just as I suspected, this receiver is quite praise worthy and my appreciation of it was solidified during this review.

ARCAM RECEIVER REVIEW SPECIFICATIONS
Codecs:

Dolby Atmos, DTS:X, Dolby Surround, DTS-HD Master Audio, DTS-ES 6.1 Discrete, DTS-ES 6.1 Matrix, DTS 5.1

Power Output (2 channels driven):

20Hz – 20kHz, <0.02% THD – 120W (8Ω), 200W (4Ω)

Power Output (7 channels driven):

1kHz, 0.2% THD – 100W (8Ω), 180W (4Ω)

Dirac Live®:

Room Correction

Inputs:

HDMI (7 Total, 1 MHL Compatible and 1 ARC), SPDIF Coax (4), Toslink (2), Analog RCA (6), 3.5 mm Aux (1), USB (1)

Outputs:

HDMI (2 Zone 1, 1 Zone 2), 7.1.4 Pre-amp output (Unbalanced RCA), Zone 2 Stereo (Unbalanced RCA)

2-Zone:

Operation

AM/FM:

Tuner

Dimensions:

6-3/4" H x 17-1/16” W x 16-3/4" D

TITLESPEC:

DESCRIPTION

Weight:

34.2 Pounds

MSRP:

$6,000 (USD)

Company:

Arcam

SECRETS Tags:

Arcam, Arcam AVR850, Surround Receiver, Receivers, Receiver Reviews 2016

Design

The Arcam AVR 850 is Arcam’s top of the line surround sound receiver. It has all the latest bells and whistles required to be the heart and soul of a high end surround sound system.

Secrets Sponsor

The biggest part for me is that the AVR850 is capable of decoding Dolby Atmos soundtracks. Atmos is one of the newest surround formats on the market. Not only is it high resolution but it involves mastering techniques where the mastering engineer can move sound objects throughout the room, including overhead. This creates a high resolution surround “bubble” in your theater. The AVR850 can also synthesized Dolby Atmos from pretty much any source and the effect was at times quite engaging. This was all very exciting to me as I had recently installed in-ceiling height speakers in my theater.

Arcam AVR850 Surround Receiver - Upclose View

The AVR850 is also DTS:X ready via an upcoming firmware update. DTS:X is DTS’s latest surround format that, though it is lagging Atmos in its roll out, is also expected to be widely released in the coming months.

Secrets Sponsor

Another major benefit of the AVR850 is that it comes complete with Dirac Live room correction. Dirac Live is a high end room correction system that not only corrects for proper frequency balance but it also manages to correct certain impulse response anomalies. The Arcam AVR850 is the second product I have tested that has Dirac Live and Dirac has proven to be in the same class as Anthem’s “Anthem Room Correction (ARC)” system.

The AVR850 is also 4K ready and supports HDCP2.2 protocols. It’s HDMI 2.0 interface is 3D compliant as well and includes Audio Return Channel (ARC) functionality. There are plenty of ins and outs with 7 HDMI inputs and two outputs.

Arcam AVR850 Surround Receiver - Inside Components

The AVR850 contains 7 channels of on-board Class G amplification rated up to 120 wpc into 8 ohm loads. Class G amplifiers use multiple power supplies which kick in as more and more power is required due to the signal waveform and the volume setting. Arcam has designed their own circuitry here which is governed by a very fast switching power supply so there is no audible lag in delivering the power required at any given moment in time. Arcam also employs multiple power output devices per channel so the amplifiers maintain a firm grip on your speakers.

Compared to Class A/B, the Class G topology allows a more efficient design. The greater efficiency means the AVR850 delivers more power when multiple channels are being used and the claimed grip on the speakers was readily heard in my listening sessions.

Arcam spared no expense in offering a high quality resistor-ladder analog volume control. This was one reason I am sure why I measured such low levels of THD+N in my bench testing of the AVR850. I have been impressed lately by what I have heard and measured from receivers over the last few years and the Arcam receiver is right up there with the best.

The AVR850 includes a high quality AM/FM tuner but no HD Radio capability 🙁 You can also listen to network streaming via the rear panel Ethernet hook up. And, if you connect your receiver to your home network, it can then be controlled by iOS devices.

Arcam AVR850 Surround Receiver - Remote

The unit comes with a nice full-function back lit remote. This remote can be programmed to control up to 8 devices. These can be accessed by included codes but also the remote can learn codes of any products not listed on the extensive library of preset codes. I liked this remote very much. It was lightweight, fit in my hand comfortably and the buttons varied by size and shape so using the remote became second nature rather quickly.

The look of this receiver is one of industrialized elegance. The AVR850 is part of the FMJ range of Arcam products and it shares the family look of other products in the range. The slick front panel, dominated by a large center-mounted volume knob is adorned in a dark matte gray, curvy aluminum fascia. The big volume knob is flanked by 10 buttons that inconceivably provide full control of the product. Above this row of controls is a rudimentary green dot matrix display that confines itself to just the most basic of information (input, volume level and sound mode). The right side of the panel has two ports for mini plugs – Auxiliary in and Headphone out. The main power toggle is just under those jacks. There are no HDMI or USB front panel inputs. Though this omission lends to the clean look of the AVR850, I am sure most users would hope for these inputs at one point or another.

Arcam AVR850 Surround Receiver - Rear View

The receiver’s back panel layout is clean, reasonably uncluttered and logically laid out. The HDMI board is along the top and is where you will find the 7 inputs and two outputs. There is an additional Zone 2 HDMI output which is a nice plus.

The analog inputs and outputs are situated below the row of HDMI jacks. And next to them are the S/PDIF coax and optical inputs. There is a USB port there too, but it is for playing files from a jump drive or a hard drive, it is not for computer audio. Also on this row are the Ethernet port, 75 ohm antenna jack and the various control ports which include four programmable DC triggers.

Speaker outputs are heavy duty five-way binding posts for all 7 channels. The two outermost channels can be readily configured for height, rear or Zone 2 speakers.

Setup

Setting up the AVR850 was about as painless as possible for a complex product such as it is. I placed the unit in the rack where I typically keep my surround processor and then hooked up all my sources, displays and speakers. Then I was ready to calibrate the unit. But first, I’d like to make a few observations about the set up.

Most of my sources are HDMI anymore. I have a satellite receiver/DVR, a Blu-ray player, a DVD player, a Roku and an AppleTV. I connected all of these via HDMI. My last analog source is my Parasound phono stage. I connected this to the “STB” input because it was available and I thought I could watch satellite TV while listening but I found that I needed to switch the video input each time (because the STB input has its own native video source). So I will switch this to the CD input so I can make the SAT video pass through a permanent choice.

I connected all 7 of my satellites to the speaker binding posts using banana plugs. I then configured outputs 6 and 7 to be used for the height channels. I was honestly thinking I would just test the internal amps for a while, become disillusioned with their quality and/or power output and then switch back to my big outboard amp. But in actuality, I never stopped using the AVR850’s Class G amps during the entire evaluation period. They were nothing short of awesome!

The last connection I made was to connect the subwoofer out to the line level input on the back of my sub. I defeated the EQ in my sub and proceeded to calibrate the AVR850.

The set up for Dirac Live is very similar to the way you set up a system with many of the other high end room correction packages. The unit comes with a USB soundcard and analog mic that you connect to a laptop on which you have downloaded the Dirac Live for Arcam software. You then connect the receiver to the same network via its Ethernet connection. The laptop and receiver need to be on the same network. Once all the connections were made, I launched the software on the laptop and was pleased with how simple and straight forward the calibration process was.

Arcam AVR850 Surround Receiver - Dirac Live for Arcam software

It was all script based and the software walked you through the process with a simple step-wise process. It is about as idiot proof as a complex system can be. Dirac Live has a default target curve, but you can also play with the curves to make revisions for your own tastes, to avoid the system trying to fill room-induced suckouts or to prevent the system from pushing your tweeters beyond their comfortable working limit.

I mostly evaluated the system using the default curve and the performance I heard was magnificent throughout. But I did need to manually balance the channels after Dirac Live was done. The channels balance adjustments I made did substantially improve the immersion factor. So now I was ready to enjoy some movies and music!

In Use

The Arcam AVR850 was so good, I’m having a hard time deciding where to begin my comments. After thinking it over for a few minutes, I’ve decided the best place to start would be with its core functionality – surround sound.

Mission Impossible: Rogue Nation

Mission Impossible: Rogue Nation

I recently upgraded my system by installing in-ceiling height speakers and that’s why I was most excited to test out Dolby Atmos. I have found “Mission Impossible: Rogue Nation” to be one of the best among the early wave of Dolby Atmos Blu-ray releases.

The best demo material on this disc would be the extended chase scene through the streets and walkways of Morocco. The AVR850 delivered a scintillating performance throughout this scene. The growl of the engines was very satisfying for sure. The engine noises were fleshy but realistic sounding – the Arcam passing these effects just the way they were intended; strongly, powerfully and with vanishingly low distortion.

But much more than that, the mix in this scene is very complex. Lesser receivers might devolve the presentation into a grungy morass of blended noises. But not the Arcam. It presented the audio with extreme clarity and a specific ability to separate out all the sounds on disc. Add that the Dolby Atmos created a true surround bubble and the effect was more akin to high quality separates as opposed to a single box solution. A big part of this observation is that I never felt that the amplifiers were straining up to their limit even when listening at very loud playback levels.

Terminator Genisys

Terminator Genisys

There was another action-packed Dolby Atmos Blu-ray that I enjoyed quite a bit while reviewing the AVR850 – “Terminator Genisys”. Similar to Mission Impossible, this is a film that would seriously tax the amplification built into lesser receivers. The AVR850 left its competition in the dust with the way it reproduced the complex, full-range effects in this movie. My main speakers are moderately efficient with a claimed in-room sensitivity of 94 dB.

But when you have a large room as I do and crank up a movie like Genisys, all sorts of bad things can happen if your amplification is not up to task. And the strength of the amplifiers in the AVR850, particularly with multiple channels firing, will be one of the most lingering impressions I will have of this fine product.

The AVR850 also offered up a clean presentation with lots of space between individual sounds. In many ways, it brought me very close to what I heard in the Datasat RS20i which is a product that costs over $25,000 and has no included amplification. I would estimate that on a movie like Genisys, the AVR850 provided over 90% of what was heard with the incredible Datasat in the system. The Arcam simply is that good.

As mentioned earlier, the AVR850 could synthesize the effect of Dolby Atmos from normal material. It was a little hard for me to figure out how to engage this effect as the manual was not altogether clear. A quick email exchange with Arcam’s US distributor cleared this up right away. You need to select “+ Dolby Surround” in the main menu. In other words, you set the AVR850 to pass the native format and then it overlays Dolby Surround which then engages the height channels.

The Revenant

The Revenant

I tried it on a movie that I happen to have missed in theaters – “The Revenant”. So the first time I watched it was over the AVR850 with the height channels engaged. I was blown away!! Of course a big part of being blown away was this incredible movie and part of it was the Arcam AVR850. This movie turned out to be the ideal choice for adding height information. Most all the scenes were outdoor scenes and the sounds of the wind rustling leaves and the rainfall/snowfall on those very leaves was incredibly convincing. And what about the sound of a grizzly’s paws raining down on you. Yikes!! I was fixated.

Tony Bennet and Lady Gaga

Tony Bennet and Lady Gaga “Cheek to Cheek Live!”

So the movie watching was pretty awesome with the AVR850 in my system. A lot of surround receivers do well with movies but fall woefully short on music. But this is not the case with Arcam’s AVR850. I found its ability for musical playback to rival many of the best 2-channel receivers I have heard. Take the Blu-ray of Tony Bennet and Lady Gaga “Cheek to Cheek Live!”.

This is a well recorded and properly mastered presentation. Listening to the 2-channel LPCM track, the AVR850 let this work shine unlike anything I would have ever expected from a surround receiver. The sound is warm and rich which was truthfully conveyed via the Arcam’s excellent response characteristics in the mid bass. Also, the singers’ voices were uncannily real and let me feel I was right there enjoying this amazing performance side by side with the audience.

Ryan Adams

Ryan Adams “Heartbreaker”

When it came to vinyl, the Arcam once again impressed with an incredible performance. One record I enjoyed was Ryan Adams “Heartbreaker” special anniversary edition on vinyl. Listening to this record proved to be a major high point in my review of the AVR850. Despite all the nice things I’ve said about this receiver heretofore, this proved to be a major high point so not sure how to describe what I heard other than to say it was singularly the very best reproduction of a 2-channel source than I have ever heard from a surround receiver.

My favorite song on this album is “Oh My Sweet Carolina”. I could have listened to it a hundred times over the AVR850. The sound of the strings, the drums and most especially the voices were amazingly true to life and emotive.

One more point – the unit makes it easy to toggle the Dirac Live on and off. When I would turn it off while listening to vinyl, the soundstage collapsed dramatically. When on, the Dirac spread the stage as wide as possible and opened up the top end in a way that I cannot fully explain with just words. It is something you must experience for yourself.

On The Bench

The below test plot is the analog frequency response of the AVR850 through the line level outputs. The unit was set to stereo direct and the room correction was turned off. The frequency response is ruler flat from DC to beyond 30 kHz and then its starts a gentle roll of up to 48 kHz at which point the filters kick in.

Arcam AVR850 Surround Receiver - On The Bench

This is the basic THD+N reading for the AVR850 with the same set up parameters described above. At 2V out, the THD+N is 0.00324%. I tried testing the unit at 5V out over the line level outputs which caused the unit to go into protection mode and shut down. This was not a concern as 2V out is ample to drive most domestic amplifiers to clipping so shutting down just before 5V is not a problem. This was in fact evidence that the protection circuits were working as expected.

Arcam AVR850 Surround Receiver - On The Bench Stats

This is the first of the IMD tests we do on amplifiers. The test signal comprises two simultaneous tones of the same amplitude, one is 19 kHz and the other is 20 kHz. The B-A peak is the difference signal that is sympathetic to the input signals, 1 kHz in this case. The AVR850 offers amazing performance with this B-A peak measured at 101.76 dB below the test signals.

Arcam AVR850 Surround Receiver - Stats

This is the other IMD test with 60 Hz and 7 kHz signals. The reported IMD at 2V was 0.0027%. There was a day not too many years ago where this low a reading would have only been possible from the most expensive of 2-channel preamplifiers.

Arcam AVR850 Surround Receiver - On The Bench Stats

The next three plots give the THD+N of the AVR850 at the speaker outputs. All tests are 2 channels driven into 8 ohms. The third and last test plot shows the THD+N is less than 0.005% just below the amplifier’s rated output of 120 watts per channel. This exceeds manufacturer claims.

Arcam AVR850 Surround Receiver - Stats

Arcam AVR850 Surround Receiver - On The Bench

Arcam AVR850 Surround Receiver - On The Bench Stats

Conclusions

THE ARCAM AVR850 RECEIVER has Pristine Video Pass-through, Modern Audio Technologies and Some of the Cleanest, Most Powerful Amplification of Any Receiver on the Market.

Likes
  • Dolby Atmos and DTS:X ready
  • UHD and 3D video passthrough
  • Low distortion
  • High power
  • Clean and vibrant sound
  • Extremely musical
  • Excellent processing for matrixed height channels
  • Dirac Live room correction
Would Like To See
  • Front-panel digital inputs
  • Asynchronous USB input

The Arcam AVR850 gets my highest recommendation. I was very much sold on it after my extensive listening sessions. There is no doubt in my mind that it can and does offer performance that rivals many of the separate processor/amp combinations on the market. My positive impressions were further reinforced by the superior bench tests results obtained.

Let me break it down a little more. The AVR850 is on the cutting edge of today’s technology with the most up to date audio processing available for the consumer market. It also has Dirac Live, one of my favorite room correction systems out there. It has an easy to follow, script-based set up routine that virtually anybody can successfully implement. It has robust and clean sounding amplifiers on board. I never had one single reliability issue with the unit throughout a very long evaluation period. Lastly, the AVR850 is very well put together and I see no reason why it wouldn’t be a reliable performer year after year.

Some may think the price of the AVR850 is a little high and I get that. There are a lot of cheaper receivers on the market that, on paper, may seem to offer better value. But I can attest through my hands-on experience with the AVR850, there are substantial benefits that the Arcam has over the competition. It reminds me of the old adage, “You get what you pay for” only that isn’t exactly correct: You can pay for it and not get it. More correctly, it should say, “You don’t get what you don’t pay for!” When you buy an Arcam AVR850, you get the best circuit designs, the best componentry and the best build quality available in any mainstream receiver. You owe it to yourself to give the AVR850 receiver a try before you invest in a new receiver.

The post Arcam AVR850 Surround Receiver Review appeared first on HomeTheaterHifi.com.

Anthem MRX 1120 A/V Receiver Review

$
0
0
In their recently refreshed MRX receiver line, Anthem Electronics unveiled the new MRX 1120 home theater receiver. This new model slots between the MRX 720 and the AVM 60 pre/pro, effectively usurping the 720 as flagship of the series.

This handsome looking piece of gear supports Dolby Atmos decoding out of the box and will support DTS:X decoding, by years’ end, with a future firmware update that can be user installed. The MRX 1120 comes equipped with 11 channels of amplification on board, with the main five channels rated at 140 watts into 8 ohms and the remaining six channels rated at 60 watts into 8 ohms. Also included in the package is the latest version of Anthem’s acclaimed ARC 2 room correction system, and DTS Play-Fi which supports streaming services like Spotify, Pandora etc.

Anthem MRX 1120 Front Panel

Highlights

Anthem MRX 1120 A/V Receiver

  • Excellent design and build quality.
  • 11 channels of amplification.
  • Amplifier channels handle 4 ohm speakers with ease.
  • ARC 2 room correction produced an exceptional level of quality sound.
  • 6 HDMI 2.0a inputs supporting HDCP 2.2 and 4K video.
  • No analog video inputs.
Introduction

Earlier this year, at CES 2016, the fine folks at Anthem Electronics revealed their updated MRX receiver line. These new units featured Dolby Atmos and would be upgradable to DTS:X capability via a firmware download later on in the year. Having had an enjoyable experience when I reviewed their entry level MRX 310 two years ago, which has now dropped from the line, I asked if I might take the top-dog MRX 1120 out for a walk this time around. About two months ago, they kindly obliged, and with four new overhead height speakers just recently installed in my home theater, the timing was perfect.

ANTHEM A/V RECEIVER REVIEW SPECIFICATIONS
Design:

11.2 channel home theater receiver

DACS:

AKM AK4458 (D/A), AKM AK5358 (A/D)

DSP:

32 bit, quad core processor

Surround Codecs and Listening Modes:

Dolby Atmos, Dolby TrueHD, Dolby Surround, DTS:X (via future firmware update), DTS-HD Master Audio, DTS Neo: 6, Anthem Logic, All Channel Stereo

Rated Power Output:

5 x 140 watts continuous – Two channels driven @ 1% THD into 8 ohms; 6 x 60 watts continuous – Two channels driven @ 1% THD into 8 ohms

Number of Zones:

2

Room Correction:

Anthem Room Correction (ARC 2)

Amplifier Type:

Class A/B (5 main channels), Class D (6 rear and height channels)

Inputs:

HDMI (6 rear HDMI 2.0a, 1- rear HDMI 1.4 with MHL support, 1 front HDMI 1.4 with MHL support), SPDIF Coax (2), Toslink (3), RCA Analog (5 Stereo Pairs), USB (1 rear, 1 front for service and updates), RS232 (1)

Outputs:

HDMI (2 HDMI 2.0a, one has Audio Return support), Toslink (1), RCA Analog (11 channel pre-outs, 2 subwoofer outputs, 1 stereo pair for Zone 1, 1 stereo pair for Zone 2), Speaker terminals (11 pair, all powered)

Tuner:

FM

Accessories:

Remote control, calibrated microphone, mic stand, Software installation disc, USB cable, Ethernet cable, Wi-Fi antennas

Dimensions:

6.5″ H x 17.25″ W x 14.75″ D

Weight:

32 pounds

MSRP:

$3499.00 USA

Company:

Anthem

SECRETS Tags:

Anthem, MRX, Receivers, ARC, Dolby Atmos, DTS:X, Home Theater, Receiver Reviews 2016

Having heard a number of Dolby Atmos demos at various audio shows, this would be my first experiment with the new surround format in my own house and I was looking forward to getting a taste of Anthem’s implementation. With a full 11 channels of onboard amplification and a price tag north of $3000.00, this is not a component for a casual installation or an entry level home theater. If history is any guide, the expectation of the MRX 1120 is for top quality performance and an exceptional level of sound quality. Let’s see if the Anthem measures up!

Design

Anthem MRX 1120 A/V Receiver - Front/Side View

With the unpacking the MRX 1120 two things became immediately clear. Firstly, the unit itself was identical in size to the 5.1 channel MRX 310 that I reviewed two years ago. “So where did they stuff the six extra amp channels?” I thought to myself. Secondly, I became aware that the unit was noticeably heavier than the MRX 310 was, which gave a hint of an answer to my initial query.

Anthem MRX 1120 A/V Receiver - Interior Top View

Anthem MRX 1120 A/V Receiver - Interior Rear View

Anthem MRX 1120 A/V Receiver - Interior Side View

Upon removing the top cover of the receiver for a look inside, I discovered a beefy new toroidal transformer and more robust heatsinking. These are substantial upgrades over what the MRX 310 had for its amplifier section. Delving into more detail, I discovered that while the 5 main channels of the MRX 1120 are Class AB amplifiers (rated at 140 watts per channel), the rear surround and height channels are more efficient, and smaller sized, Class D amplifiers (rated at 60 watts per channel). This is a rather elegant design solution for the power section that keeps the MRX 1120 from growing out of control, dimensionally.

While on the subject of the guts of the unit, the DAC chips have been upgraded to AKM AK4458 parts which Anthem bill as “Premium 768 kHz / 32-Bit Differential-Output D/A Converters.” All digital inputs can now accept up to a 24 bit/192 kHz input signal, however a direct DSD bit-stream cannot be accepted. Convert those to PCM at your player outputs first and then you’ll be fine. The main DSP silicon is now a 32bit-Quad-Core chip which allows even better filter resolution with the ARC 2 room correction system.

The face of the MRX 1120 is essentially a carbon copy of the 310. It’s visually uncluttered with a modest array of six primary buttons under the main display labelled: Setup, Dim, Mode, Level, Zone and Input. To the left is a circular grouping of five buttons similar to a cursor scroll and select control on a remote. Below that, there is a small door covering the headphone jack, front USB (for updates) and front HDMI (1.4) inputs. The main volume knob is to the right with two small buttons for Zone 2 and Main power just below it.

Anthem MRX 1120 A/V Receiver - Rear View

The rear panel is equally organized and well laid out with inputs and outputs in black and white color coded groups for easy identification. The MRX 1120 receiver sports eight HDMI inputs (seven in back, one in front) and two HDMI outputs. Six of the rear inputs are of the HDMI 2.0a variety which are HDCP 2.2 compliant. This means the receiver fully supports and switches 4K/60 video resolution, HDR (High Dynamic Range) video and the BT.2020 Color Gamut. The remaining rear HDMI input is HDMI 1.4 and supports MHL (Mobile High-Definition Link) as does the input in front. MHL provides special considerations for the connection of mobile devices and also allows a device to be charged when connected. One of the two HDMI outputs supports an Audio Return Channel (ARC), which allows you to listen to audio from your television without the need for an additional cable. On the MRX 1120, legacy video inputs are just that, a legacy. They don’t exist at all on this receiver period, end of story. The MRX 1120 supports five sets of stereo analog RCA inputs and five digital audio inputs (2 coaxial and 3 optical). There is also a USB connector to assist with Play-Fi updates, if a network connection is unavailable, and an Ethernet connector to be jacked into the home network, the old-fashioned way. The new-fashioned way of interfacing with your home network sees this newest Anthem sporting a pair of Wi-Fi antennas. This also allows the use of the streaming services on the 1120 and permits the ARC room correction system to be a fully wireless exercise to setup and implement.

Anthem MRX 1120 A/V Receiver - Tripod Package

The ARC kit, which is included with the receiver, comes with a calibrated microphone, an adjustable tripod, a USB cable, a software disc and an Ethernet cable. The software itself is simply called ARC 2 (Anthem Room Correction) and it is their latest generation of code. It features both an automatic and fully manual mode which can allow either a streamlined or a detailed level of adjustability for the system. Anthem also includes a complete set of 11.2 channel pre-outs should you want to use the MRX 1120 with higher power amplification down the road. Zone 2 audio duties can be handled with either the line level outputs or by configuring the speaker outputs through the setup menu. New on the MRX 1120 are the afore mentioned streaming services afforded through DTS Play-Fi.

Anthem MRX 1120 A/V Receiver - Remote

Play-Fi compatibility may be of increasing interest as there are a number of DTS Play-Fi certified network speakers coming to market and any of them could be mated to this receiver to create a whole house wireless music system with the MRX 1120 as its hub. There is also a DTS Play-Fi app for iOS, Android and Windows systems that can integrate and control the whole shooting match, along with connecting to external music servers. The remaining connections on the MRX 1120 back panel allow for antenna connection to the standard FM tuner. No AM, sorry talk radio fans, just stream it! There is also an IR input as well as an RS-232 jack that can be used to control the MRX 1120 with an external control system. A 12 Volt DC Trigger is also included which allows you to turn on another device, such as an external amplifier for zone two.

The MRX 1120 comes with the same basic, non-learning remote that the MRX 310 had. It’s light, it works and it’s backlit. Enough said.

Setup

As I found with the MRX 310, the setup of this receiver is pretty straightforward with no real surprises. The Ethernet cable connection was ditched this time around in favor of having the MRX 1120 talk to my network wirelessly. Within a few moments, that was taken care of.

Compared to some of the fancy GUI menus on many receivers and processors today, Anthem’s menu system is simple, clean and straightforward. No gee-whiz graphics here, just a simple intuitive list system. As I began to go about assigning my inputs, I discovered that five inputs are setup by default at the factory but that you can add, remove and reconfigure any inputs for a maximum of 30. A nice bonus was that HDMI sources could be reused across any input. Once the inputs were set up, I entered the distance between my primary listening position and each speaker in my room. Distances are entered in the "Listener Position" menu and can be entered in feet or meters in increments of 1 foot or .3 meters respectively. This is something that you must do manually as the Anthem Room Correction system does not do this for you when calibrating as some other systems do.

Now it was time to run the ARC 2 software. A quick check of the receiver menu showed that it had the latest firmware installed. A quick check on Anthem’s website showed there was a newer version of the software for the laptop than what came packaged with the kit. I downloaded and installed the newer software which included the calibration files that matched my microphone’s unique serial number. Anthem informed me that they are phasing out including the physical software disk with ARC in favor of just downloading the software directly when you get your unit home. That way you are always guaranteed to be working with the latest software revision. A quick note, since I use two subwoofers in my HT, Anthem advises you to level match them first with a SPL meter from the main listening position to just under 75dB each before running ARC 2, which I did.

I started the software in the Automatic Mode which found the MRX 1120 on the network and began by offering me the default choice of 5 measurement positions for the microphone. I elected to choose 6 for my room, but you can choose more if you need. Once the measurements were done and uploaded to the receiver, I reviewed the calculated settings on my laptop. While everything seemed reasonable and would have been fine to go as is, I saw that ARC 2 had set the crossover on my center channel at 100 Hz and 170 Hz on my height speakers. Through past experience, I know that those speakers can be crossed a little lower and the raw measurement graphs confirmed that there was some response to spare.

Anthem MRX1120 Target customization panel

I closed up the ARC 2 Auto Mode portion of the software and opened up the Manual Mode. I selected the file which contained my measurements and pressed the Target button. This opened up a new window with a number of customization options including individual crossover settings, adjustable high-pass filtering for the subwoofers, room gain level, speaker level trims, etc. There is also provision to store and upload settings for up to 4 different speaker profiles and associate them with specific inputs if you so choose. I decided to adjust the crossover setting for my center channel to 80 Hz and the height channels to 120 Hz. After that, I pressed the Recalculate button and ARC began to re-calculate and calibrate for the new settings based off the original measurement data. When complete, press Upload and the new data is sent to the receiver. Now, it’s time for the fun stuff!

Anthem MRX1120 ARC Results-Front Left and Center

Anthem MRX1120 ARC Results-Front Right and Surround Right

Anthem MRX1120 ARC Results-Surround Left and Subwoofer

Anthem MRX1120 ARC Results-Height 1 Left and Right

Anthem MRX1120 ARC Results-Height 2 Left and Right

In Use

For this review, the connected components consisted of: Pioneer KURO 50” Plasma TV, OPPO BD-103 Blu-ray Player, Sony PS3, Xbox ONE, Motorola DCH-6200 Cable Decoder box, APC H-15 Power Conditioner and Blue Jeans Cable speaker wire and interconnects. Speakers used were the Salk Songtowers for the front left and right channels, a Zaph ZD3C center channel speaker, AV123 RS300 quasi-dipole surround speakers, 4 GoldenEar SuperSat 3 speakers for the height channels and Chase Home Theater 18.1 and 18.2 subwoofers.

Usually when I set up an HT receiver for review, I don’t program our universal remote so there is always a short learning curve before the receiver’s usage becomes second nature. This not only applies to me but also to my two boys who will have no barriers placed between them and the enjoyment of their video games! Having just finished setting up the MRX 1120 in an afternoon and after confirming that everything worked, I powered it off and proceeded to do some business in my studio. My 12-year-old son comes downstairs with his buddy to play Xbox and before I can pause what I’m doing to explain some pointers about the receiver to him, he has everything powered up, inputs properly selected and is up and running! I walk in, asking him how he figured it out so fast? “Easy!” he says, and then proceeds to show me how he did it, using the buttons on the unit, in a matter of seconds. It just goes to show that, once the initial set up is done, the MRX 1120 (and by extension all the Anthem MRX receivers) are basically a cinch to use and live with.

I don’t currently have any 4K source material so I can’t test if any signals of that resolution passed the 1120 successfully, but all 1080p Blu-ray content looked subjectively spotless. Colors seemed clean and true and I did not experience any HDMI handshake issues throughout any of my usage.

On the audio side of things, the Anthem was, quite simply, exemplary. My home theater sounded at least as good as I’ve ever heard it, if honestly not a touch better. My front three speakers have a 4-ohm impedance and the surrounds are 6 ohms. Neither of which presented any sort of challenge to the Anthem’s amplifier stages. In fact, the receiver kept a tight rein on all the speakers as none of them showed any signs of stress or misbehavior. Another note about the amplifiers is that when there were pauses in the music, or very quiet passages, there wasn’t a hint of any background noise even when turned up fairly loud. I’ve owned a couple of receivers where I would hear switching noise when changing inputs or there would be the slightest hiss in the background when nothing was playing. Complete silence with the MRX 1120, dead quiet, an electronic monastery.

This was also my second experience using the ARC 2 room correction system and I continue to be impressed by what it was able to accomplish in my room. The consistency of the sound, particularly the bass, across all four of my theater chairs was excellent with minimal variation. The subs were equalized just right for my liking. Bass sounded deep and punchy without getting bloated at all. Sometimes, with other EQ systems, the bass will get flattened out too much for my taste and then I invariably have to go into the settings and tweak levels and whatnot. ARC got the bass right where I wanted it on the first go. No additional “juicing’ of the levels was required. Another nice quality about the ARC system is that, since it doesn’t EQ anything above 5000 Hz, I felt that the sonic attributes that I like about my main speakers weren’t overly messed with, which has to do with why I bought them in the first place.

As this was also my first dipping-of-the-toe in the waters of Dolby Atmos, I had a little trepidation as my speaker setup was not exactly “textbook.” I couldn’t install ceiling speakers due to existing can-lighting being right where those speakers would normally go, and those Atmos-enabled “bounce” speakers weren’t an option for me either. After some research, I got 4 GoldenEar SuperSat 3 speakers and attached them to omni-mounts right at the point where the ceiling met the walls. This allowed me to angle the speakers towards the seating position so that their sound would be coming from roughly the Dolby prescribed angles. My surround speakers were also not direct radiators placed at ear level, but quasi-dipoles (only tweeters out of phase) placed just above head level. I couldn’t alter that arrangement because, at ear level, the speakers would be too close to anyone sitting at the end seats in my room. I was honestly wondering if this set up would even work. And, I had pared down from a 7.2 set up years ago because I found that 5.2 sounded so much cleaner in my room. Would adding 4 more speakers just mess things up again?

Well, after living with it for a couple of months, I can honestly say that Atmos, in general, and the Dolby up-mixer that extends non-Atmos material into the height channels is a very welcome addition that sounds better than my standard 5.2 and my original 7.2 setup, with a couple of minor caveats. Speaking generally, I found that most of the Atmos material I listened to made good use of the height channels (obviously some more than others) and that this new height layer of sound tended not to adversely draw too much attention to itself but successfully added to the overall experience. On non-Atmos encoded surround material, the Dolby up-mixer in the MRX 1120 did an admirable job of extending the soundtrack into the height channels and creating a larger sense of space without it sounding gimmicky. After switching back and forth, I found myself listening through the up-mixer for most of my surround movies and music. On some surround music recordings however, I did find that I preferred Anthem’s home-brewed “Anthem-Logic Music” steering mode better in certain instances. On 2 channel music, I will have to agree with what I’ve read from some of my other colleagues here at Secrets. The Dolby up-mixer does a noticeably less convincing job of expanding 2 channel music to multiple speakers than the old Dolby Pro Logic IIx steering did. In almost all but a precious few cases that I tried, stereo music sources just sounded thin and detached when put through the up-mixer and the height channels. In many instances with my usual receiver, Dolby Pro Logic IIx would give some surprisingly pleasing results with stereo music, particularly live recorded material. Some music examples, while not equaling truly discreet surround mixes, were actually downright impressive. The comparable DTS listening modes have never sounded as successful to IIx in my experience. The lack of an equivalent to Pro Logic IIx is not a deal breaker by any stretch on the Anthem but, speaking broadly, I wish Atmos receivers would come to market with IIx still as a listening option. Just because you may have 11 channels on tap, doesn’t mean you should always use all of them. With the ability to have ARC calibrations for up to 4 different speaker profiles, the MRX 1120 would be a perfect vehicle to have a speaker preset for expanded 2 channel music. With that being said, some of the more standout listening experiences that I had with the MRX 1120 were:

Batman vs Superman

Batman vs Superman – The Ultimate Edition

Batman vs Superman-The Ultimate Edition, Warner Bros. I’ve been a comic book fan for a good portion of my life and, as such, these particular characters hold a certain hallowed place in my heart. So let me say up front that, conceptually, this film is an absurdly long, ponderous, steaming hot load of poo! I really dislike this dark, overly serious tack that DC comics and Warner Brothers has taken with the production of their comic book properties. With overly cynical, dystopian worlds and flawed heroes that are constantly questioning themselves with overwrought internal struggles.

The main premise of this movie was adapted from parts of Frank Miller’s “The Dark Night Returns” comic book series and then taken in a direction that the comic book never intended. Even my 14-year-old son, whose alley this should be right up, kept looking at me after various scenes and said, “Dad, that was ridiculous!” I mean the best part of this film was when Wonder Woman makes her appearance in the final battle with Doomsday. Her character outshines the two leads with a bit part! Hate on this movie much? You bet I do. It’s a pig. But the Dolby Atmos soundtrack and the playback through the Anthem receiver? Oh my word, it is fantastic! Despite its story flaws, this movie has one of the better Atmos soundtracks that I have come across and the MRX 1120 plays it for all its worth. Compared with what I am used to hearing with my 5.2 setup, the new height channels really gave an extra sense of spaciousness throughout the entire movie with additional ambience and music cues applied judiciously. The heights are put to very aggressive use during the final battle with debris from crumbling buildings, helicopter fly-bys, explosions, and the like. All the height effects seemed to pan seamlessly when they needed to and really added to the sense of space without drawing undo attention away from the main action. The Anthem’s ARC 2 system also had excellent control of the low frequency effects content in this movie. The deep rumble of that Batplane when it hovered was just cavernous and palpable. Whenever Doomsday would set off one of his epic blasts, the bass hit was low, powerful and solid without ever getting muddy. Everything, as a whole, sounded crystal clear and in proper balance via the Anthem. So, in this case, the MRX 1120 made the best out of the situation by putting lipstick on a pig and successfully taking it to the ball. Not a bad party trick!

Mission: Impossible - Rogue Nation

Mission: Impossible – Rogue Nation

Mission: Impossible – Rogue Nation, Paramount. With this next installment in the venerable franchise, Paramount ups the ante with a really enjoyable story and an excellent Dolby Atmos soundtrack. The addition of the height channels really goes a long way here to create a true bubble of sound. Every chase scene felt bigger in dimension. The assassination attempt at the opera house had just a larger degree of space, what with the audience, backstage rigging and various effects all taking place overhead.

The extended underwater scene when Ethan Hunt is trying to facilitate Simon Pegg’s character breaking into the vault, while holding his breath was particularly immersive with plenty of panning sound, both at ear level and above. ARC 2 shined again here with plenty of controlled, hard-hitting bass throughout the film.

ALT

Goldberg Variations – Acoustica

Goldberg Variations Acoustica, The AIX All Star Band, AIX Records. Another fine recording from Mark Waldrep’s label. This Blu-ray disc features 6 well regarded studio musicians re-interpreting J.S. Bach’s work through almost a jam session type of arrangement. The audio was recorded and mixed in 5.1 Dolby TrueHD at 24/96. The surround mix sounded incredibly natural on this disc with every performer properly placed in space.

The instruments had a clarity and purity to their sound that I don’t come across very often on recorded material. An “unmolested” sound would be a good way to describe it. The acoustic bass plucks came across forceful and clean sounding while both the acoustic piano and Hammond B-3 organ had an almost “right there” quality to their notes. Drums also had excellent weight and impact while the cymbals sounded as clean as a whistle. And the quiet passages that I touched on earlier? They were here and they sounded dead silent on this recording. You could tell that the musicians were genuinely enjoying playing off one another as the interplay was incredibly skillful. In particular it was great to see and hear Dean Parks and Laurence Juber trade licks on electric and acoustic guitars respectively. When switching between the standard TrueHD steering and the Dolby up-mixer, it seemed that the latter was intelligently extending the sound field higher and expanding the natural environment but still maintaining a level of clarity and cohesion. The added sound level didn’t draw undue attention to itself and sounded as if it belonged. The MRX 1120 basically put me right in the middle of the performance and it felt like I was very much there.

Diana Krall-The Girl in the Other Room

Diana Krall “The Girl in the Other Room”

The Girl in the Other Room, Diana Krall, Verve Records, Multi-channel SACD. Yes, it’s the recording that is both the mainstay and the bane of everyone’s existence that goes to an audio show. It is one of the most commonly used pieces of demo material for a reason, because it sounds so darn good! I had never heard the multi-channel mix before and, frankly I hadn’t thought about it as the stereo mix is excellent by any measure. Not to engage in hyperbole but, what a fool I am! This surround mix, rendered on the Anthem using the Dolby up-mixer sounded nothing short of gorgeous!

The MRX 1120, again, put me right there in the recording studio. The instruments and the ambience of the recording were so rich though, that it could have just as easily been a nightclub. From the opening notes of “Stop This World”, the Anthem and the ARC system work convincingly as they reproduce the piano’s deep, resonant, lush sound while the kick drum had nice, impactful hits that were clearly felt. Krall’s voice is placed perfectly in the soundscape, sounding clear but with just the right amount of the trademark huskiness to its tone. The basslines through this entire disc are just palpably good, sounding big and rich but not sloppy at all. Once again, thank you ARC! On “Temptation”, probably the most overplayed audio show demo tune, the surround mix has a depth that puts the stereo mix completely to shame. Again, when switching in the Dolby up-mixer, the sound bubble just got bigger but not in an un-natural or distracting way. The MRX 1120 kept everything sound big and lush, but while maintaining control with detail and specificity to all the instruments and vocals. It could have easily fallen to sonic mush on a lesser receiver, but not with the Anthem.

Are there any negatives about the MRX 1120, since I have essentially been gushing about it up until now? Mostly small things. The remote control, while serviceable, could be so much more. I’m sure many prospective buyers would expect a learning unit be included at this receiver’s price point. During ARC setup, it would be great if, when running dual subwoofers, the software would ping them individually and allow a user to dial in their sound levels during the pre-measurement phase. The latest iteration of Audyssey does this and it is very convenient.

There are no analog 7.1 audio inputs. Some people might find this problematic depending on their setups, I didn’t.

On The Bench

Benchmark audio tests were conducted on both the analog inputs of the MRX 1120 and the digital input via HDMI. The source device for both analog and HDMI tests was an Oppo BDP-83SE. For the analog tests, the input level was 2.2 VRMS into the RCA inputs of the MRX 1120. The volume was adjusted for 2 VRMS at the speaker outputs.

Anthem MRX1120 1 kHz Sine Wave-Analog

At 1 kHz into the RCA input, THD+N was 0.002921%. We see a few harmonics throughout the spectrum with the second harmonic at 2 kHz being about 88 dB below 2 VRMS.

Anthem MRX1120 IMD Test-Analog

The IMD measurement using the RCA input was 0.004248%. We see minor noise spurs on either side of the fundamentals and a second harmonic at 14 kHz at 100 dB below 2 VRMS.

Anthem MRX1120 19 and 20 kHz Sine Waves-Analog

Here are the results for the 19 kHz, 20 kHz combined test frequencies using the RCA input. There is a visible B-A peak at 1 kHz about 88 dB below 2 VRMS. We see distortion spurs throughout the spectrum. The second harmonics at 38 kHz and 40 kHz are about 85 dB below 2 VRMS.

Anthem MRX1120 Frequency Response-Analog

I measured the frequency response of the MRX 1120 out to 96 kHz. In analog direct, the response is flat out to about 70 kHz and then we see a gradual roll-off of the high frequencies at 80 kHz. Note that the minor “tick” at 2.5 kHz is an artifact from my measuring setup.

Anthem MRX1120 1 kHz Sine Wave-Digital

At 1 kHz, and 16-bit/44.1k sampling rate, THD+N was 0.003628% measured from the speaker outputs. We see several harmonics in the spectrum with the peak at 2 kHz being about 88 dB below 2 VRMS.

Anthem MRX1120 1 kHz Sine Wave-Digital

The IMD measurement using the HDMI input was 0.003974%. We see noise spurs on either side of the fundamentals and a second harmonic at 14 kHz at 100 dB below 1.9 VRMS.

Anthem MRX1120 19 and 20 kHz Sine Waves-Digital

Here are the results for the 19 kHz, 20 kHz combined test frequencies using the HDMI input with 24-bit/96k sampling at 2 VRMS. We see higher distortion spurs throughout the spectrum. There is a visible B-A peak at 1 kHz about 89 dB below each test tone which is insignificant. The second harmonics at 38 kHz and 40 kHz are about 85 dB below each test tone.

Conclusions

Anthem MRX1120 Front Panel

THE ANTHEM MRX 1120 is the Best Home Theater Receiver That I Have Had the Pleasure of Ever Using.

Likes
  • Great design and solid construction.
  • Lots of power with ample reserves.
  • Superb sound quality for movies and music.
  • ARC 2 room correction is a standout.
Would Like To See
  • Learning remote.
  • Dolby ProLogic IIx for expanding stereo sources into surround.
  • ARC subwoofer level set up stage.

To put not too fine a point on it, the Anthem MRX 1120 is the best home theater receiver that I have had the pleasure of ever using. It looks deceptively simple on the outside and while it might not have every last bell and whistle that some of its competitors do, the features it does have are the ones that matter and are well thought out. It’s defining characteristic though is its sound quality and the MRX 1120 is truly top shelf in this regard. I don’t think I’d be overstating it if I said that the sound quality you get from this unit is comparable to having separates from some other manufacturers. ARC 2 room correction continues to show why it is one of the most well regarded of these types of systems. Bass was always tight, powerful and perfectly rendered regardless of the source material. Also, as the first receiver that allowed me to experience a proper Atmos set up in my home, it was a home-run in terms of showing what the format can do, even with a slightly unorthodox speaker layout. If anything, it has unfortunately set the bar rather high for any other Atmos receiver that comes through these doors. Well done indeed!

*Note: As soon as Anthem releases an update enabling DTS:X functionality on this receiver, I will post a follow up report on my experience. Also, special thanks go out to Robert Kozel for his assistance with the bench test results.

The post Anthem MRX 1120 A/V Receiver Review appeared first on HomeTheaterHifi.com.


Legacy Audio Wavelet Preamp/Processor Review

$
0
0
The Wavelet preamp/ processor from Legacy Audio is an interesting hi-fi animal. It combines the features of a control preamp, a DAC, a multi-way digital crossover and a speaker correction system in one unit.

While these are somewhat commonplace features in a home theater-centric product, they are not often seen in a product expressly designed for a two-channel application. Originally the Wavelet was created to work solely with Legacy’s own speaker models as the speakers’ characteristics could easily be profiled and loaded into the processor’s memory before customers took delivery. Lately though, Legacy has measured and built a library of various speaker profiles from other manufacturers that allow the Wavelet to be used with non-Legacy speakers as well. This piqued my interest and Legacy Audio founder, Bill Dudleston, graciously agreed to measure my speakers and set up a Wavelet processor for me to try out with my 2.2 channel stereo rig.

Legacy Wavelet ¾ view

Highlights

Legacy Audio Wavelet Preamp/Processor

  • Variety of analog and digital inputs including asynchronous USB.<
  • Analog inputs have individually adjustable trim levels.
  • Digital crossover can be programmed for 2, 3 or 4-way operation.
  • Loudspeaker/room correction system is simple and effective.
  • Can be controlled wirelessly via web browser on a computer or smartphone.
  • Hardware and firmware upgradable design.
Introduction

So, let me begin with a little background information. My home stereo system’s speaker setup consists of a pair of MTM stand-mounted monitors and a pair of sealed subwoofers running in stereo. Essentially a 2.2 channel arraignment. The system’s bass management is controlled and routed through a high quality, external, analog electronic crossover and a parametric bass equalizer, both of which are separate from my preamplifier. It’s not an overly complex ensemble and I think it sounds pretty good, but it’s not exactly the most streamlined audio path considering all the signal manipulation is being done in the analog domain. Of course, any astute reader could point out that I should consider using a surround sound pre-amp or even a good quality surround receiver to make sure all the bass management is handled in the digital domain and I could leverage the benefits of one of the many room correction systems on the market to boot. True enough, I’d say, but somehow deploying a product geared for full-on surround sound use in a stereo-only application just seems a little wasteful to me as I would never use half of the features available on many of these components. Another issue I have is that I’ve never been entirely happy with any room correction system when I’ve deployed one with my stereo rig. Some sound just fine when you are sitting in and around the stereo sweet-spot where most of the measurements have been taken, but when I am working in other parts of my studio and I’m just casually listening, the room-corrected music just doesn’t sound as good to me. Yes, truly first-world problems, I know.

Studio 2.2 channel system

At RMAF 2015, I had visited the Legacy Audio booth and, amongst other things, CEO and Chief Engineer Bill Dudleston gave me an introduction to their Wavelet preamp/processor which was working in tandem with a pair of Legacy’s Aeris loudspeakers. He pointed out to me that beyond being a simple preamplifier, the Wavelet had built-in A-D/D-A conversion, could be set up as a two, three or four-way digital crossover (depending on the loudspeaker) and had a speaker correction system licensed from Swedish company, Bohmer Audio. The fact that all the digital processing and speaker correction was claimed to be done at a 96kHz sampling rate (most other systems down sample higher resolution content to 48kHz) surprised and impressed me. It’s a great component option to have for someone looking at buying a Legacy speaker system I admitted. That’s when Bill told me that the Wavelet could also be set up to work with almost any speaker from any manufacturer. Legacy would just need to have one of the target loudspeakers shipped to them for acoustic measurement. The resulting data would help them create a profile to load into the Wavelet for correction within a given room. Apparently, they have slowly been compiling a database of measurements from various speakers to have ready for prospective customers. My interest was immediately piqued and after I described my own system to Bill, he thought it would be a good candidate for an experiment and he agreed to have me send him one of my monitor speakers for profiling. Due to their size, one of my subwoofers was out of the question to ship but, since they are a DIY design, I provided Bill with the enclosure dimensions and links to the T/S (Thiele/Small) parameters of the drivers to help with profiling them.

LEGACY AUDIO PREAMP/PROCESSOR REVIEW SPECIFICATIONS
Design:

2 Channel preamp/processor with DAC and multi-way crossover function

DSP:

Analog Devices 56 bit processor with 96kHz sample rate

Speaker/Room Correction:

Licensed from Bohmer Audio (utilizes both frequency and time- based correction)

Analog Inputs:

2 pair of unbalanced RCA inputs with adjustable trim levels (input impedance 100 kOhm)
2 pair of balanced XLR inputs with adjustable trim levels (input impedance 20 kOhm)
1 XLR measurement microphone input with 48Vdc phantom power

Digital Inputs:

1 Asynchronous USB up to 64 bit-352.8 kHz PCM, 1 Coaxial SPDIF up to 24 bit-96 kHz, 1 optical TosLink up to 24 bit-96 kHz

Analog Outputs:

4 pairs of balanced XLR outputs (output impedance 33 ohm)
4 pairs of unbalanced RCA outputs (output impedance 33 ohm)

Digital Outputs:

1 Coaxial SPDIF up to 24 bit-96 kHz, 1 optical TosLink up to 24 bit-96 kHz

Control Interface:

Ethernet, TP Cable & WLAN

Accessories:

Remote control, calibrated microphone, USB Flash Drive, Wi-Fi Dongle, USB cable, 25 foot XLR cable, Power Supply

Dimensions:

3.74 H x 17.52” W x 11.85” D

Weight:

13.5 pounds

MSRP:

$4950.00 ($3450.00 for Legacy customers upgrading from previous generation Wavelaunch processor.)

Company:

Legacy

SECRETS Tags:

Legacy, Wavelet, Processor, Crossover, Room Correction, Bohmer, Processor Reviews 2017

Design

Legacy Wavelet front panel

About two weeks after my speaker arrived home in good order from its adventures at Legacy HQ, the Wavelet box showed up at my doorstep as well. The Wavelet is a very handsome and modern looking piece of equipment. The bulk of the enclosure is made of black anodized aluminum with an extra thick matching front faceplate. The front of the Wavelet is simply laid out beginning with a horizontal array of 7 selection buttons on the left side. They are labelled as follows: Input, Mode, DAC, Preset, Mute, Contour and Channel Level.

Input: Pretty self-explanatory. You select from various digital or analog inputs.
Mode: Allows a choice from Stereo, Mono, Inverted Stereo and Inverted Mono listening modes.
DAC: Offers a choice between Pre-Ringing and Apodizing filters.
Preset: Allows a choice of up to 5 preset listening setups.
Mute: You can guess what that one does.
Contour: Access to an advanced set of tone shaping controls.
Channel Level: Allows adjustment of levels for various pairs of outputs.

Legacy Wavelet front display

Legacy Wavelet volume control

In the middle of the faceplate is a large, blue dot-matrix display whose brightness level can be adjusted via the web based control (more on that later). To the right of the display we have the Standby/Power button and then the flush mounted volume knob with a finger divot. The volume control is described as a hybrid design where it operates digitally from 0 up to 84dB and then transitions to analog for the remainder.

Legacy Wavelet back panel

Legacy Wavelet analog inputs

Legacy Wavelet digital inputs/outputs

Legacy Wavelet analog outputs

On the Wavelet’s back panel, we find the left side devoted to analog inputs with two pairs of unbalanced RCA jacks and two pairs of balanced XLR inputs. Each pair of analog input jacks is flanked with a bank of mini-dip switches. These switches can attenuate the incoming signal by either -3db, -6dB or -12dB, depending how the switches are set. This helps prevent an incoming signal from overloading the A-D converter and causing distortion. To the right of these, we are presented with a SPDIF and Toslink set of digital inputs and a matching set of digital outputs. Next to these is a Micro-USB Port for computer input and an Ethernet connector labeled “Communications.” Above these is a XLR input jack for connecting the included measurement microphone (a Dayton EMM-6 unit with downloadable calibration file). After this, there are four pairs of unbalanced RCA analog outputs, four pairs of balanced XLR analog outputs, a USB connector for the wireless dongle and, below that, a DIN type jack for the external switch mode power supply. The Wavelet also ships with a small, palm-sized plastic remote control that performs basic power, volume and selection commands.

Legacy Wavelet accessories

While Legacy asked that I not take any photos of the interior of the unit, due to the proprietary nature of the circuit design, Bill Dudleston informed me that the Wavelet’s innards essentially consist of custom designed processing boards whose functions are controlled and managed by an onboard Raspberry Pi computer. Bill was also “mum” about the exact type of A-D and D-A converters that are used in the Wavelet, again owing to the proprietary nature of the design. What is of note though is that all internal processing, including the speaker/room correction, is done at a 96kHz sampling rate with a bit depth of 56 bits, which is very rare to see in a consumer oriented product. It also provides abundant resolution for the digital portion of the volume control to work with.

The Wavelet uses a speaker/room correction system that has been licensed from Swedish company, Bohmer Audio. It differs, procedurally, from other room correction systems in that instead of taking multiple measurements with a calibrated microphone around the main seating area, the Bohmer system requires 4 measurements be taken from only 2 positions. Those positions are 4 feet from each speaker with the mic pointed directly at either the left or right speaker face. The first two measurements are for the setting of levels and the second two are for the actual speaker/room correction. The resulting data obtained from measuring the Wavelet’s internally generated tones are uploaded, via your home network, to a dedicated processing server. The server crunches the data, which you can monitor real-time via the web browser on your computer or smartphone, with the final calculations being communicated back to the Wavelet itself. In terms of describing what the Bohmer system does, in a nutshell, it not only measures and corrects anomalies in the frequency domain but also measures and corrects in the time domain as well. This additional time alignment claims to make a more complete and accurate sonic picture not just at the main listening position, but all around the rest of the room as well. Here is an additional summation from the manual: “The Bohmer Correction is a loudspeaker in-room energy-time alignment that optimizes the loudspeaker room acoustic transfer function in both frequency and predominantly time domain. Working with revolutionary new algorithms, it starts with a psychoacoustically based measurement method. Alignment errors are then optimized individually, not resorting to the common crude bulk correction over the entire frequency spectra. The Algorithms use psychoacoustic reasoning for alignment and correction of the loudspeaker room transfer function. The correction improves sound quality in the whole room, provides improved transient response, clarity & soundstaging and gives a relaxed sound without rough edges or any booming.”

Setup

For this review, the connected components consisted of: An OPPO BDP-105 Universal Disc Player, a Technics SL1200 Mk 6 turntable with a KAB fluid dampened tonearm mod and a Shure M97xE phono cartridge, a Parasound “Zphono” phono preamp, two Class D Audio SDS-470C Power amplifiers (300 watts @ 8 ohm, 600 watts @ 4 ohm), Bamberg Series 2 MTM monitor loudspeakers, two 5.0 cubic inch sealed subwoofers, each with a single 15” Dayton Reference HF15 subwoofer driver and a Panamax M5500 power conditioner. Speaker wire and interconnect cable by Blue Jeans Cable.

As I noted earlier, I had shipped one of my speakers to Legacy HQ where they had taken measurements to analyze its impulse response, and checked to see if there were any abnormalities or colorations that needed adjusting. This information was then programmed into the Wavelet before it and my speaker were sent back to me. Bill Dudleston did mention that he found my speaker to be well executed and that the crossover was properly designed and voiced resulting in no serious issues to correct. I always thought I owned a decent pair of speakers and it was nice to get corroboration from another respected speaker engineer!
When the Wavelet arrived, I set about following the directions to get the unit dialed into my home wireless network. Once this was accomplished, I was also able to get the Safari browser on my iPhone to communicate with the Wavelet and its Wi-Fi remote menu system displayed easily on my screen. My smartphone pretty much became my defacto setup and remote control for the duration of the review.

Legacy Wavelet web browser, volume

Legacy Wavelet web browser, settings

ALLegacy Wavelet web browser, room correctionT

Legacy Wavelet microphone, close up

I then began going about conducting the auto-level and polarity measurements for my speakers. Once I accessed the appropriate menu on my phone, I was instructed to enter the microphone’s serial number. This allowed the Wavelet to download the matching calibration file and the measurements could begin. I connected the microphone, via the included XLR cable, to the mic jack on the back of the processor. Then, as instructed in the menu, I set the master volume control to 85dB, placed the microphone on a tripod exactly 4 feet away from my left speaker (on the axis between the speaker and my left ear at the main seating position) with the mic pointing directly at the tweeter.

Secrets Sponsor

With the room kept otherwise noiseless, I began the left channel measurement. After a few chirps and sweep tones, the menu on my phone indicated that a satisfactory result had been obtained and I moved the microphone to the right speaker. This time though, my phone said the volume level was too low and the measurement was unsatisfactory. The menu suggested repeating both L and R measurements at an even but slightly higher volume. I reset the master volume to 90dB and repeated the measurements. This time they both were fine. At this point I pressed the “Upload to Server” button and the measurements were sent to Legacy’s remote server for analysis and processing. The menu also provides the ability to monitor the server’s progress in real time. After about 10 minutes the server’s calculations were complete and the proper level settings were downloaded to the Wavelet. At the factory, output channels 1 and 5 were assigned to my speakers while channels 2 and 6 were assigned for my subwoofers. I now moved to the Room correction menu and essentially repeated the same procedure as I just outlined for the Auto Level settings, again keeping the overall volume at 90dB. Once the remote server had crunched the numbers and downloaded the results to the Wavelet, I was ready to get on to the business of listening.

Legacy Wavelet Left speaker measurement

In Use

Let me preface this next part with a few personal observations. I’ve lived with my current 2 channel system long enough that I know what it should and shouldn’t sound like in my room. As such, I know what its strengths and weaknesses are. “Strengths and weaknesses” in this case are defined as sonic characteristics that I find appealing versus those I do not. Look, I don’t live in an anechoic chamber and I ultimately don’t want my speakers to sound completely flat in my listening room. A room can add gain, power and impact to a speaker’s response and these traits, to my mind, are good things to have. A room can also add unwanted reflections, unfortunately, smearing some of the detail and imaging that we would also want to hear (part of the reason why speaker placement is so important). And, at the end of the day, that has been an issue I’ve had with many a room correction system when implemented in a two-channel set up. In my experience, most tend to reduce the effect of the room to almost nil, thus helping with the excess reflections issue, but also decreasing the perceived dynamic power as well. I‘ve experienced it here in my own room and, anecdotally, at a number of audio shows. Two-channel room correction systems are a mixed bag. They “work” in a fairly defined listening area, making off axis casual listening even less enjoyable and, unless they have a certain degree of customization, can leave you with a very flat sounding result.

Secrets Sponsor

So, he said gingerly stepping down off his soapbox, how did the all-digital Legacy Wavelet fare riding herd in my previously all analog music chain? Surprisingly, very, very well. After a few trial and error attempts at calibration, and some back and forth with Bill Dudleston (ended up being more “operator error” than anything hardware related), I felt that the Wavelet got the right balance between my speakers and subwoofers in that I didn’t feel the need to tweak with the levels after calibration. At the factory, the crossover from the speakers to the subs had been set to 85 Hz (this is not adjustable from home) and the resulting blend between the two appeared quite seamless throughout my listening. As you can switch the Wavelet’s room correction on or off, on the fly, a few other general observations could be immediately made. With the correction on, there was an overall increased sense of precision in playback with my speaker system. Perceived images of performers and instruments became more clear in space with main vocals being the most obvious beneficiary of the processing.

Legacy Wavelet Web browser, contour control

For example, without correction I would have a pretty good idea that the main singer’s image was placed in the center between the speakers. Now, when the correction became active, images sharpened up considerably and I felt as though I could almost draw an outline of exactly where the singer was. Another thing I noticed was that the dynamic response of my speakers had been largely maintained with the correction being active. They did not end up sounding overly flat at all, even when listening casually, off axis.

Additionally, the bass output from my subwoofers had been significantly tightened. There was a lot less reverberation brought on from the room and much more precision. The bass was perhaps a little bit drier than I would have liked as I normally do prefer a little bit more punch and reverb than what I was getting. This is where I went into the Wavelet’s “Contour” menu and was presented with a selection of tone controls labelled: Brilliance, Low-Treble, Upper-Bass, Mid-Bass, Low-Bass and Punch. The sliders can be adjusted in 0.1dB increments and I found, with a little experimentation, that, a modest bump in the Low-Bass and Punch sliders got my subwoofers sounding more like what I wanted. I left all the other sliders alone as I didn’t feel the need to mess with any of the other frequency bands. Contour Memory Presets and a handy Reset Slider button are provided for people to recall various saved EQ settings or to bail themselves out of a session of over-exuberant “Contour-ing.”

Legacy Wavelet Web browser, DAC filters

The DAC’s selectable filtering mode, Apodizing or Pre-Ringing, had results that I found much subtler to my ears than the speaker/room correction improvements. In the main, I felt that selecting Apodizing filtering resulted in a slight softening of the high frequency musical edges versus the standard Pre-Ringing (linear) setting. I eventually found the Apodizing filter useful when listening to older or less well recorded digital and analog material, as it tamed a bit of the harshness I would otherwise experience. While it doesn’t perform miracles mind you, I did find myself spinning some more selections from that shelf on the music rack that I would normally avoid. For well recorded music however, I found the standard Pre-Ringing setting to be quite satisfactory as the “daily driver” filter.

In regards to the quality of the Wavelet’s analog inputs, I found them to be quite good sounding with either an analog signal from my OPPO player (normally connected digitally through SPDIF) or my turntable. The extra A-D conversion before signal processing did not noticeably hinder the sound quality to me at any point. I did have to attenuate the incoming analog signal by -12dB as I was initially getting some distortion at the output due to the incoming signal level being too high. The handy little DIP switches though, made experimenting to get the right input level very easy and convenient.

Some of the musical selections that I found particularly enjoyable in my time with the Wavelet were:

JVC

JVC “XRCD Sampler CD”

JVC XRCD Sampler, JVC Compact Disk. An excellent sampler CD with great selections from various jazz and New Age musical talents. This CD definitely gave the Wavelet’s speaker/room correction system a chance to shine with plenty of well recorded material to exploit.

From the opening bass clarinet strains of “The Peacocks” by The Bill Homan Band, the Wavelet helped my speakers put the clarinet player solidly front and center with the vibrating of the instrument’s reed being the clearest and most detailed that I have heard before on any system. As the group transitions to the next track, “Lightnin,” the sound becomes bigger and brassier with more horns competing for space. The Wavelet’s processing kept all the detail from each of the instruments discernable but also allowed space, if you will, between them so that the imaging and sonics didn’t just become jumbled together. Carmen Lundy’s lush vocals on the track, “Round Midnight” stood out clearly and imaged precisely thanks to the Wavelet’s chops, with the surrounding string sections encompassing her voice like gentle wings, each feather (or instrument) clearly delineated. Clarity, precision and detail without sterility are the Legacy’s calling cards here.

Luther Allison

Luther Allison “Live in Montreux CD”

Luther Allison, Where Have You Been? – Live in Montreux 1976-1994, Ruf Records CD. A compilation of live performances spanning almost two decades of this often-overlooked blues dynamo. These tracks indeed found some benefit from the Wavelet’s Apodizing digital filter, softening up some of the harder edges of the earlier recorded tracks especially.

Listening to Allison’s almost 12-minute version of “Little Red Rooster” through the Wavelet and its filtering becomes a much less ear-wincing experience. His guitar licks still had plenty of bite and attack, but the Apodzing filter definitely attenuated the irritating glare that this particular track normally has. It, subsequently, reminded and allowed me to appreciate how much of a force of nature Luther Allison was in this performance. The savagery of both his vocals and guitar playing still come through quite successfully.

The New Stan Getz Quartet

The New Stan Getz Quartet “Getz Au Go Go, LP”

The New Stan Getz Quartet with Astrud Gilberto, Getz Au Go Go, Verve Records 1964 Stereo LP. Switching to analog and vinyl, the Legacy Wavelet did not miss a beat reproducing this jazz classic. Cueing up the first track “Corcovado” immediately brings Astrud Gilberto’s sweet yet sultry voice fully to bloom right in front of me. The imaging of the song is wide with subtle cues of the nightclub’s interior sounds rendered clearly.

Stan Getz’s rich tenor saxophone then comes in slightly to the left of the vocalist and all the while the standup bass lines are clearly heard and felt coming from the background. The Wavelet seems to do an excellent job handling these various components cleanly, even from vinyl, without losing any of the recorded set’s atmosphere. Switching the Bohmer speaker correction off made Mrs. Gilberto’s vocals seem more diffuse and the backing guitar and bass became less in focus. Toggling the correction back on caused everything to immediately snap back into place, with a notably tighter focus.

If there are any particular caveats that I have about the Wavelet, they’d mainly center around two things. First would be the volume control via the web based remote. It’s comprised of two separate slide adjustors; one is for course volume adjustments while the other is for finer tweaking, up to +/- 3dB at a time in 0.1dB increments. I understand why it is set up this way and it’s a practical solution, but I wish the Course adjustor was a wheel or at least a semi-circle shape, with the Fine adjustment slider placed right underneath it. This could help provide easier one-handed operation with my thumb on my smartphone. And speaking of volume controls, the included basic plastic volume control is serviceable but it seems a little cheap and out of place with a component at this price level. A more substantial unit with some clearer controls, I think, would be more appreciated. The other issue I have centers on the RCA connectors at the back of the unit, mainly the digital inputs and outputs. They are currently attached to the circuit boards and peek out through holes in the back panel and this gives them a little bit of wiggle. I would prefer if they were physically attached to the back panel to provide a little more support and confidence when attaching and removing interconnects. Beyond those somewhat minor niggles, I found the Legacy Wavelet a genuine pleasure to use and it succeeded in making a noticeable and welcome improvement in the day-to-day sound of my system. There are comparable products in the pro and DIY audio markets but they’re not really geared to the audiophile in terms of features or usability. The few enthusiast products that do directly compete with the Wavelet tend to be even more expensive for the same level of features and flexibility. It does speak to the confidence that Legacy has in the Wavelet’s abilities that they should open its application up to be used with non-Legacy speakers. You’ll obviously have to inquire to see if your existing speakers would be good candidates for the Wavelet, and there is the little matter of shipping one of your speakers to Legacy for profiling, if it’s not already in their existing measurement database. There is a lot more potential for headaches when using such a product out of a closed ecosystem, but Bill Dudleston has stated that there are several future updates and improvements that are being looked at (both hardware and software) to help keep the Wavelet current, and a buyer’s investment more secure and valuable. If there was something that I would like to see in a future upgrade, it would be the inclusion of a good quality headphone amp and maybe some sort of headphone audio correction/expansion system designed by Bohmer Audio as well.

On The Bench

Benchmark audio tests were conducted on both the analog and digital inputs of the Legacy Wavelet. The source device was a LYNX Two professional PC sound card using test signals created by SpectraPLUS audio measurement software. Measurements were done at 2 VRMS respectively.

Legacy Wavelet 1 kHz Sine Wave-Analog

At 1 kHz into the XLR input, THD+N was 0.003394%. We see a few harmonics throughout the spectrum with the second harmonic, at 2 kHz, being about 87 dB below 2 VRMS.

Legacy Wavelet IMD Test-Analog

The IMD measurement using the XLR input was 0.006058%. We see very minor noise spurs on either side of the fundamentals and a second harmonic at 16 kHz at 92 dB below 2 VRMS.

Legacy Wavelet 19 and 20 kHz Sine Waves-Analog

Here are the results for the 19 kHz, 20 kHz combined test frequencies using the XLR input. There is a visible B-A peak at 1 kHz about 92 dB below 2 VRMS. We see very minor distortion spurs throughout the spectrum. The second harmonics at 38 kHz and 40 kHz are about 100 dB below 2 VRMS. There is a slightly larger distortion spur centered at 43 kHz at about 84 dB below 2 VRMS

Legacy Wavelet Frequency Response-Analog

I measured the frequency response of the Wavelet out to 96 kHz. Due to the fixed pre-programmed crossover point, the graph is a compilation of both the low pass and high pass outputs. In analog direct, the response is flat out to about 50 kHz and then we see a steep roll-off of the high frequencies right after that. The crossover point between the mains and the subs looks to be centered at about 85 Hz.

Legacy Wavelet 1 kHz Sine Wave-Digital

Using the coaxial SPDIF input, at 1 kHz and 16-bit/44.1k sampling rate, THD+N was 0.002466% We see a few harmonics in the spectrum with the peak at 2 kHz being about 88 dB below 2 VRMS.

Legacy Wavelet 19 and 20 kHz Sine Waves-Digital

Here are the results for the 19 kHz, 20 kHz combined test frequencies using the coaxial SPDIF input with 24-bit/96k sampling at 2 VRMS. We see relatively few distortion spurs throughout the spectrum. There is a visible B-A peak at 1 kHz about 87 dB below each test tone which is insignificant. The second harmonics at 38 kHz and 40 kHz are about 95 dB below each test tone.

Conclusions

Legacy Wavelet ¾ view

THE LEGACY AUDIO WAVELET is a Powerful and Versatile Control Center for your Two-channel Listening Pleasure.

Likes
  • Impressive flexibility.
  • Speaker/room correction that makes a noticeable and desirable improvement.
  • Superb sound quality with both analog and digital sources.
  • Future expandability.
Would Like To See
  • Better basic remote.
  • More intuitive controls on the web based remote menus.
  • A quality headphone amp.

Originally designed for use with its own speaker models, the Legacy Wavelet is a unique and effective product that is much more than the sum of its parts. Combining the features of a quality preamp, a multi-way electronic crossover, a DAC and an effective speaker/room correction system in one box, Legacy gives 2-channel listeners a great deal of value and flexibility in a handsome streamlined package. The fact that Legacy will now allow its use with an ever-expanding selection of speakers from other manufacturers shows confidence in the product’s design and its intended results. Once properly set up and deployed in my reference 2.2 channel system, I found the sound quality of the Wavelet exceptional, rivalling what I experienced with the 3 expensive analog components that the Legacy unit was substituting for. Both analog and digital sources sounded as if they were handled transparently without any noticeable loss of resolution. The Bohmer speaker/room correction system proved to be a simple and effective method of improving the sonic experience in my studio, making my music sound more focused and enjoyable both on and off axis. Features like the Apodizing filter and Contour controls add an extra measure of tailoring to your musical experience and its inherent upgradability will allow customers to take advantage of newer capabilities as they become available. For anyone setting up a high performance two-channel system, with or without Legacy speakers, I would suggest they inquire about whether a Wavelet preamp/processor would be a good fit in their equipment lineup. If you can, audition one at a dealer or show. I think you will be properly surprised and impressed with its capabilities.

The post Legacy Audio Wavelet Preamp/Processor Review appeared first on HomeTheaterHifi.com.

AudioControl Maestro M9 Surround Sound Processor Review

$
0
0
I found the AudioControl Maestro M9 to be a top performer in all areas demanded from a surround processor.

This would be digital surround sound of course but also the analog audio performance, even in bypass mode with two channels driven. The Maestro M9 includes the full version of Dirac Live which is a top room-correction package. It also had pristine video pass through with 4K and HDR functionality.

AudioControl did not skimp on the design and internal componentry which leads to a somewhat high price. In this case, you get what you pay for.

Highlights

AudioControl Maestro M9 Surround Sound Processor

  • Dolby Atmos (up to 7.1.4) and DTS:X included
  • 4K and 3D video passthrough with full HDR support
  • Dirac Live room correction
  • Individual Burr Brown DAC’s
  • Robust power supply
  • Custom installation control ready (Savant, Control 4, Elan, Crestron and AMX)
Introduction

AudioControl has been around for 40 years now. I first heard of them because of some nifty equalizers and bass restoration components they produced in the early days. Back then, these products would typically be introduced to your system in a recording loop on you preamplifier. Everything was analog then and AudioControl learned a lot about analog circuit design.

AUDIOCONTROL SURROUND SOUND PROCESSOR REVIEW SPECIFICATIONS
Codecs:

Dolby Atmos, DTS:X, Dolby Surround, DTS-HD Master Audio, DTS-ES 6.1 Discrete, DTS-ES 6.1 Matrix, DTS 5.1

  • Dirac Live® Room Correction
  • Inputs:

    HDMI (7 Total, 1 MHL Compatible), SPDIF Coax (4), Toslink (2), Analog RCA (6), 3.5 mm Aux (1), USB (1)

    Outputs:

    HDMI (2 Zone 1 [1 ARC Enabled], 1 Zone 2), 7.2.4 Pre-amp output (Main Channels Balanced, Height Channels Unbalanced RCA), Zone 2 Stereo (Unbalanced RCA)

    Control Drivers Available:

    Savant, Control 4, Elan, Crestron and AMX

    2-Zone:

    Operation

    AM/FM:

    Tuner

    Signal to Noise (MFR):

    110 dB (A-Weighted, Analog Bypass)

    Frequency Response (MFR):

    20Hz-20kHz ± 0.2 dB

    Total Harmonic Distortion (MFR):

    -100dB

    Dimensions:

    16.5”D x 17”W x 7”H (4U)

    Weight:

    42.0 Pounds

    MSRP:

    $8,900 (USD)

    Company:

    AudioControl

    SECRETS Tags:

    AudioControl, Maestro M9, Surround Sound Processor, Processor Reviews 2017

    Although AudioControl makes some really cool audio products for the home, they are probably best known for car audio with processors such as the AudioControl Epicenter as well as converters, amps and other accessories. And now they have a growing and well respected pro audio group.

    On the home audio front, AudioControl’s products cover a wide range of categories from massive multi-channel amps like the Savoy G3 to small accessory amps for distributed audio. The lineup also includes some impressive surround receivers and processors.

    The Maestro M9 is AudioControl’s latest surround processor and it contains the most significant technologies at the forefront of home cinema. I had the chance to spend quite a bit of time with it and my full review is presented below.

    Design

    The AudioControl Maestro M9 is AudioControl’s newest home cinema surround processor and is the sixth generation in the Maestro line of surround processors. It is a well-designed product with excellent build quality and high-end internal components. It naturally handles all the latest surround codecs to include Dolby Atmos and DTS:X.

    This is the second processor I have reviewed that features Dolby Atmos and the first with DTS:X. So this was my first chance at a sort of side by side comparison between the two formats. Looking back in time, it was not long ago that Dolby Digital was the king of the hill. This was back when DVD was the predominate consumer format. Dolby Digital became ubiquitous despite the fact that many cinephiles preferred the sound of DTS. But Dolby’s dominance started to erode as Blu-rays came to the fore. A majority of Blu-ray discs now have DTS-HD Master as opposed to Dolby TrueHD Lossless. There are a lot of reasons why this would be the case ($) though I won’t go into them here. Suffice it to say that DTS has been seriously gaining ground on Dolby in the age of Blu-rays.

    But now that I have heard both Dolby Atmo sand DTS:X in a direct comparison over my own home audio system, I feel that Dolby may very well reclaim the mantle. Dolby Atmos recordings create a more convincing surround bubble with a much more homogeneous directionality. The individual channels simply melted away much more so than with DTS:X.

    AudioControl Maestro M9 Surround Sound Processor - Front View

    Apologies for that diversion, why don’t I get back to discussing the AudioControl Maestro M9’s design?

    This is a well put together unit, with a strong all-metal case that is of heavy gauge forged steel (even the top of the case is heavy). It has large openings in the case to promote cooling of the internal components. These large openings offer an interesting view of the inside of the case. You see, the case needs to be pretty big to accommodate all the back panel jacks. And also to allow for amplification as their receivers use the same case. The view inside was “interesting” because all the vacant space left behind by the non-existent power amp section which gave me the feeling that the product was “incomplete” but it most certainly was not.

    Secrets Sponsor

    What all this extra space does allow was a clear view of the substantial toroidal transformer. This transformer was bigger and heavier than ones I see in a lot of mass market receivers and the Maestro M9 doesn’t have any power amplification stage! AudioControl has informed me that this transformer is rated at 800 VA! I love it when a component has a substantial power supply like this – it promotes dynamic, low-distortion playback about as much as any other single design and implementation aspect of an audio product. And this is a large toroid versus an EI transformer so it exhibits all the inherent advantages of its advanced design.

    The front panel has 10 buttons and a volume knob. These can control virtually everything the Maestro M9 is capable of doing except for turning the unit on or off. Toggling the power on and off must be done via the remote or by way of IP or serial port control if you have a theater control and integration system. This doesn’t sound like a big deal, but it was a problem for some of my family members who would wind up leaving the thing on overnight, etc.

    Also on the front panel are a blue dot matrix two-line readout, a mini headphone jack, a mini plug for auxiliary input and a power status LED. I do wish the Maestro M9 had front panel HDMI and USB inputs as these get used around here quite regularly.

    AudioControl Maestro M9 Surround Sound Processor - Front View

    AudioControl produces the Maestro M9 in two versions – gloss black with gold tone lettering or an “espresso” black with white lettering. My review unit was the espresso black model and it was indeed a handsome looking piece of kit albeit a little on the utilitarian side of things.

    The AudioControl Maestro M9 comes complete with a full version of Dirac Live for AudioControl. I will discuss this in more detail in the Setup Section below but, in a nutshell, Dirac Live is a room correction system that not only corrects for proper frequency balance but it also manages to correct certain impulse response anomalies. Dirac Live is scalable from a small system all the way up to a large screening room. It is one of my favorite room correction packages that are available on the consumer market.

    Secrets Sponsor

    The Maestro M9 includes a high quality AM/FM tuner. You can also listen to network streaming and internet radio via the rear panel Ethernet hook up (no built-in WiFi). Once you connect your Maesto M9 to your home network, it can then be controlled by iOS devices via a slick app.

    On the audio side, there are some omissions that may be a concern for a portion of consumers – the AudioControl Maestro M9 does not decode DSD signals and doesn’t do computer audio over USB. This is not a concern to me and it really shouldn’t be for you either. DSD, though highly regarded by many, is hampered by extreme high frequency noise that puts an undue burden on your electronics and speakers. It is my opinion that this leads to audible distortion. PCM is not plagued with this issue.

    On the computer audio over USB point, I would stress that the Maestro M9 is primarily built and marketed as a home cinema product and though it does perform magnificently on music, it has limited aspirations as a stereo product. So, do like me and get an OPPO Blu-ray player that has DSD and USB. Playback over analog to your AudioControl Maestro M9. The audible results will really wake up your senses!

    The Maestro M9 is 4K ready and supports HDCP2.2 protocols including full HDR support. Its HDMI 2.0a interface is 3D compliant as well and includes Audio Return Channel (ARC) functionality. There are plenty of ins and outs with 7 HDMI inputs and three outputs.

    AudioControl Maestro M9 Surround Sound Processor - Rear View

    The processor’s back panel layout is clean, reasonably uncluttered and logically laid out. The HDMI board is along the top and is where you will find the 7 inputs and two main outputs. There is an additional Zone 2 HDMI output which is a nice plus.

    There are 6 analog inputs and outputs, two of which feature the option to use balanced inputs (CD and BD). S/PDIF coax and optical inputs are nestled in this cluster of jacks and are easily identified because of the high contrast lettering on the back panel. There is a USB port here that is for playing files from a jump drive or a hard drive. As discussed previously, it is not for computer audio. Also on this row are the Ethernet port, 75 ohm antenna jack and the various control ports which include four programmable DC triggers.

    The main outputs are on the bottom. All channels have unbalanced RCA outs while there are also 8 balanced outs for the main channels (7.1). One nice feature is that the surround back balanced outputs can be re-routed as height speakers if you have a 5.1.2 set up like mine.

    Setup

    I hooked up the AudioControl Maestro M9 in the usual way. In recent years, almost all my source components are connected via HDMI. I do have a few components where I make some analog connections: for example, my phono stage and my OPPO Blu-ray player. The Maestro M9 allows the user to connect a component with both digital and analog hook ups and then you can select which one to enjoy during playback. This is how I connect my OPPO BDP 105D and it allows me to bypass the DAC’s in the Maestro M9 which (in theory) may provide improved audio performance for music listening. And in actuality I do use the OPPO for computer audio over asynchronous USB.

    On the video side, I have two displays: a direct view monitor and a front projector which can both be connected to the two individual HDMI outputs of the Maestro M9. Both of these outputs are active at all times. This makes life easier because there is no need to switch the output when switching displays.

    The Maestro M9 must be connected to your home network via Ethernet so you can calibrate the audio using Dirac Live. You should also keep it connected to the ‘net to take advantage of audio streaming, internet radio and iOS control.

    I do not have a home automation system nor do I have multiple zones in my house. So I didn’t utilize any of these features and their associated hook ups for this review. I would like to say that AudioControl is and should be a darling among custom installation purveyors. I think they sell a lot of these units through these supply chains for several reasons such as . . . products that are built with the custom installer in mind, reliability of their products, excellent customer service and superior performance qualities.

    Audio output-wise, I connected the 5.1.2 balanced connections to my ATI 7-channel amp and my SVS SB 13 Ultra sub.

    Dirac Live

    Once everything was hooked up and ready to go, I was ready to calibrate. The set up for Dirac Live is probably a challenge for some but I personally find it to be quite logical and straight forward. The Maestro M9 unit comes with a USB sound card and an analog mic that you connect to a laptop on which you have downloaded the Dirac Live for AudioControl software. You then connect the receiver to the same network via its Ethernet connection. The laptop and receiver need to be on the same network. Once all the connections are made, you launch the software on the laptop and follow the script-based calibration process.

    This process walks you through the basic calibration to the Dirac Live default target curve. It gets a little more complex if you want to tailor your own custom response curve. I have gotten to where I rarely do this but from time to time, I truncate the correction to only act on the bass region that would be most affected by room response and leave the speakers to their native response above 300 Hz or so.

    My first attempt to calibrate the AudioControl Maestro M9 didn’t work out. Every satellite speaker reflected an unusual, high-Q peak in the treble region that does not in fact exist. This peak was about +15 dB at 10 kHz. My first thought was that there must be something amiss with the USB sound card. So AudioControl promptly shipped me a new sound card and mic combo.

    That did not fix the problem and AudioControl wound up sending me a whole new Maestro M9 unit which worked perfectly. I do not see this as a major issue because AudioControl handled it quickly and let’s face it, complex electronics sometimes have issues due to their very complexity. Such issues usually show up early in the life of the product. And in the rare case that the problems may rise up at a later date, no worries because AudioControl offers a full 5-year warranty!

    Once I finished the calibration, I generally evaluated the Maestro M9 using the default curve. I did manually set the delays and channel balance after Dirac Live was done. These manual adjustments substantially improved the immersion factor. So now I was ready to enjoy some movies and music!

    In Use

    Once I had everything set up and calibrated, I settled in for a long evaluation period. I will say right here and now that I enjoyed my time with the AudioControl Maestro M9 about as much as any other surround processor I have owned or evaluated. I have experience with some very pricey products and the AudioControl did an excellent job holding its own in comparison to these other products.

    One of the most salient categories was the way the AudioControl created a seamless surround bubble. This distinction became apparent as soon as I put my reference SSP back in the system at the conclusion of this review. It was at that moment when I realized more than ever that the Maestro M9 was able to localize sounds in my theater with little regard to where the speakers were placed. With my old SSP, I could close my eyes and point to each speaker. With the AudioControl, I could not do this.

    Rogue One

    Rogue One

    One movie that clarified this observation for me was Rogue One. This excellent work is mastered on Blu-ray with a DTS HD Master 7.1 sound track. I listened to the first half of the film in this format and then switched to the Dolby Surround mode which derives height channels from the DTS audio track.

    This effect was a real treat and added a dimension of envelopment that was simply absent with the native soundtrack. This is one of the best features of the AudioControl Maestro M9 – its ability to render height information from just about any source possible. And as discussed above, it does this as seamlessly as one could imagine.

    I didn’t altogether care for the bass integration on this movie and played around with the settings, finding a better quality of sound when I ran my mains as “large”. I went back and forth between large and a 60 Hz crossover throughout the review period and the best choice was typically program-dependent. The better setting for whatever I had on would be heard primarily as improved integration of the bass (which is something that I am very sensitive to.)

    Sing

    Sing

    There was a time when I had convinced myself that you could have a system that worked equally well for both movies and music. But now I see that I was delusional. Up until very recently, that is. I can now confidently state that a system can perform equally well on movies and music.

    This transformation of opinion required decades of experience along with exposure to products like the AudioControl Maestro M9. I think this is because AudioControl does not skimp on the internal components as is commonplace among mass market SSP’s. One great example of the Maestro M9 having chops in the musical arena was the movie Sing.

    I was enraptured with the audio and video of this disc from the moment it started playing. To begin with, this movie is done in Dolby Atmos. It is a fine recording. The performances are all very excellent. As a matter of film art, it was easy to root for the characters and the movie has a bit of a dark edge, satirizing modern life. This movie had very few weaknesses.

    The Masetro M9, to its credit, stepped aside and let all of that shine through. It was a very immersive experience. Oh, and I played this movie again the other night on my old SSP and I was severely let down with the audio and video in comparison to the prowess of the AudioControl Maestro M9. I think the biggest difference lies in the AudioControl’s re-clocking of the HDMI audio which reduces jitter to immeasurably low levels. Plus the Maestro M9 has Burr Brown DAC’s that are a significant upgrade over many competitors.

    The Rocky Mountain Express

    The Rocky Mountain Express

    There wasn’t much Dolby Atmos material on the market when I first installed in-ceiling height speakers in my theater. So I queried the trusty internet for Atmos titles and came up with this gem – The Rocky Mountain Express. This documentary tells the story of the Canadian Transatlantic rail line. It is in Dolby Atmos and they have a restored steam locomotive in there.

    You see where I am going with this? Just give it a screening for yourself and I think you will come away with a better appreciation of what a steam train sounds like all up close and everything. It doesn’t hurt that the scenes of the Rockies are presented in 4K video either.

    This disc was another example where the AudioControl Maestro M9 really separated itself from the pack with a magnificent presentation that passed all the power and majesty of the trains, the score, etc. I must admit that from time to time I felt that the Maestro M9 might be a touch soft dynamically with a somewhat indifferent bass response but then a disc like this would come along and I realized the Maestro M9 was not the problem. The “problem” was lesser program material; the Maestro M9 didn’t suffer any of these ailments when I played material with high production values such as The Rocky Mountain Express.

    I did test the AudioControl Maestro M9 with 2-channel analog audio both from my OPPO BDP-105D and from vinyl. When compared to the best two-channel preamps, the maestro M9 did tend to flatten the front-to-back layering but, for the most part, the Maestro M9’s ability with analog audio was a refreshing break from the sound offered by most of the competition.

    David Bowie

    David Bowie “Black Star”

    Take the LP of David Bowie’s acclamation, Black Star. I listened with the sub turned off, Dirac Live was off (to avoid A/D D/A conversions) and I set the unit to stereo bypass. What I heard was a very impressive performance at the frequency extremes. The bass was surprising in its weight and pitch definition. The treble was extended with no artificial bite or undue steeliness. This made it easy for me to fall into the music, shirk my responsibilities and just enjoy the music.

    The side to side imagery was much better than what I would expect from an SSP while the front to back layering was very good for an SSP but not up to the standards of the best stereo only preamps.

    The percussion was lively which meant the unit had good rhythm and pace. All in all, this album over the Maestro M9 gave me goosebumps galore!

    Phil Woods Quintet

    Phil Woods Quintet “Song for Sisyphus”

    I want to close out by mentioning another LP I have enjoyed over the years, Phil Woods Quintet "Song for Sisyphus". This is a direct to disc vinyl from 1978. This album is a good choice for review as I have listened to it so many times, the performances are mastreful and the recording is above average.

    "Change Partners" rocked my socks off. This song buzzed with life and energy. It was that whole rhythm and pace thing again. Once more, I felt much of this boiled down to the way the Maestro M9 rendered the percussion with a very natural tone and transient impact. The Maestro M9 could also separate out individual notes better than 95% of all SSP’s I have reviewed. The sound here really took me back in a most positive way.

    On the Bench

    The below test plot is the analog frequency response of the AudioControl Maestro M9 through the line level outputs. This was the left channel driven through the CD balanced input to the balanced analog out. The unit was set to stereo direct and the room correction was turned off. The frequency response exhibits a mostly flat response from DC to 20 kHz. There is a useable signal up to 90 kHz at which point a sharp roll off begins. The signal at 90 kHz is less than 5 dB below the signal at 1 kHz.

    AudioControl Maestro M9 Surround Sound Processor - On The Bench

    I wanted to test the Dirac Live filtering of the Maestro M9. So I ran the below test in the same set up as described above. But this time, the Dirac Live was engaged. The output signal is the inverse of the room response for the left speaker. The system has some aggressive correction and the corrected curve is multi-faceted which indicates that the Maestro M9 contains a reasonably powerful DSP engine. Note that the signal starts to roll off around 22 kHz which indicates that the A/D to D/A process takes place at a sampling rate of around 44 kHz.

    AudioControl Maestro M9 Surround Sound Processor - On The Bench

    This is the basic THD+N reading for the AudioControl Maestro M9. This test was run through the balanced analog input to the balanced analog out and with Dirac Live disabled (stereo direct). At 2V out, the THD+N is 0.0013%. This is a remarkable test result for a surround processor.

    AudioControl Maestro M9 Surround Sound Processor - On The Bench

    Below is the first of the IMD tests I do on preamplifiers/processors. The test signal comprises two simultaneous tones of the same amplitude, one is 19 kHz and the other is 20 kHz. The B-A peak is the difference signal that is sympathetic to the input signals, 1 kHz in this case. The Maestro M9 offers amazing performance with this B-A peak measured at 102.89 dB below the test signals.

    AudioControl Maestro M9 Surround Sound Processor - On The Bench

    This is the other IMD test with 60 Hz and 7 kHz signals at a 4:1 amplitude ratio between these fundamental waveforms. The reported IMD at 2V was 0.0022%. Again, this is a sterling result for this class of product.

    AudioControl Maestro M9 Surround Sound Processor - On The Bench

    I also like to test the digital inputs using some basic signals. The below plot is a 1 kHz sine wave over the Blu ray HDMI input, output via the left channel balanced outs. Dirac Live was bypassed. The test signal was a 24-bit, 96 kHz PCM signal. The Maestro M9 delivered this signal at a THD + N reading of just 0.0008%. Not only does this match the Datasat RS 20i I tested, but it also exhibits even order harmonics which lends the signal a kind of tube like sound. This is quite the excellent test result!

    AudioControl Maestro M9 Surround Sound Processor - On The Bench

    This next test was also a digital signal with the same set up described above. The B-A peak at 2.1V out was not quite as good as the analog test, coming out to 95.24 dB. This is nevertheless so far below the threshold of audibility as to be nothing more than an academic exercise.

    AudioControl Maestro M9 Surround Sound Processor - On The Bench

    The last test plot of the AudioControl Maestro M9 is presented below. This was again a digital signal over HDMI at 24-bits and 96 kHz. The IMD at 2.1V was 0.0025% which is slightly more again than the analog test but still as excellent as one could expect from a complex surround processor such as this.

    AudioControl Maestro M9 Surround Sound Processor - On The Bench

    Conclusions

    THE AUDIOCONTROL MAESTRO M9 Offers Excellent Audio Performance From Digital And Analog Sources Alike. I Also Found It To Be Ruggedly Built And Quite Reliable.

    Likes
    • Dolby Atmos and DTS:X ready
    • Seamless surround envelope
    • Midrange transparency
    • UHD and 3D video passthrough
    • Extreme musicality (especially for a surround product)
    • Excellent processing for matrixed height channels
    • Dirac Live room correction
    • Pristine analog passthrough
    • 5-year warranty
    Would Like To See
    • More front-panel inputs: HDMI, S/PDIF, TOSLINK and/or USB
    • Calibrated mic for room correction system
    • Built-in WiFi

    The AudioControl Maestro M9 strikes me as a professional grade piece of equipment.

    Professionals demand that their equipment must be reliable. The Maestro M9 has a 5-year warranty.

    Professionals also seek out products with excellent performance. The Maestro M9 has a massive power supply, upgraded DAC’s, well-designed analog circuits and Dirac Live.

    A professional product should have some flexibility and the Maestro M9 has many inputs and outputs, it can be configured in many ways and it has compatibility with all the major integration and control systems for home automation.

    The only part of the story where this product possibly falls short is with the soundcard and mic. The mic is reminiscent of the ones that you get with a mass market receiver. I wish they included a calibrated mic.

    Professional products tend to be expensive and the AudioControl Maestro M9 ain’t cheap. This is a definite consideration, but keep in mind how cheapo most products have become these days. Not AudioControl, this thing is the real deal inside and out. That’s the cost of excellence. I say give it a listen and decide for yourself.

    The post AudioControl Maestro M9 Surround Sound Processor Review appeared first on HomeTheaterHifi.com.

    Outlaw Audio RR2160 Stereo Retro Receiver Review

    $
    0
    0
    The new Outlaw Audio RR2160 Stereo Retro Receiver is an updated successor to the RR2150 which has been in circulation for over a decade.

    On the outside, the Outlaw Audio RR2160 has the same unique Art Deco facade as its older brother, but under the chassis are some nice modern amenities that today’s audiophile will love.

    Outlaw Audio RR2160 Stereo Retro Receiver Front View

    Highlights

    Outlaw Audio RR2160 Stereo Retro Receiver

    • High power stereo receiver, 2 x 110 watts continuous power into 8 ohms
    • 7 analog inputs, 2 digital coaxial, and 2 optical inputs
    • 3 USB inputs (1 front, 2 back)
    • Adjustable speaker EQ adds a half-octave bass boost for bookshelf speakers
    • Preamp outs and main amplifier inputs plus dual sub outs with selectable crossover points
    • High performance AM/FM stereo tuner with HD radio and 20 presets
    Introduction

    When I first decided to ditch my trusty Marantz 2226B stereo receiver from my college days and move up to separate components, Outlaw was near the top of the list of companies I wanted to check out. They are based in my neighborhood (New England) and were starting to gain a good reputation as an inexpensive, yet potent amplifier company. That was over 15 years ago, and I eventually went with a company with a similar business philosophy out of Tennessee.

    Outlaw Audio RR2160 Stereo Retro Receiver Rear View

    But even over the years, I would check in on Outlaw Audio to see what the boys there were cooking up. I have always admired the Art Deco design of the Outlaw Audio RR2150 receiver as it reminded me of something you’d see on an old Flash Gordon episode aboard their space ship; “This is Dr. Zarkov, calling Flash…do you read me?”. I liked the lines and curves because it was not just another “black box” design. Indeed, it only comes in silver… but it looks spiffy that way.

    When I saw that the gang from Outlaw Audio were about to release an updated version of the well-received RR2150, I decided to ask Chief Outlaw, Peter Tribeman, for a review sample. Peter kindly set one aside for me and when I found out that their “secret hideout” was within driving distance, I offered to come there and pick it up. Of course, once there, I had to spend the afternoon with Peter and listen to their new THX-certified sub and new (soon to be released into the Wild) home theater processor. I brought the music and a pizza and was entertained all afternoon!

    OUTLAW AUDIO RECEIVER REVIEW SPECIFICATIONS
    Type:

    Two-channel analog & digital receiver

    Continuous Average Power:

    110 watts per channel (20Hz-20kHz, <.05%THD @ 8 ohms) / 165 watts per channel @ 4 ohms, both channels driven)

    Input sensitivity/impedance:

    High-level – 200mV/47 kohms, MM Phono-3.3mV/47kohms, MC Phono – .6mV/47 kohms

    S/N ratio:

    96dB

    Bass Management:

    60/80/100Hz crossover, bypass, High & Low-pass slope-12dB/octave (2nd order)

    Tone Control:

    Bass-center – 50Hz +/-10dB, Treble-center – 10kHz +/-10dB

    Inputs:

    2 x coax, 2 x optical, 4 x RCA, 1 x phono (MM or MC), USB, RJ-45

    Outputs:

    2 x subwoofer, 1 x external processor, speakers A/B

    Control:

    2 x 12v trigger out, IR in/out

    Dimensions:

    5.75 H x 17.1 W x 15” D

    Weight:

    27lbs

    Warranty:

    Two years

    MSRP:

    $799

    Company:

    Outlaw Audio

    SECRETS Tags:

    Outlaw Audio, RR2160 Stereo Retro Receiver, Stereo Receiver, Receiver Reviews 2017

    Outlaw Audio RR2160 Stereo Retro Receiver Front View

    Design

    Building on the analog design of the RR2150, the Outlaw Audio RR2160 adds some nifty new features that make it more versatile for today’s audiophile. Starting with the front panel, the LED display window is a new design and is slightly bigger than the RR2150’s VFD display. A quarter-inch headphone jack and volume control are on the left, followed by a 3.5mm auxiliary jack. A selector button allows for A and B speakers to be active or turned off. It is lit when speakers are selected and in fact, all buttons on the RR2160 will light up when engaged.

    Outlaw Audio RR2160 Stereo Retro Receiver Front Top View

    Next, a new speaker EQ button is included that allows you to select a bass boost frequency (55, 65, or 80Hz). This allows for better blending with bookshelf speakers and is fun to experiment with as I have full range speakers. It is NOT part of the bass control, which affects a wide boost/cut, and it is not part of the bass crossover settings on the back panel. It will just bump up the selected frequency. An external processor loop button (rare these days) allows for the addition of a signal-modifying component, like an equalizer, to the system.

    Outlaw Audio RR2160 Stereo Retro Receiver Front Angle View

    Outlaw Audio RR2160 Stereo Retro Receiver Remote

    A USB 2.0 input on the front allows for plugging in a thumb drive or other compatible storage device up to 16GB for music file play back. Source, mute, menu, and record buttons surround the volume knob. Balance, treble, bass, and a tone defeat button are located under the display which is dimmable and can be turned off completely if you so choose. When playing music files or streaming, the display scrolls the media data. I found this to be a nice touch and quite useful. So, the front panel has everything you need and is not cluttered with things you don’t. All functions can be controlled from the all-aluminum remote which is also backlit (Hooray!).

    I was pleased to see that the remote design includes a door that opens for easy battery replacement. It’s attached to the remote so you can’t lose it. My only quibble is that all the buttons are the same size; I would have preferred the volume and selection buttons to be bigger (by feel) than the rest. After using it for a while though, my fingers remembered their way around the handset without too much trouble.

    Now let’s take a look at the back panel. Here is where things really start to look different from the RR2150. On the upper-left side is a USB connection that doubles as service port. An Ethernet jack is provided to get the RR2160 online for Internet radio. There is no Wi-Fi, so keep that in mind. You’ll need to run an Ethernet cable to your rack to get on the network. A PC USB-B port allows you to hook up a computer to the RR2160. Two coaxial and two optical connections bring in your digital devices and allow for direct connection to that new Ultra HD TV you got for your birthday. Two USB ports also provide power for charging a device. They are located next to the two trigger outs and IR in/out jacks. You get two subwoofer outputs, plus main pre-inputs and pre-outs should you want to connect to a more powerful amplifier. Four analog inputs and a phono input (moving magnet or moving coil) are also included. The binding posts are quite nice as they are designed to allow for a better grip to tighten down your speaker wires. I don’t recall ever seeing these specific posts before and I liked them.

    Outlaw Audio RR2160 Stereo Retro Receiver Back Panel

    I’d be remiss if I didn’t mention the bass management switch which allows you to have the RR2160 control the subwoofer’s crossover point. In the Defeat mode, you will need to set the crossover on your sub, but if you let the receiver manage bass, you get crossover points at 60, 80, and 100Hz. The sub outputs are controlled by the main volume. The power cord is removable should you prefer to replace it with an upgraded one.

    Outlaw Audio RR2160 Stereo Retro Receiver Rear View

    At 110 watts-per-channel (all driven) and a Burr-Brown PCM DAC with native 24/192 capability, the Outlaw Audio RR2160 makes a good choice for a music lover that is powerful, clean, and easy to use. The new features allow for high resolution streaming, DLNA play back, and HD Radio/Internet Radio while maintaining the RR2150’s excellent sounding analog section. All in all, it’s a more than worthy successor to that venerable receiver.

    Secrets Sponsor

    Setup

    Unboxing the Outlaw Audio RR2160, I was immediately impressed by its weight. So many receivers these days are light and mostly empty inside, but not this one. Included in the box was the remote, an FM antenna, a power cord, and a printed manual. It is very well-written and illustrated and I also found it contained some nice audio advice on setup and dialing in optimal sound. I cleared off the center-channel speaker on my audio table and placed the RR2160 just under my wall-mounted flat-panel television. My speakers for this review are the Revel F36 towers I reviewed back in March. I didn’t have any bookshelf speakers on hand during the review period, so my observations about the bass boost will apply to full range towers, as well as with the sub engaged.

    Outlaw Audio RR2160 Stereo Retro Receiver Binding Posts

    The five-way binding posts are nice because of their shape. I originally set 14-gauge bare copper wires into them, but later finished the ends with banana connectors. There are tiny colored caps in the middle of the posts that pop out so a banana plug can be accepted. Either way, the posts really grip bare wire tightly and that’s what you want.

    Outlaw Audio RR2160 Stereo Retro Receiver Room Setup

    I hooked up my OPPO BDP-103 to the back of the RR2160 via analog connections (Kimber Kable PBJ) and digitally with a coaxial connector (Morrow Audio) so I could compare sound from a single source. I hooked up one of my subwoofers to the sub-out on the back and selected 80Hz for its crossover to start with. My sub is an Earthquake Audio CP-8 which is delightfully easy to move around. I connected the RR2160 to my network via a short CAT6 cable and I was just about ready to go… all in less than 15 minutes!

    Listening

    Since this receiver is not intended for home theater use, I did the bulk of my listening to stereo music on CD, SACD, or high-res files from a thumb drive. For my download samples, I went to the 2L website http://www.2l.no/hires/index.html and downloaded some free music at different sampling rates. The lowest resolution I used was 16-bit CD-quality and up to 24-bit/96kHz for comparisons. The Outlaw Audio RR2160 does not play DSD files, but the OPPO BDP-103 can output them at a sampling rate of 88kHz in PCM, which the Outlaw was able to play.

    Using the Internet Radio was fun, but I quickly learned how daunting it could be. You can select regions in the USA, or from around the world. You can select genres both for music and podcasts. Around channel 50, I found an all-Bach station that I listened to for a while. How many stations are out there? I have no idea, but if you can’t find something that you like, you are hopeless. Many of these stations are CD-quality or better; usually sounding much better than local FM stations. For some of you, this feature alone may make the RR2160 a worthwhile upgrade.

    Outlaw Audio RR2160 Stereo Retro Receiver USB Port

    The LED panel scrolls a display for the station names and from the remote you can save your favorites. When I put in my 16GB thumb drive, I could play the files I downloaded from 2L. The Outlaw Audio RR2160 plays the files in alphabetical order, so you cannot select them randomly.

    Outlaw Audio RR2160 Stereo Retro Receiver DLNA Display

    Metadata scrolls across the display showing track titles and their sample rates. Sound quality was excellent, and I could hear a clear superiority from the higher sample rate material. I downloaded a free DLNA application and was able to stream music from my iPhone to the RR2160 without any trouble.

    Secrets Sponsor

    The Persuasions

    The Persuasions “The Persuasions Sing the Beatles”

    For music choices, I selected The Persuasions Sing the Beatles from Chesky records. This a Capella quartet sounds fantastic and the stereo imaging of the RR2160 Retro Receiver was impressive. All four voices were in distinct locations on the front stage.

    Voices sounded natural, and every breath intake and finger snap was captured. Recorded in a large church in New York City, the acoustical space was also well-preserved by the RR2160. It’s a fresh take on some great tunes by Lennon and McCartney that sound as though they were originally written for these guys.

    Aqualung

    Steve Wilson “Aqualung”

    Aqualung by Jethro Tull has been remastered by Steve Wilson and its new stereo mix is both dynamic and detailed. If your system is finely tuned and set up, you’ll be rewarded with rock tunes that are almost three-dimensional. The grunge has been removed, revealing some pretty nice sonic licks on the guitars and punchy bass beats from the drums.

    Turning up Locomotive Breath let me judge the prowess of the RR2160. It easily delivered tight, deep bass while allowing Ian Anderson lots of vocal flexibility. His flute sounded sweet, and of course, breathy. All the nuances in this Tull masterpiece were well handled by the RR2160. I played this stuff loudly too, and felt that the RR2160 had plenty of gas when I called for it. I can’t imagine the average person needing more power than what it can deliver, but you do have the option to use the pre-outs. I felt that it put out a lot of good sound at higher volumes and still had plenty of headroom for the more dynamic passages, but your mileage may vary.

    Organ Orgy

    Richard Wagner, Anthony Newman “Organ Orgy”

    Organ Orgy is a transcription for organ of some great passages from Wagner’s Ring Cycle. This recording came out in the 70’s while I was in college and really set me on the path to becoming an audiophile. The Aeolian-Skinner organ in the Cathedral of St. John the Divine in New York City was unique at the time for its division of pipes called the State Trumpets in the back of the church.

    These en chamade pipes are mounted on the back wall near the ceiling in a horizontal position and run at 50psi of air pressure (the average organ pipes run at 4-6psi), so they have a very distinct, piercing sound quality.

    St John Organ

    The decay time in this cathedral is about five seconds and the sense of space was well-presented by the Outlaw. This recording has lovely soft passages that usually give way to dramatic fanfares and driving bass lines that can be a challenge for any system to handle (it is opera after all). The CD was remastered at 24/96 (Columbia/Sony) which easily bests the sound quality from the original vinyl LP that I owned, especially in the dynamic range department. The RR2160 made it sound the way the live recording would have sounded if you had been there when it was made.

    Using the speaker EQ, I noticed that even my F36s sounded good with it set to 65Hz. 80 was bit honky in the vocal range and 55 was a bit too rich in the bass. Though I did not try this with actual bookshelf speakers, I can see how this could be an appealing feature, ripe for experimentation.

    Conclusions

    Outlaw Audio RR2160 Stereo Retro Receiver Angle View

    THE OUTLAW AUDIO RR2160 STEREO RETRO RECEIVER is a worthy successor to the RR2150. For just $799, it offers great performance from analog and digital sources.

    Likes
    • Powerful, clear sound quality from both digital and analog sources
    • Retro style is refreshingly different
    • Bass management with dual subwoofer outputs
    • Internet Radio is literally a world of music to be discovered
    • Headphone jack with independent volume control
    Would Like To See
    • Larger volume and source buttons on remote

    The Outlaw Audio RR2160 Stereo Retro Receiver takes a fresh, new spin on the highly regarded RR2150 by providing the same sound quality and power, but now with digital inputs, bass management, and Internet Radio. If I were starting out again as a stereo-only guy, the Outlaw RR2160 would be a great choice because it will accept almost any device you have; whether it be a turntable, universal disc player, Internet Radio, Bluetooth, or computer with high resolution files. I like the retro look because it is distinctive and doesn’t follow the “me too” look of almost every other black box receiver on the market. The all-aluminum backlit remote is easy to use and once you master it, you may never get out of your seat again (OK, a little hyperbole). It doesn’t do home theater with surround sound, but it sounded fantastic with stereo sources. Make no mistake, the Outlaw Audio RR2160 Stereo Retro Receiver may look old fashioned, but it is ready for the future. You will want to ride off into the sunset with this Outlaw!

    The post Outlaw Audio RR2160 Stereo Retro Receiver Review appeared first on HomeTheaterHifi.com.

    Onkyo TX-NR676 7.2-Channel Network A/V Receiver Review

    $
    0
    0
    In the ultra-competitive market for mid-range receivers, the Onkyo TX-NR676 stands out due to the company’s commitment to audiophile quality sound over gimmicks.

    It includes every format currently available on the market, including Dolby Atmos, DTS:X, 4K pass-through with HDCP 2.2 with HDR10 and Dolby Vision compatibility. Onkyo has quite a few proprietary sound enhancement modes, such as Music Optimizer, and I was happy to test everything it had.

    Onkyo TX-NR676 7.2-Channel Network A/V Receiver - Front View

    The Onkyo TX-NR676 7.2-Channel Network A/V Receiver offers multiple Dolby Atmos/DTS:X set up options, including front or rear height, front, middle, or rear ceiling, and options for up-firing speakers which Onkyo labels Dolby Speakers. In addition the Onkyo TX-NR676 7.2-Channel Network A/V Receiver also has the ability to easily stream Spotify, Tidal and Pandora for music on demand as well as Chromecast built-in, Wi-Fi, Air Play, and Bluetooth for music and media streaming to your theater.

    Highlights

    Onkyo TX-NR676 7.2-Channel Network A/V Receiver

    • Dolby Atmos 5.2.2 processing
    • DTS:X processing
    • 7 channel assignable amps; including Zone 2 and Bi-Amp
    • HDMI 7 in / 2 out including 1 Front with HDCP 2.2 and HDR
    • 4K pass-through
    • Chromecast built-in
    • Intuitive GUI
    • AccuEQ system calibration
    • AccuReflex for Dolby Atmos/DTS:X calibration
    • Built in Wi-Fi with easy access to Spotify, Tidal, Pandora and more
    Introduction

    Onkyo had a phenomenal press release about their new midrange priced receivers, the TX-NR575 and the focus of this review the TX-NR 676, you can read it here. Since 1946, Onkyo has been passionately committed to developing audio products that deliver uncommon performance, quality, and value. Bundling proprietary technologies and innovations with other sound-enhancing exclusives, Onkyo continues to create award-winning products that are lauded by many industry-leading publications. The company’s philosophy is to deliver products that are superbly designed and built to a consistently outstanding standard of excellence. The results can be seen in the obvious quality of any Onkyo-manufactured product, even before it is turned on. Visit Onkyo’s website at www.onkyousa.com. Follow Onkyo USA at Facebook.

    ONKYO RECEIVER REVIEW SPECIFICATIONS
    DESIGN:

    7.2 channel home theater receiver

    DAC:

    AKM AK4458 384 kHz

    DSP:

    32 bit processing engine

    SURROUND CODES AND LISTENING MODES:

    Dolby Atmos, Dolby True HD, DD Plus, DTS:X, DTS-HD Master Audio, DTS Neural:X, Onkyo Game Surround Modes

    RATED POWER OUTPUT:

    170 watts 1 channel driven @ 1% THD into 6 Ohms 1kHz FTC; 100 watts 2 channels driven @ 0.08% THD into 8 Ohms, FTC

    NUMBER OF ZONES:

    2

    ROOM CORRECTION:

    AccuEQ Room Calibration with AccuReflex phase calibration for object based audio

    INPUTS:

    HDMI (7 rear HDMI 1-3 support 4K/60 Hz w/ HDCP 2.2 & HDR, 1 front HDMI w/ HDCP 2.2 & HDR), Component video (2), Composite video (2), SPDIF Coax (1) Toslink (2), RCA Analog rear (7), front (1), USB 2.0 rear (1), Phono M/M (1)

    OUTPUTS:

    HDMI (1 main with ARC support, 1 sub for projector), Analog Subwoofer (2), Zone 2 analog (1), digital (1), Speaker Terminals (9 pair, 2 pair used for 7.1 or Atmos or Bi-Amp, 2 pair for powered Zone 2)

    TUNER:

    FM/AM 40 Presets

    ACCESSORIES:

    Remote Control, calibration microphone, Wi-Fi antennas, Tuner antennas

    DIMENSIONS:

    17 1/8" x 6 13/16" x 14 7/8" (435 x 173.5 x 378 mm)

    WEIGHT:

    22 pounds

    MSRP:

    $699.00 USA

    Company:

    Onkyo

    SECRETS Tags:

    Onkyo, TX-NR756, Dolby Atmos, DTS:X, Home Theater, Chromecast, Network, Receiver Reviews 2017

    Design

    Onkyo has long been highly regarded for their renowned sound quality and attention to detail in builds and the TX-NR676 looks to continue that tradition, so I was interested to see if it was at all possible for a receiver in this price range, while blowing away my receiver for features, would be able to keep up in clarity and headroom with the amps. When the box was delivered to my home, I was shocked at the weight while carrying it in, it had far more heft than I was expecting. The specs state that there is 210 watts per channel, which raised my eyebrows a bit, and they went right back down again when, as suspected, it was at 6 ohms at 1kHz with 10% THD!!! with 1 channel driven. Upon looking for a more realistic number, I found the amp section rated at 100 watts per channel at 8 ohms, 20 Hz – 20 kHz, 0.08% THD, with 2 channels driven FTC. The recent redesign of Onkyo receivers has been a success in my eyes, the front panel had only the buttons I found useful such as direct access to a source, a large volume knob, power on/off and listening mode control. There is one front A/V input for the calibration microphone, 3.5mm audio jack and HDMI, however I feel the design could have looked just a little bit sharper if that was behind a door. Having 5 kids in the house means I have to either listen at very low volumes at night, or my preference which is to use audiophile headphones and I was happy to find a ¼” jack easily accessible on the front.

    Secrets Sponsor

    The layout on the rear is clean, well designed, and not overly cluttered by the overuse of redundant analog inputs that the majority of users in this mid-level range are not apt to use. Inputs include 7 HDMI w/ 2 outputs, 8 analog audio, 3 digital audio (2 Optical, 1 Coax), a USB input, 2 component video and 2 composite video. What really caught my eye was the inclusion of a MM phono input at this price range, having tested receivers 5x the cost that don’t include phono. While there is no video upscaling, I was pleased to see the inclusion of 4K/60 Hz passthru with HDCP 2.2 protection and both HDR10 and Dolby Vision supported. With the inclusion of premium quality AK4458 384 kHz/32 bit DAC I was looking forward to listening to some SACD’s and TIDAL streaming music. Also included was AccuEQ and AccuReflex, Onkyo’s version of room calibration software.

    Onkyo TX-NR676 7.2-Channel Network A/V Receiver - Front View

    Onkyo TX-NR676 7.2-Channel Network A/V Receiver - Rear Closeup

    Setup

    Most of the equipment I use has HDMI outputs, sans the JVC D-Theater and my turntable. The Onkyo has a total of 7, 6 of them in the back and 1 on the front panel. I started by connecting my Blu-ray player, STB, AppleTV, video game source, SACD player, HD-DVD player, the aforementioned JVC, and my turntable. Once all those were connected to the matching input labels in the rear, I tried to connect my speakers using my normal speaker cable, however the binding posts will not accept audiophile quality cables, in using other cables I found 16 gauge to be tight, 18 gauge would be much easier to install if using bare wire. The binding posts are tightly packed so getting bare wire in at the 45 degree angle proved to be a bit tough, I found it much simpler to just use banana plugs and everything went together perfectly. I was pleased by the silk screened lettering in white clearly designating where each speaker cable was to go, including labels for rear surround, bi-amp or height speaker use on the same binding post pairs.

    Onkyo TX-NR676 7.2-Channel Network A/V Receiver - Rear View

    While I never look at set up or owners manuals when doing reviews, I did this time as the Onkyo unit had a lot of technical terms I wasn’t up to speed on. The quick set up guide is more than adequate for new owners to be able to run all their equipment properly, the users guide was nothing more than a more detailed explanation of set up procedures and gave me no information about all the interesting terms I was looking for more information on. So off to their website I went to get the information I was looking for about things such as; Dynamic Audio Amplification, Fire Connect with Blackfire, and Play Fi. Awhile back I began purchasing all new movies in 4K simply because they came with the Blu-Ray version as well, but since getting them I’ve been more than anxious to try out Dolby Atmos/DTS:X and this receiver came packaged ready to rock at either 7.2 (the .2 sub signal is the same for both outputs, however my set up is 7.1) or 5.2.2 which is what I was most excited about testing. Additional speaker set up options include 5.2 with 2 channels for a separate zone, or using the additional 2 channels to bi-amp the front speakers, which I was going to test as well.

    Secrets Sponsor

    I have spent a lot of time, effort, and patience in setting up my room using SPL, RTA, and FFT analysis to EQ room issues with notch filters and other corrective measures, so I was interested to see how AccuEQ, which is the automatic calibration system for Onkyo, would fare upon set-up. I plugged in the included mic and left the room to let AccuEQ run through the process. Upon return I went through the settings and found that the system set all speakers to small with a 40 Hz crossover on the front 3 and the rear set to 50 Hz, which I hadn’t expected, as my Definitive Technology system consists of BP7001SC front, CLR3000 center, BPVX/P sides, and BP7002 rear, and a Sunfire Signature True sub. While I don’t run them full range in my system, I do however cross over the fronts at 40 Hz, and the rest at 60 Hz so I was pleased to see how well the calibration set up crossovers and distance settings. However, what I was most impressed with was the difference in sound from the before and after calibration set-up. I brought out my test equipment, and to my absolute amazement, what took me hundreds of hours of trial and error and listening tests to achieve, AccuEQ got very close but did it in less than 30 mins. To be able to test using overhead speakers, and since the system only allows 2 channels of height amplification, I did something highly irregular, I used my bipolar side speakers and went through the tedious task of setting them up in 3 of the 7 different height settings that the receiver will allow. I ran them middle overhead, rear overhead, and rear height. I then ran AccuEQ again but this time the system ran AccuReflex which is the calibration system to recognize and properly set up speakers for overhead effects.

    In Use

    My B&K AVR 507 receiver has been a very difficult piece for me to let go of for many reasons; amazing build quality with ample amounts of power, phenomenal levels of adjustability for room nodes, 7 channel s of DTS and Dolby surround formats, but the main reason it is still in use is due to the unrivaled sound of B&K products. What was once reserved for the upper echelon of high end Pioneer, Denon, and Onkyo units costing thousands of dollars, is now available in units, sub $1000, and the unit I have now added to my equipment rack has every advanced format available for the unreal price of $699!!! I could not have been more excited than to have been asked to review an insane amount of technology, for a price that just a couple years ago was impossible to achieve, kudos to Onkyo for the incredible TX-NR676, a piece of gear that I suspect will be hard to return after the review is finished.

    With set up done, I grabbed some music, set up both Spotify and Tidal, and sat down to listen. While being able to log in directly to your accounts using Chromecast built-in and a Wi-Fi connection, logging in was incredibly tedious having to use the remote with a virtual keyboard for account name and password, which takes a long time for each program you wish to use. Having a voice program for entry, such as Apple’s use of Siri on Apple TV, would make set up a more pleasant experience. That aside, while having logged in to multiple programs I subscribe to, I ended up only using Tidal, which I can’t recommend enough, as the Hi-Res music program is head and shoulders above other music sites.

    Norah Jones

    Norah Jones “Come Away with Me”

    However, first up was the SACD of Norah Jones’s debut album and her voice sounded flawless at low volumes, but what made me happy was the lack of noise and absolute quiet in between passages when playing at reference level volume.

    I found a little bit lacking was the small sounds I love to hear, such as fingers moving across strings, hands moving up and down piano keys, and the ability to close my eyes and place each instrument exactly where they recorded from. Bass notes were tight and controlled, however when first listening the bass seemed over emphasized, in checking the settings the auto-calibration set up the sub at 12 while I manually set mine to 5, and once backing it down to 6, the bass was absolutely tight and fully in sync with midrange transitions.

    Jason Aldean

    Jason Aldean “My Kinda Party”

    Next up was some Jason Aldean to turn up the volume and get the house rockin’.

    I never sensed the amps straining to play at high volumes, or the distortion that so often happens when you push too hard with little to no headroom, and I believe part of that to be due to the fact that each Def Tech speaker has a powered sub built in, and they are very efficient, so little power is needed for ear bleeding sound to piss off the neighbors. Aldean’s music includes heavy use of electric guitar and drums, which when using low quality pre-amps or amps will cause everything to sound blended and mostly just noise. Using AccuEQ’s calibrated EQ settings, I was able to make small changes to clean up the sound and save it in one of the three user custom presets.

    Alison Krauss

    Alison Krauss “Windy City”

    Moving on, I downloaded some 192/24 and 96/24 tracks from HDtracks.com to see if there was any difference in sound quality, and while listening to Gentle On My Mind by Alison Krauss from the Windy City album, the wispy and mesmerizing soothing of her voice was as clear as one could hope for.

    Faith Hill

    Faith Hill “Breathe”

    Breathe by Faith Hill was so clear you could hear her breath at the end of a phrase, however I was still missing the sounds of finger transitions on acoustic guitar during quiet passages. The final listening test would come from vinyl.

    I have a collection of well over 5000 albums, and while I love the sound and portability of Hi-Res downloads, for me there is still nothing like vinyl. Because my turntable is in my audio room, this would also be a good test of the amps power ratings, as my Martin Logan Request stats are very amp picky and drop into 2 ohm loads at high frequencies. I have been running the turntable into my classic Pioneer Series C20 pre-amp, which then runs to my Emotiva amp. I spend more time in this room than my theater room, so I am more than intimate with the correct sound I spent hours on hours moving the ML’s around to achieve. I tried a tube amp which failed miserably, but the Emotiva does everything I could ask, from tight bass, to wide open mids, and crystal clear highs.

    Garth Brooks

    Garth Brooks “Sevens”

    Using the phono input on the Onkyo, it was very apparent this combination was not a good fit, as the ML’s are power hungry and it couldn’t keep up.

    It made a difference using the bi-amp option which helped the ML’s keep the bass surprisingly tight, however ML’s are notoriously finicky about mid-range sounds and vocals and using the Onkyo it became apparent why as everything sounded “chesty”, like when a singer holds the mic down by their chest instead of using the mic closely which creates a far cleaner sound. I ran through album after album but it was the same every time, Alison Krause lost her signature wispy sound, Garth lost his noted hanging sibilance and to me this was just not a good fit until I heard the sound quality difference when activating the Music Optimizer button on the front panel. While this is supposed to enhance compressed digital tracks, it seems to use some kind of dynamic EQ’ing, it worked incredible on vinyl, tightening up the bass and adding clarity to mid-range voices that I had not heard before.

    However, the average buyer of this receiver will not be listening to $5000 speakers with vinyl as their primary source, which meant only one thing, to do what this receiver came to do; rock my home theater. Movies included John Wick 1 & 2, Assassin’s Creed, and one of my all-time favorites, the 25th anniversary release of Top Gun . All 4 of the movies have very unique sound tracks, ranging from subtle use of wide open sound and space in the Animus scenes of Assassins Creed , to non-stop fast action flight scenes in Top Gun. I watched the movies using my Xbox One S through the 4K pass-through and then watched the same scenes with the HDMI connected directly to the TV and there was absolutely no discernable loss in picture quality. Wanting to test my Atmos set up, first up was the John Wick series back to back to test Atmos vs my usual 7.1 set ups. The use of Atmos for height was used somewhat liberally in both movies; most noticeable both times that John is caught inside abandoned cathedrals and warehouses, creating an immense feeling of being somewhere else. With my theater walls being black, dark gray carpet, and any lack of light, it was easy to feel somewhere else in the darkness.

    Assassin’s Creed is a very original movie idea and is actually really well done. I enjoyed the movie so much I bought as it also happens to be my 14 year old daughters’ current favorite. We viewed the movie together and I watched her turn her head multiple times in response to the amazing surround soundtrack with occasional voices from prisoners to wind blowing, horses galloping, thrown weapons, punches, kicks, breaking furniture, breaking bones – there are so many effects picked up by the surround speakers you are left feeling pummelled.. There is a lot of activity in the back 4 speakers and this is a demo worthy 7.1 DTS HD Master Audio soundtrack. This is one movie I will have to repurchase in 4K and test the Atmos soundtrack and Dolby TrueHD soundtrack.

    John Wick

    John Wick Chapter 2

    Top Gun

    Top Gun

    And finally, I used the 25th anniversary Blu-ray of Top Gun which has an excellent 7.1 DTS HD Master Audio soundtrack, although they could’ve cleaned up the picture quality a bit, as there is a lot of noticeable grain in some of the flight scenes over the desert. As I know this soundtrack intimately as best I can count, I’ve watched it over 100 times on many formats including VHS, Laserdisc, DVD and now Blu-ray.

    As I’ve stated many times throughout the review, Onkyo tends to favor bass in this unit though it was incredibly tight and controlled and the music tracks blew away the Hi-Res 44.1/24 CD soundtrack I downloaded from HDtracks.com.

    I will finish with some information about the remote. I immediately liked the small feel in my hands, but that also meant very small buttons. While the bright white lettering does stand out, I had to strain a bit at times. The inclusion of every valuable button for short cuts and direct input changes was there, I didn’t see anything I was missing. My favorite part of the remote was the center placed volume button with nothing surrounding it, it sits all alone and easy to use in the dark. I would like to see backlighting however at this price point I can’t think of any companies offering backlighting on their remotes.

    Onkyo TX-NR676 7.2-Channel Network A/V Receiver - remote

    Conclusions

    THE ONKYO TX-NR676 offers an audiophile quality amp, every current audio format, 4K pass-through with all the necessary protection and HDR formats.

    Likes
    • Supports 5.2.2-Channel Dolby Atmos® and DTS:X™ Playback
    • 100 W per Channel
    • HDMI 7 In (1 Front*1) / Main Out, and Sub Out*2 Supporting 4K/60 Hz, HDR10, Dolby Vision™, BT.2020, and HDCP 2.2 Pass-through
    • Dynamic Audio Amplification with 4-Ohm Speaker-driving Capability
    • 384 kHz/32-bit DAC and VLSC™ Filtering for Superior Clarity
    • Ready for Chromecast built-in*3 and DTS Play-Fi*3
    • Dual-band Wi-Fi, AirPlay, Spotify®, TIDAL, Deezer, Pandora®, TuneIn*4
    • FireConnect™*5 Wireless Multi-room Audio
    Would Like To See
    • Backlit remote
    • Ability to get deep into menus (esp for music) without having to use GUI
    • Improved binding posts with more spacing

    I was very impressed in my home theater, the only downside was the inability to drive my large electrostats, though this isn’t the first amp that couldn’t.

    While the mid-range priced receiver market is the most competitive and sought out range for purchase by consumers, the Onkyo TX-NR676 stands out in the crowd due to the emphasis on sound quality. It took everything I could throw at it and kept asking for more, with the Music Optimizer feature cleaning up not only compressed audio tracks but my vinyl as well. Onkyos’ Vector Linear Shaping Circuitry (VLSC), which takes the signal and completely removes pulse noise generated by the digital to analog conversion, made a noticeable difference in sound when comparing to high end external DAC’s I had on hand, allowing music played through the USB input to sound closer to pure analog such as high end tape or vinyl. The few times it didn’t satisfy me musically was due to comparison with products costing 10x as much, or pushing it far past what the general consumer would likely not push to. I highly recommend this unit and I will be sad to see it go.

    The post Onkyo TX-NR676 7.2-Channel Network A/V Receiver Review appeared first on HomeTheaterHifi.com.

    Anthem AVM 60 Preamplifier Processor Review

    $
    0
    0
    Secrets of Home Theater and High Fidelity - Best of Awards 2017
    The AVM 60 is the first 11.2-channel preamplifier-processor from Anthem.

    It supports both the Dolby Atmos and DTS:X object-based audio formats, as well as the Dolby Surround and DTS Neural:X upmixers, which can create a 3D surround experience from a stereo or multichannel soundtrack. Anthem includes the latest version of their Anthem Room Correction (ARC) system, which now supports four separate speaker profiles. Like the Anthem MRX x20 A/V receivers, the AVM 60 is ready for 4K UHD TV and UHD Blu-ray, including Dolby Vision. The AVM 60 includes DTS Play-Fi, which supports Wi-Fi streaming from digital libraries on your network or device, as well as from streaming services like TIDAL, Pandora, Spotify, Amazon Music, and many more. Anthem has an amazing track record of building preamps/processors, and the AVM 60 is an outstanding addition to that legacy.

    Anthem AVM 60 Preamplifier Processor

    Anthem AVM 60 Front Angle

    Highlights

    Anthem AVM 60 Preamplifier Processor

    • Includes Dolby Atmos, Dolby Surround, DTS:X and DTS Neural:X processing to create an immersive 3D surround experience.
    • Anthem Room Correction (ARC) with four separate speaker profiles.
    • Supports HDMI 2.0a, HDCP 2.2, HDR (high dynamic range), BT. 2020 wide color gamut, Dolby Vision, Hybrid Log Gamma (HLG), and 4:4:4 color subsampling at 4K 50/60 Hz (18.2 Gbps).
    • 4K 50/60 Hz video pass-through and switching.
    • Functions as a DTS Play-Fi receiver and supports the DTS Play-Fi Wi-Fi streaming system.
    Introduction

    The Anthem AVM series preamplifier-processor (surround processor) is a legend in the A/V industry. We started covering them here at Secrets back in 2001 when Brian Florian published his review of the AVM 20. Back then, Dolby Digital and DTS were the formats of choice and the AVM 20 retailed for $3,199 USD. The AVM processors evolved over time and became increasingly flexible and feature rich. Anthem did something amazing with the AVM series, and they offered AVM owners the chance to upgrade the hardware (for a fee) to match the new model AVMs that were coming to market. This approach lasted for many years and helped Anthem develop a very loyal customer and dealer base. The final model of the original AVM series preamp/processor was the AVM 50v 3D, which supported HDMI 1.4a, 3D-pass-through, and included a high-end video processor, retailed for $6,499 USD and came to market in 2012. The AVM product line also gave birth to the Anthem Statement series processors, which were the pinnacle of performance for Anthem, featuring full time digital upsampling and oversampling. I had the pleasure of reviewing the Statement D2v 3D which is still being sold for $9,499 USD.

    ANTHEM PROCESSOR REVIEW SPECIFICATIONS
    Design:

    11.2-channel Preamp / Processor

    DAC:

    AKM AK4458 32-bit / 768 kHz Differential-Output

    ADC:

    AKM AK5381 24-bit 96kHz Delta-Sigma

    DSP:

    Quad core Cirrus Logic CS49844A 32-bit processor

    Dolby® and DTS® Surround Sound Processing:

    Dolby Atmos, Dolby Surround, Dolby TrueHD, Dolby Digital, DTS:X, DTS Neural:X, DTS-HD Master Audio, DTS

    Room Correction:

    Anthem Room Correction (ARC) with calibrated microphone and stand

    Video:

    4K 50/60 Pass-through and switching, 4:4:4 color subsampling at 4K60 (18.2 Gbps), HDR (high dynamic range), BT.2020 (wide color gamut), Dolby Vision

    Wireless Audio:

    DTS Play-Fi (Apple, Android, Windows PC)

    Number of Zones:

    2

    Connections:

    HDMI 2.0a:

    8 In (includes 1 front-panel input), 2 parallel Out with HDCP 2.2

    MHL Support:

    2 ports (front-panel HDMI and rear HDMI port 7)

    Digital Audio Inputs:

    3 Optical and 2 Coaxial

    Analog Audio Inputs:

    5 RCA

    Analog Audio Outputs:

    1 stereo pair for line out, 1 stereo pair for Zone 2

    Pre-Outs:

    11.2 Channel (RCA and XLR), including 2 parallel subwoofers

    USB Ports:

    1 front for firmware updates, 1 rear for DTS-Play-Fi updates

    Network:

    Ethernet Port for Wired Network Connection, built-in Wi-Fi

    Control:

    RS-232C, Remote IR (1 in), 12 Volt-trigger (1 out), IP Control

    Headphone Jack:

    1/4" front panel output

    General Features:

    Wi-Fi Remote Control App:

    Apple iOS (Android coming soon)

    Tuner:

    FM Radio

    Accessories:

    Remote Control

    Dimensions:

    6.5" H x 17.25" W x 14.5" D

    Weight:

    20 Pounds

    MSRP:

    $2,999 USD

    Company:

    Anthem

    SECRETS Tags:

    Anthem, Anthem AVM 60, Surround Processor, Preamplifier, Dolby Atmos, Dolby Surround, DTS:X, Dolby Vision, ARC Mobile, Anthem Room Correction, Surround Processor Reviews 2017

    Unfortunately, it was no longer viable for Anthem to continue the hardware upgrades using the existing AVM 50 product architecture. As we started seeing the success of Anthem’s MRX series receivers, it seemed only to be a matter of time before we would see the introduction of a new preamplifier-processor based on the MRX platform. At CEDIA in October of 2015, Anthem finally announced the AVM 60 which is the subject of this review. Let’s take a look at how the AVM 60 lives up to the legacy of the AVM product line and see how it compares to the AVM 50v 3D.

    Design

    Anthem AVM 60 Front Panel

    Take one look at the AVM 60 and you immediately think that this is another member of the MRX receiver product line. The AVM 60 says goodbye to the tiny buttons that adorned the front panel of the AVM 50 series and takes on the same clean lines and simplified interface of the MRX x20 A/V receivers. The front panel is made of brushed aluminum. The bright blue LED display is flanked by a large volume knob and a standard set of cursor buttons that allow for easy navigation of the AVM 60 setup menus. Directly under the display are six control buttons for setup, display brightness, sound mode, level, zone control and input selection. The AVM 60 supports up to 30 virtual inputs. Rather than clutter the front panel with 30 tiny buttons that might never be used, Anthem kept the design simple. Inputs can be selected from an onscreen menu or by using the front display and the cursor buttons. In the bottom-right corner of the AVM 60 are power buttons for the main and secondary zones. The front HDMI input, USB update port, and a headphone jack are hidden on the bottom-left behind a small door. The exterior case of the AVM 60 has a textured black finish.

    The rear panel also looks like an MRX x20 receiver with the notable addition of 13 balanced XLR outputs to support 11 speakers and two parallel subwoofers. The AVM 60 matches the input and output capabilities of the MRX 1120 receiver with eight HDMI inputs (seven on the rear panel, one on the front) and two parallel HDMI outputs. The first HDMI output supports ARC (Audio Return Channel), so you can listen to audio from your television through the AVM 60 without an extra audio cable. Anthem has included support for MHL (Mobile High-Definition Link) on HDMI port 7 and on the front HDMI input. The HDMI ports are HDMI 2.0a-compliant and they support HDCP 2.2. The AVM 60 supports HDMI video switching and video pass-through at 4K 50/60Hz resolution as well as HDR (high dynamic range), BT. 2020 wide color gamut, and 4:4:4 Subsampling at 4K60 (18.2 Gbps). These capabilities mean that the AVM 60 is ready for the latest 4K UHD televisions and 4K UHD Blu-ray with support for HDR10 and Dolby Vision.

    Anthem AVM 60 Rear Panel

    Anthem includes 13 unbalanced RCA pre-out connections, five pairs of stereo analog inputs, two pairs of stereo analog outputs (one for line out and the other for zone 2), three optical inputs and one optical output, and two coaxial digital inputs. For networking, the AVM 60 includes both an Ethernet jack as well as built-in Wi-Fi support with two antennas. The networking connections allow for streaming to the built-in DTS Play-Fi receiver in the AVM 60. They also provide network access for the Anthem Room Correction (ARC) system which is also included. For control, Anthem includes IP control, RS-232 jack, one IR input, and one 12-Volt trigger output, which can be used to turn on an external amplifier. The remaining connections are the antenna jack for the FM tuner and two USB ports which are used to update the AVM 60 (front USB) and the DTS Play-Fi module (rear USB).

    Secrets Sponsor

    If you were making a mental list of the differences between the AVM 60 and its predecessor, the AVM 50v 3D, here are some of the big differences. The analog video components are completely gone along with the video processor. Also absent are the multi-channel analog input, the AM Tuner, Zone 3, the two-channel balanced XLR input, an AES/EBU digital input, two additional 12-Volt triggers, two IR emitter jacks, and an IR receiver jack.

    The AVM 60 comes with a backlit remote that is standard with the MRX receiver line.

    Anthem AVM 60 Remote

    From a technology perspective, the AVM 60 supports Dolby Atmos and DTS:X and speaker configurations up to 7.2.4 with two pair of height channels. The latest Dolby Surround and DTS Neural:X upmixers are included to synthesize an immersive 3D surround experience from a stereo or multichannel soundtrack. With the latest firmware, the AVM 60 support the latest high dynamic range formats including HDR10, Dolby Vision and Hybrid Log Gamma (HLG). The signal processing is done with a Quad core Cirrus Logic CS49844A 32-bit processor. The AVM 60 uses differential-output AKM AK4458 32-bit / 768 kHz D/A convertors and AKM AK5381 24-bit 96kHz Delta-Sigma A/D converters.

    Secrets Sponsor

    A peek inside the AVM 60 reveals a very similar layout to that of the MRX x20 A/V receivers sans the amplifier section and its big heatsink and cooling fan.

    Anthem AVM 60 Internals

    According to Anthem, the AVM 60 was also the first preamplifier-processor to include support for DTS Play-Fi. Located just behind the Ethernet jack on the rear panel is a complete standalone module allowing the AVM 60 to act as a receiver in the DTS Play-Fi ecosystem. This means that you can stream content from a DTS Play-Fi application directly to the AVM 60. We’ll talk more about that later.

    Anthem AVM 60 Play-Fi Receiver Module

    Setup

    In order to enjoy 3D surround formats like Dolby Atmos and DTS:X, you need to have at least one pair of height speakers in the listening room with two pair being ideal. The AVM 60 supports traditional-height speakers that you might find in a Dolby PLIIz configuration, in-ceiling or top speakers, and of course Dolby Atmos-enabled speakers which have upward-firing drivers to reflect the sound off of the ceiling and towards the listener. If you aren’t yet familiar with the basics of Dolby Atmos, Secrets’ Co-Editor Chris Eberle has provided a great introduction in his article: “Dolby Atmos and Auro-3D: The Technology and The Reality.”

    To get started with setting up the AVM 60, I connected my amplifiers and components, and then entered my speaker configuration. For my room, I was using a 7.2.4 speaker configuration with a pair of front on-wall speakers and a pair of middle in-ceiling speakers.

    Anthem AVM 60 Speaker Setup Height 1

    The AVM 60 menus are well organized and easy to use, but they lack the kind of interactive menu system that you find in the Denon or Marantz products like the Marantz AV8802/A. For example, if the Height 1 speakers are selected as “Middle In-Ceiling”, you will see the same option listed again for the Height 2 speakers. Ideally, the middle speaker options should not be present in the list. This really isn’t a problem at all during setup, but it might make you wonder for a moment seeing the options duplicated in the menus.

    Anthem AVM 60 Speaker Setup Height 2 Duplicate Options

    To help with speaker placement, Anthem has included a series of speaker diagrams that illustrate the various configurations that are possible. It is a simple matter to scroll through and review the diagrams, and then return to the speaker setup menu to make the correct selections for your room.

    Anthem AVM 60 Speaker Diagram Ceiling Options

    Anthem AVM 60 Speaker Diagram Dolby-Enabled Height Options

    After speakers, the next step is to check the various source setup menus. The options are extensive and allow for such things as custom input naming, video and audio input selection, speaker profile selection, Anthem Room Correction on/off, Dolby Volume on/off, and listening mode presets. The best thing about the source options are that you can create and delete inputs so you can tailor the AVM 60 to your exact needs.

    Anthem AVM 60 Input Setup Menu

    The next step is room correction. The AVM 60 comes with an Anthem Room Correction (ARC) kit in the box. It includes a calibrated microphone, a tripod, and USB and CAT5 cables. The ARC software is designed for Windows and no longer comes on a handy CD (or shall we say coaster) in the box. With CD/DVD drives being a thing of the past on most modern laptops, Anthem has moved to a really simple download process. The old CD is now replaced with a postcard that directs you to the Anthem website. Simply enter the serial number of your microphone, and the software and the calibration files for your specific microphone are downloaded as a ZIP file.

    Anthem AVM 60 ARC kit

    I installed the ARC software on my Macbook by running Windows 10 in a Boot Camp partition. The ARC software has a number of enhancements including the option to configure up to four different speaker profiles. For example, this allows for stereo vs multi-channel configurations, and also allows for the easy comparisons of settings. For instance, if you wonder how your system sounds with a max EQ frequency of 1 kHz vs 5 kHz, or with or without a subwoofer, it is a simple matter to configure multiple profiles, one for each change, and then switch back and forth between the profiles via the Source Setup menu. Secrets’ Dr. David Rich has published two extensive articles on the latest capabilities of ARC which provides everything you need to know about ARC for the AVM 60 and the MRX x20 A/V receivers. The first article covers the features of ARC-2 as Anthem intended. The second guide is really a super geeks ARC tutorial and it explores some features that push the boundaries of tweaking ARC and getting the most from your system.

    With room correction completed, I returned to the AVM 60 setup menus to review the ARC profile options for my inputs. I also entered the speaker distances for each speaker profile. The ARC process does not determine speaker distances, and this has been a manual process since the first AVM came to market. I suggested to Anthem that they could improve the ARC software by allowing the user the option to enter the distances once in the software, and then upload those settings with the ARC profiles. They thought this was a good idea but noted that it would involve adding speaker distance commands to the extensive API command set (both IP and RS232) that the AVM and MRX products’ support. Hopefully we’ll see this as an added feature down the road.

    I also checked that the AVM 60 firmware was up to date. The update process on the AVM 60 relies on the front USB port. Simply download the latest file from the Anthem web site, unzip the contents to your favorite USB stick, and insert into the front USB port. If the power was off, turning on the AVM 60 starts the update process. If the power was on, just hold the Select button on the front panel for a few seconds and the update will begin. The entire affair takes less than five minutes and is well worth it. For instance, the support for features like DTS:X, Dolby Vision and HLG all appeared as firmware updates along with plenty of bug fixes. One consistent hallmark of Anthem has been their outstanding customer support. If you have an issue that needs a software correction, they will do their best to make it happen.

    Over the years, I have often heard complaints from users that they might not feel comfortable using a PC to run ARC. Perhaps they don’t have a Windows PC available to them, or perhaps they felt it might be too complicated. ARC does have an automatic mode on the PC that is really easy to use if you don’t want to get into the advanced features. You can check-out my review of the MRX 710 receiver which walks through the automatic process if you aren’t familiar with it. But what are you to do if you still don’t want to use PC software for ARC? Anthem has an answer to this question, and it is a feature which is available for the AVM 60 and MRX x20 receivers. It is ARC Mobile.

    The ARC Mobile application is currently available for iOS and it allows you to run Anthem Room Correction using the built-in microphone on your Apple device or from an external Anthem microphone connected to the device. In my case, I used my iPhone and was really pleased with how easy it was to use and how good it sounded. From a technical perspective, there are a few differences between ARC mobile and the full-blown PC version. The maximum EQ frequency when using the phone’s internal microphone is 2 kHz instead of 5 kHz. There may also be some minor variations from the ideal room response due to the internal microphone. If you use the external microphone, it does provide the exact same accuracy as the PC version. Of course the PC version provides all the goodies like viewing and printing the correction curves, adjusting the settings, and the option for multiple profiles. But, if you are PC averse, this brings the wonders of ARC to your listening room just by downloading an app from the Apple App Store.

    I will give you a quick walkthrough of the application so you can see how simple it is to use.

    Anthem AVM 60 ARC Mobile Menu

    The ARC Mobile app opens with a simple menu.

    Anthem AVM 60 ARC Mobile Compatible Devices

    The Supported Audio Devices menu shows the full array of Anthem, Paradigm and Martin Logan devices that support ARC Mobile. It seems that the list is growing with every update of the application.

    Anthem AVM 60 ARC Mobile Successful Connection

    The next step offers a menu of ARC capable devices on the network. In my case it was just the AVM 60. I selected it, and the application then connects to the AVM 60 and displays all the speakers that will be measured.

    Anthem AVM 60 ARC Mobile Microphone Type Selection

    The next screen asks about the type of microphone you’ll be using. Simply touching the graphic of the microphone continues the process.

    Anthem AVM 60 ARC Mobile Measurement Guide

    The next step is a reminder of how to hold the phone. It is just like using the full version of ARC, but you get to act as the tripod and hold the microphone. You also get to point the phone’s microphone toward the speakers!

    Anthem AVM 60 ARC Mobile Measurement Locations

    After a last reminder about where to measure in the room, the fun finally begins.

    Anthem AVM 60 ARC Mobile Position One

    Start at the main listening position, and press continue. Ok, so this step does take some coordination to properly hold the phone and not accidentally press the cancel button.

    Anthem AVM 60 ARC Mobile Height Measurement

    If you wondered about the height speakers, ARC mobile does pause and ask you to point the phone’s microphone at the ceiling.

    Anthem AVM 60 ARC Mobile Positions Two – Five

    With position one out of the way, the application walks through the same set of measurements for the remaining four positions.

    Anthem AVM 60 ARC Mobile Optimizing and Uploading

    Once everything is measured, you can put your arm down while the iOS device computes all the corrections and uploads the ARC configuration to the AVM 60.

    Anthem AVM 60 ARC Mobile Congratulations Page

    Here is the final congratulations page of the process.

    ARC Mobile takes only a few minutes and is so very worth it. If you haven’t experienced the PC version, then use your iPhone or find a friend with an iPhone, and take advantage of this feature.

    In Use

    In my listening environment, I used a 7.2.4 GoldenEar Technology Triton One system with a pair of Triton One front speakers with powered subwoofers, a GoldenEar SuperCenter X center channel, a pair of GoldenEar Invisa MPX in-walls as surround speakers, two pair of GoldenEar Invisa HTR 7000 as top-middle height and rear surrounds, and a pair of GoldenEar Aon 2 speakers for front height speakers. I used a McIntosh MC8207 amplifier for my main and surround channels. To power the height channels, I used a Rotel RMB-1095 5-channel amp and Rotel RMB-1080 2-channel amp. I only needed four channels of amplification, but having the extra two amps allowed me to independently power the two pair of height speakers. This came in handy when listening to just the height speakers by themselves to get a perspective on what they were actually adding to the listening experience. I used an Oppo UDP-205 4K Ultra HD Blu-ray player and an Oppo BDP-105 as my primary source devices. I was really looking forward to hearing the combination of the AVM 60 and the GoldenEar Triton One system.

    I have had plenty of experience listening to Dolby Atmos and the Dolby Surround upmixer in my room, and the results were equally impressive with the AVM 60. Dolby Atmos movies like “Mad Max Fury Road”, “Passengers”, and “In the Heart of the Sea” were brought to life in all their cinematic glory. The AVM 60, together with the GoldenEar Triton One system, delivered on the promise of transforming my listening room into an immersive theater-like experience. The soundstage was huge and exceptionally detailed, the dialog was crystal clear, and thanks to Anthem Room Correction, the bass response from the Triton One speakers was outstanding. The AVM 60 was effortless in handling the full range of these movie scores, from the most dramatic special effects to the quietest moments, and everything in-between.

    Blade Runner: The Final Cut

    Blade Runner: The Final Cut

    If you are looking for a great Dolby Atmos demo, then look no further than the 4K UltraHD version of “Blade Runner: The Final Cut”. The AVM 60 had no trouble passing the 4K HDR10 encoded video to my LG OLED G6 display. This movie is an outstanding example of just how good 4K content can look, with the remastered video revealing details that are just jaw dropping considering this movie is 35 years old.

    “Blade Runner” is a sci-fi classic and it has never looked so good. The updated Dolby Atmos soundtrack is no less impressive drawing me into Ridley Scott’s vision of a future Los Angeles. The sounds of the city and the seemingly endless rain make great use of the height channels. The AVM 60 drew me into Decker’s hunt for the replicants, and it delivered the most satisfying viewing of this film that I’ve ever experienced.

    Despicable Me

    Despicable Me, 4K UltraHD with Dolby Vision and DTS:X

    “Despicable Me” is the first Dolby Vision 4K UltraHD Blu-ray with Dolby Vision. It features an awesome DTS:X soundtrack, but the real star of this movie is the Dolby Vision high dynamic range video. The AVM 60 had no trouble handling this new video format and the results were drop dead gorgeous. This movie has never looked this good with incredible detail and contrast and an amazing range of color.

    I look forward to watching many more movies with Dolby Vision. The AVM 60 presented an immersive soundtrack, but there was limited use of the height channels except for the occasional sound effect. While the AVM 60 supports DTS:X, the Dolby Atmos format is much more prevalent these days with many of the new 4K UltraHD titles offering Dolby Atmos soundtracks. I liked having the option to experiment with both the Dolby Surround and DTS Neural:X upmixers, but I found that the Dolby Surround upmixer became my preferred choice.

    Sara Bareilles, What’s Inside: Songs from Waitress

    Sara Bareilles “What’s Inside: Songs from Waitress”

    Having the Triton One speakers in my system, I have grown accustomed to the natural sound and exceptional detail that these speakers can reveal. With the AVM 60 in the system, I was reminded of how good these speakers can sound.

    I had the chance to see Sara Bareilles on Broadway playing the title role in “Waitress”. Her album, “What’s Inside: Songs from Waitress”, includes the wonderful music that she wrote for the musical. On the track “She Used to Be Mine”, the AVM 60 showcases the full range of her voice from the soulful lower range notes to the emotionally-charged high end. You could hear the subtle consonant endings of each word without any hint of harshness. I appreciated how much the AVM 60 helped me remember the live performance.

    Yo-Yo Ma and Friends

    Yo-Yo Ma and Friends “Songs of Joy and Peace”

    Since this is going to press during the holidays, I wanted to include one of my favorite holiday albums, “Yo-Yo Ma and Friends, Songs of Joy and Peace”.

    On the track “Here Comes the Sun”, Yo-Yo Ma’s solo cello and James Taylor’s solo vocals can be distinctly appreciated, yet they blend together to create a gorgeous harmony. The entire album is like this, featuring a wonderful mix of instruments and collaborative vocals on both familiar and less familiar melodies. The AVM 60 is able to extract the delicate nuances of the instruments, giving them each a unique voice. Combined with the natural sound of the Triton One speakers, the AVM 60 creates an emotional connection to the music that I will enjoy listening to this season.

    My experience with the AVM 60 regardless of type of movie or music was consistently excellent. ARC did a wonderful job helping manage the bass response in my room, and I really appreciated being able to explore multiple ARC configurations. I also tried ARC Mobile and was impressed with how good it sounded considering that I measured the room with my iPhone. I ultimately used the PC version of ARC, but there should be no more excuses for avoiding ARC.

    From a video perspective, the AVM 60 performed well, but I did have my share of issues with HDMI handshake problems when introducing the Oppo UDP-205 into my system. Thankfully, after updating firmware for every device in the system, my issues went away and I am able to use the AVM 60 for pass-through video between my source devices and my display.

    It wasn’t that long ago that the A/V manufacturers tried to include all sorts of applications into their products. These apps were for such things as internet radio or DLNA and streaming services like Pandora or Spotify. For several years, it seemed like a marketing game to see who could add the latest streaming service to their A/V receiver. These apps often left much to be desired especially in terms of user interface, and the end user had to wait for the A/V manufacturer to issue software updates. Anthem has taken a completely different approach with the AVM 60 and the MRX x20 A/V receivers by including support for the DTS Play-Fi system.

    Inside the AVM 60 is a DTS Play-Fi receiver. Simply download the DTS Play-Fi app to your favorite iOS or Android device, and the application will discover the AVM 60 on your home network. This worked nicely for me, but some troubleshooting can be involved if the two devices are not connecting on the network. Once the DTS Play-Fi application connects, it automatically determines if any software updates are needed for the AVM 60.

    Anthem AVM 60 DTS Play-Fi App Firmware Update

    It’s then a simple matter of updating and the application will download any updates and install them directly to the AVM 60. Do you remember the USB port on the rear panel of the AVM 60? This can be used to manually load firmware files into the AVM 60 DTS Play-Fi receiver if necessary and if suggested by Anthem support. Once the software updates are loaded, it’s a simple matter to select and configure any of the currently fourteen available media services for use with the DTS Play-Fi application.

    Anthem AVM 60 DTS Play-Fi Sources

    Anthem AVM 60 DTS Play-Fi Sources Continued

    The DTS Play-Fi application allows for the configuration of multiple compatible devices on your network, regardless of the manufacturer, as long as the device supports DTS Play-Fi. The application supports the configuration of speaker and stereo pairs, and includes support for Amazon Alexa-enabled devices. Using the application is very simple and worked well for me. Keep in mind that all the streaming for DTS Play-Fi is happening from your device, which for me was my iPhone. This works for the most part, but there were times that I just wanted the phone to be a control app and not the actual streaming source. I also found the placement of the volume control in the app to be problematic as it is placed at the very bottom of the user interface. If you accidentally swipe across the volume control slider, it is very easy to turn up the volume unexpectedly. I would like to see the option to specify a maximum volume for the DTS Play-Fi source for this reason.

    In addition to the basic back-lit remote, Anthem offers the Anthem MRX Remote 2 application for iOS which supports the AVM 60.

    Anthem AVM 60 MRX Remote 2 Application Device Found

    When the application starts, it automatically downloads the inputs and settings that are defined in your AVM 60 or MRX x20 receiver. This helps personalize the application to your system.

    Anthem AVM 60 MRX Remote 2 Application Audio Interface

    The app provides easy access to the audio and level settings.

    Anthem AVM 60 MRX Remote 2 Application Control Interface

    It also provides quick access to the surround mode, Dolby Volume, setup and lip-sync options.

    Anthem AVM 60 MRX Remote 2 Application Surround Modes

    The surround modes are intended to be interactive and will have a green check mark placed next to the currently active mode. Despite having the latest version of the application, the surround modes for Neo:6 Cinema and Music are still showing despite those formats being replaced with the DTS Neural:X upmixer.

    Anthem AVM 60 MRX Remote 2 Application Info Screen

    The info screen does a nice job of showing the incoming video resolution, audio format, audio mode and audio rate in one convenient place. This is so much more convenient than the AVM 60 on-screen status display which has to be scrolled repeatedly to get all this info. I really wish Anthem would provide a comprehensive status display like that found on the Marantz AV8802, which is still my reference for best user interface.

    Anthem AVM 60 MRX Remote 2 Application Source Selection

    Source selection is very simple but the designers are limiting the source list to only four devices. If you have more devices, you have to scroll to find your favorite source despite having plenty of room on the screen.

    Anthem AVM 60 MRX Remote 2 Application Unknown Mode

    The remote application gets confused when the AVM 60 is using one of the new DTS formats and leaves the mode check mark hanging around the top left of the screen. This doesn’t affect the operation of the AVM 60, but it makes for some frustrations using the app.

    I should also note that AVM 60 plays digital sources in Zone 2 which is greatly appreciated. I did find that I missed the extra 12-Volt trigger outputs, especially having multiple amplifiers in my system.

    On The Bench

    By: Robert Kozel and David Rich

    My standard benchmark tests were done using analog direct mode so that all digital signal processing was off. On tests using the RCA input, I measured the XLR preamp output of the AVM 60. The source device for both analog and HDMI tests was an Oppo BDP-105. For the analog tests, the input level was 2.2 VRMS into the RCA inputs of the AVM 60. The volume was adjusted for 2 VRMS at the XLR outputs of the AVM 60.

    Anthem AVM - On The Bench

    At 1 kHz into the RCA input, THD+N was 0.001881%. We see numerous spurs and a few harmonics throughout the spectrum with the third harmonic at 3 kHz being about 92 dB below 2 VRMS.

    Anthem AVM - On The Bench

    At 10 kHz into the RCA input, THD+N was 0.005162%. The second harmonic at 20 kHz is about 96 dB below 2 VRMS. Notice the lift in the noise floor starting around 10 kHz. This lift comes from the New Japan Radio NJW1298 AVR LSI chip used in the AVM 60 and MRX x20 A/V receivers. Let’s take a different view of the noise floor.

    Anthem AVM - On The Bench

    Here is the same test with a logarithmic scale. You will notice that the lift starts around 10 kHz but is only about 6 dB higher at 20 kHz. While we don’t want to see this lift at all, the overall effect of the noise floor lift is insignificant and not audible at well below 120 dB, especially at these frequencies.

    Anthem AVM - On The Bench

    Here is the same test with the logarithmic scale but this time I have turned on the signal processing. We see the same basic spectrum with more distortion spurs due to the extra processing, but we also have some side bands around the fundamental at 10 kHz. This is some clock jitter on either the ADC or the DAC which should ideally not be present.

    Anthem AVM - On The Bench

    Here are the results for 19 kHz, 20 kHz combined test frequencies using the RCA input. There is a visible B-A peak at 1 kHz about 101 dB below 2 VRMS. We see some minor distortion spurs throughout the spectrum. The second harmonics at 38 kHz and 40 kHz are about 90-95 dB below 2 VRMS (6 dBV). You will notice the consistent lift in the noise floor in each of the distortion tests.

    Anthem AVM - On The Bench

    I measured the frequency response of the AVM 60 out to 96 kHz. In analog direct, the response is flat until we see a very gradual 6 dB roll-off as we approach 90 kHz. The second plot shows what happens with digital signal processing (analog DSP) and Anthem Room Correction (ARC) enabled. The AVM 60 downsamples the signal to 96 kHz and applies the computed room correction filters for each channel. You can see the correction curve for the left channel in the graph below 5 kHz. The signal rolls off at -6dB to 46 kHz which makes sense since the ADC is rated at 96k samples/sec max.

    Anthem AVM - On The Bench

    Here is what happens when we look at the frequency response out to 96 kHz using the HDMI input. The plots are almost identical with the correction curve for the left channel, when ARC is enabled, visible below 5 kHz. Bass management is still in use which is why both plots roll off. We notice a gradual roll off of the high frequencies starting around 10 kHz with absolutely no downsampling of the signal! This is the first time that Anthem has included this much DSP horsepower in their processor implementation and is a major differentiator for the AVM 60.

    Anthem AVM - On The Bench

    Now we take a look at the results using one of the HDMI inputs, fed from test discs played on an OPPO-BDP-105. At 1 kHz, and 16-bit/44.1k sampling rate, we see some distortion spurs as well as harmonics throughout the spectrum with the harmonics at 2 and 3 kHz being about 93 dB below 2 VRMS. As with the analog direct tests, the volume was increased 1 dB to bring the single ended output to 2 VRMS with the -5 dBFS digital input to the DAC.

    The remaining tests are for HDMI input and XLR output only.

    Anthem AVM - On The Bench

    At 1 kHz, and 24-bit/96k sampling rate, THD+N was 0.000813%. We see some distortion spurs as well as harmonics throughout the spectrum with the harmonics at 2 and 3 kHz being about 102 dB below 2 VRMS. We see no side bands around the fundamental which is excellent.

    Anthem AVM - On The Bench

    At 1 kHz, and 24-bit/96k sampling rate, THD+N was 0.001285% at 4.0 VRMS. We see numerous distortion spurs as well as harmonics throughout the spectrum with the second harmonic at 2 kHz being about 89 dB below 4 VRMS.

    Anthem AVM - On The Bench

    At 1 kHz, and 24-bit/192k sampling rate, THD+N was 0.000833% at 2 VRMS.

    Anthem AVM - On The Bench

    At 10 kHz, and 24-bit/96k sampling rate, THD+N was 0.003432% at 2 VRMS. The second harmonic at 20 kHz is about 98 dB below 2 VRMS. We see the same noise floor lift above 10kHz just as we did with the analog 10kHz THD test.

    Anthem AVM - On The Bench

    At 10 kHz, and 24-bit/96k sampling rate, THD+N was 0.006977% at 4 VRMS. The second harmonic at 20 kHz is about 88 dB below 4 VRMS.

    Anthem AVM - On The Bench

    Here are the results for the 19 kHz, 20 kHz combined test frequencies using the HDMI input with 24-bit/96k sampling at 2 VRMS. We see distortion spurs throughout the spectrum. There is a visible B-A peak at 1 kHz about 96 dB below each test tone at 1 VRMS which is insignificant. The second harmonics at 38 kHz and 40 kHz are about 103 dB respectively below 1 VRMS.

    Anthem AVM - On The Bench

    Here are the results for the 19 kHz, 20 kHz combined test frequencies using the HDMI input with 24-bit/96k sampling at 4 VRMS. We see higher distortion spurs throughout the spectrum. There is a visible B-A peak at 1 kHz about 84 dB below each test tone at 2.0 VRMS. The second harmonics at 38 kHz and 40 kHz are about 91 dB below each test tone at 2.0 VRMS.

    On the video side of things, the AVM 60 uses pass-through video so our standard scaling tests do not apply. The AVM 60 successfully passed our chroma tests with no loss of fine chroma detail.

    Conclusions

    THE ANTHEM AVM 60 is the best 11.2-channel processor that I’ve used this year and is highly recommended.

    Likes
    • Immersive 3D surround experience
    • Anthem Room Correction (ARC)
    • ARC Mobile
    • Dolby Atmos and DTS:X and the Dolby Surround and DTS Neural:X upmixers
    • Support for HDMI 2.0a, HDCP 2.2, HDR (high dynamic range) and Dolby Vision.
    • DTS Play-Fi
    Would Like To See
    • The MRX Remote 2 Application recognize the DTS Neural:X surround mode and allow for more than four sources in the input list without scrolling.
    • Better placement and control of the volume control in the DTS Play-Fi application.
    • More than one 12-Volt trigger
    • The ability to specify speaker distances in the ARC PC application.
    • A future model integrating the multichannel capabilities of the AVM 60 with the analog stage and hardware platform of the Anthem STR preamplifier.

    The Anthem AVM 60 has all the technology necessary to support a modern home theater system. It can function as a leading-edge 11.2 channel processor supporting Dolby Atmos and DTS:X. It is capable of HDMI video pass-through and handles the latest 4K UltraHD Blu-ray content including Dolby Vision. It features an updated Anthem Room Correction system, and with ARC Mobile, it is now easier to use than ever. Of course the best thing is that the AVM 60 sounds amazing for both movies and music.

    As for living up to the AVM legacy, I think it succeeds very well in delivering a product that offers exceptional functionality and performance for the consumer. If there is anything missing here, it is the analog audio legacy of the AVM product line. I can’t fault Anthem for not including a premium analog audio stage in the AVM 60 considering that they have built a new stereo platform with their new STR integrated amplifier and STR preamplifier. I would like to see Anthem offer a future model integrating the multichannel capabilities of the AVM 60 with the analog stage and hardware platform of the Anthem STR preamplifier. Market demand will ultimately dictate if such a product will ever be sold.

    If you are looking for a new 11.2 channel processor, put the Anthem AVM 60 on your short list. The AVM 60 is highly recommended.

    The author would like to thank Dr. David Rich for his contributions on this article.

    The post Anthem AVM 60 Preamplifier Processor Review appeared first on HomeTheaterHifi.com.

    Viewing all 42 articles
    Browse latest View live